

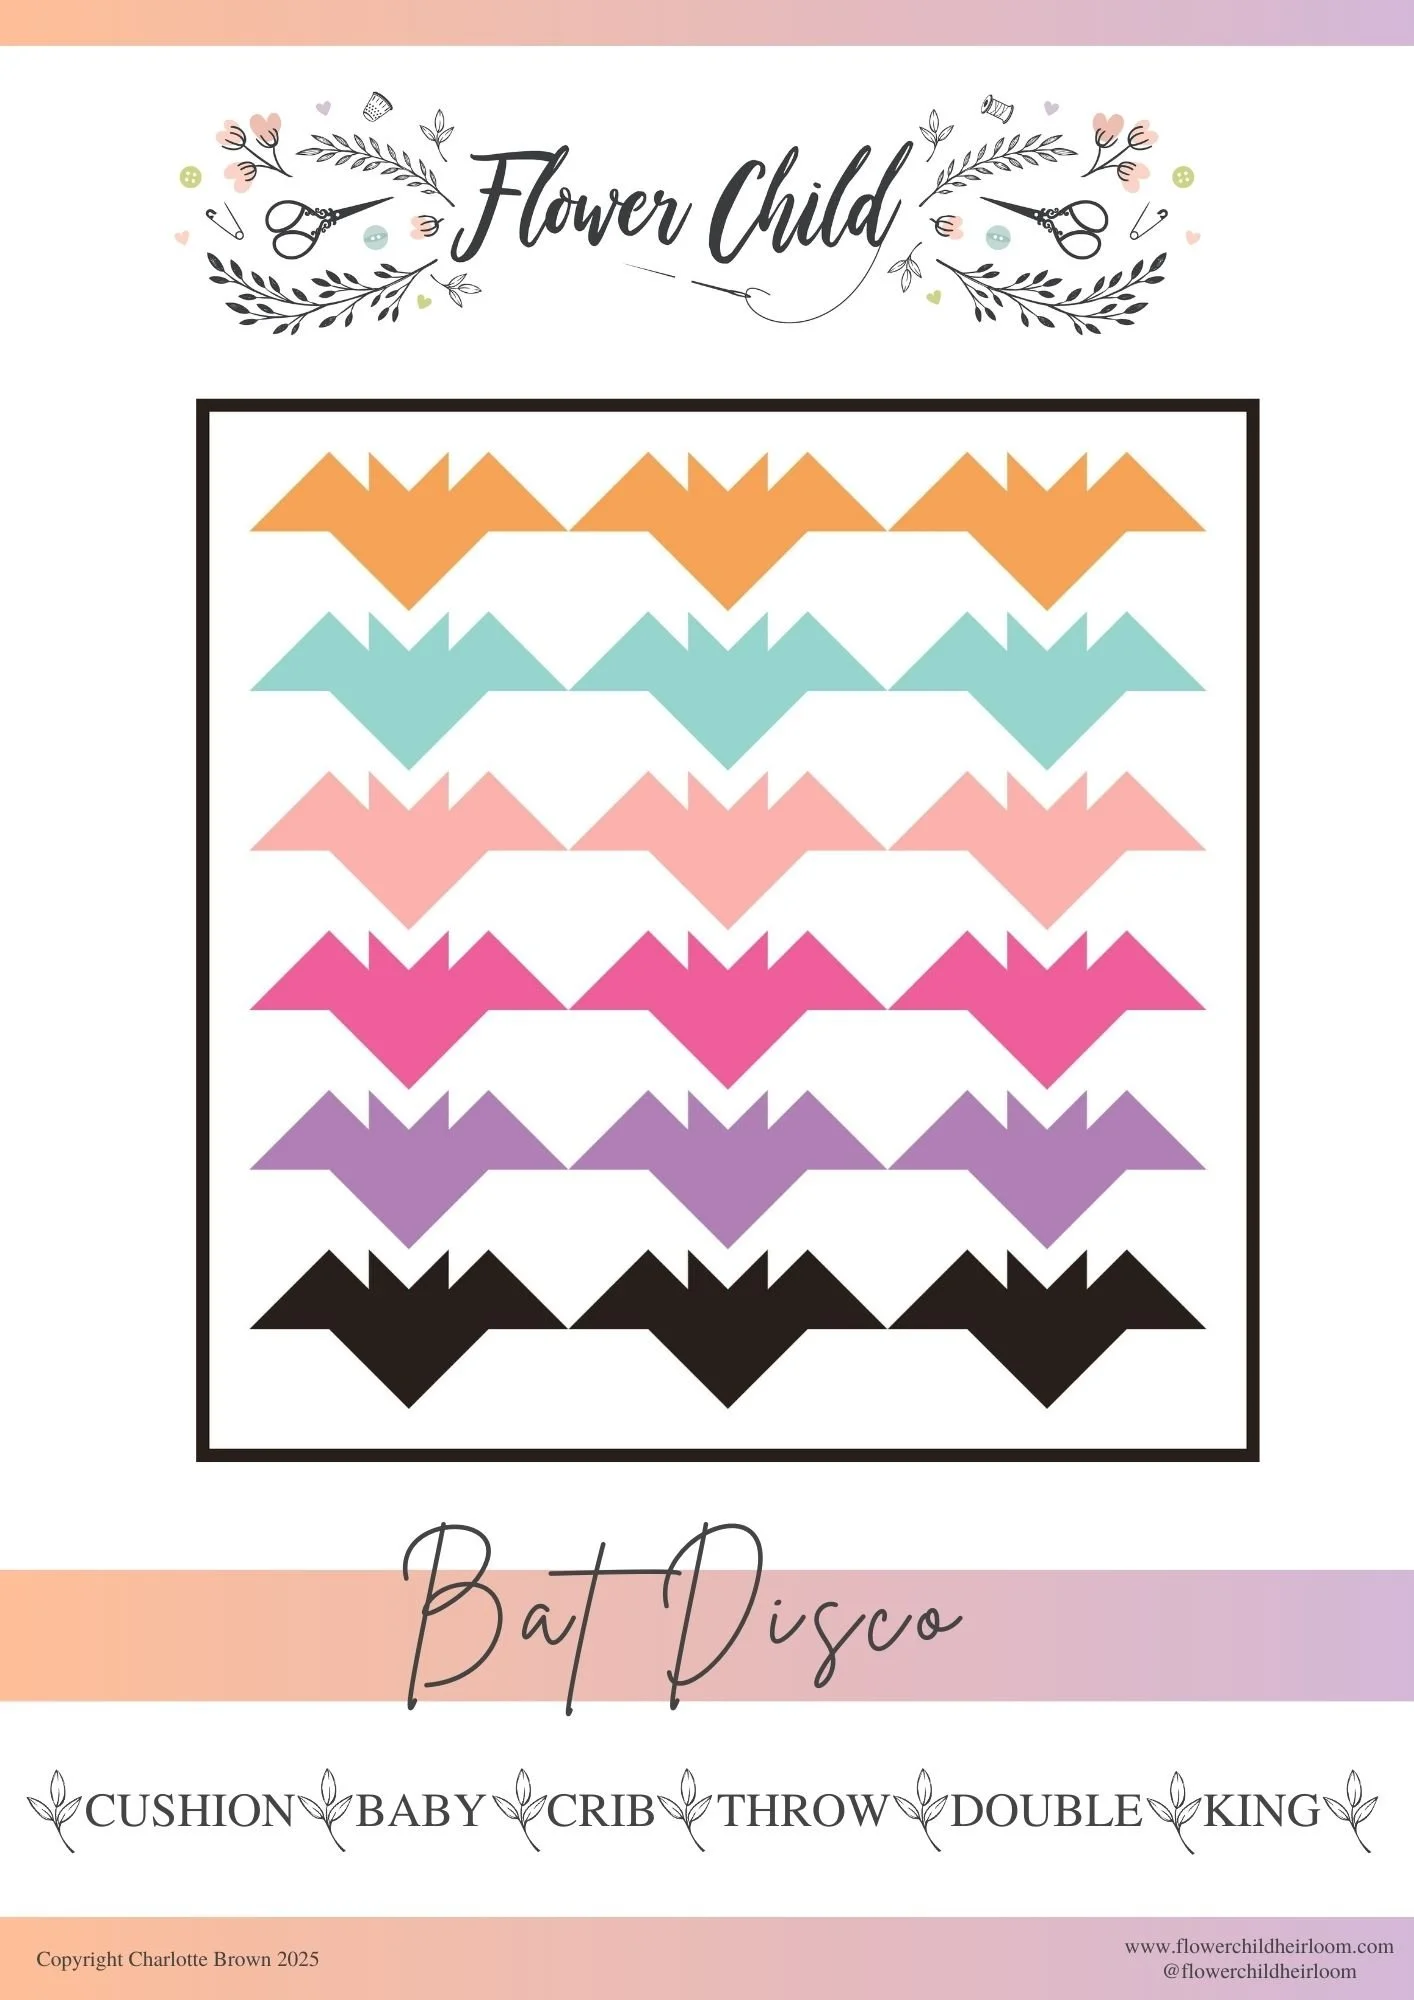
Bat Disco Quilt Along – Week Six
Layout & Quilt Top Assembly
Welcome back to the Bat Disco Quilt Along! We’re in Week Six, and this is where everything comes together — literally!
You’ve made your bat blocks, pressed them to perfection, and now it’s time to start laying out your quilt top. This is the stage where the whole Bat Disco design really begins to dance (soz) — bats in formation, rhythm, and color, coming together in one big swoop of spooky-cute fun.

Multicoloured version, with a single colour per row.
Laying Out Your Bat Disco Quilt
Find your space
A design wall, the floor, or even a big table will work — anywhere you can see your blocks spread out clearly.Start with the bats
Lay out all your finished bat blocks first, following the pattern layout as your guide. This helps you visualise how your colours and prints play across the quilt.Balance your colours
Step back and take a look from a distance. Make sure your colours (or prints) feel balanced — no one corner too dark or too light.Snap a quick photo
Take a photo on your phone before you start sewing — it’s a lifesaver if a block gets turned or mixed up while assembling!Add border strips pieces
Once your bats are in place, add the border to them. This is where the pattern really comes to life, giving your bats space to “fly” and will set off your binding when you get to that stage.

This monochrome version really stands out with a contrasting binding.
Tips for Success
Work one row at a time — (when I say row I mean a bat block row) join your bat blocks in rows according to the version you have chosen.
Press seams carefully, alternating direction between rows for nested seams and flatter joins.
Once all bat block rows are ready, sew them together to complete your quilt top.
Take your time — this is the big moment! Watching your Bat Disco quilt top come together is pure sewing joy. Use plenty of wonder clips or pins at seam joins so keep sharp.

Another monochrome idea in striking black and white.
My Progress
Literally as I type this I am debating whether to do rows of lighter fabrics to dark, dark to light or to completely jumble up the prints? Check back next week or follow me on Instagram to see what I do.

How about this bonus layout?! You could even just have one bat round the other way in a contrast colour.
Your Task This Week
Lay out your bat blocks.
Adjust your colours and placement until you’re happy with the balance.
Sew your rows together and press your finished quilt top.
Share your layout or completed top with #BatDiscoQuiltAlong — we can’t wait to see your bats take flight!
Next week we’ll dive into quilting, binding, and a fun little bonus — adding embroidered bat details! Get ready to finish your Bat Disco quilt with flair and a touch of handmade magic.
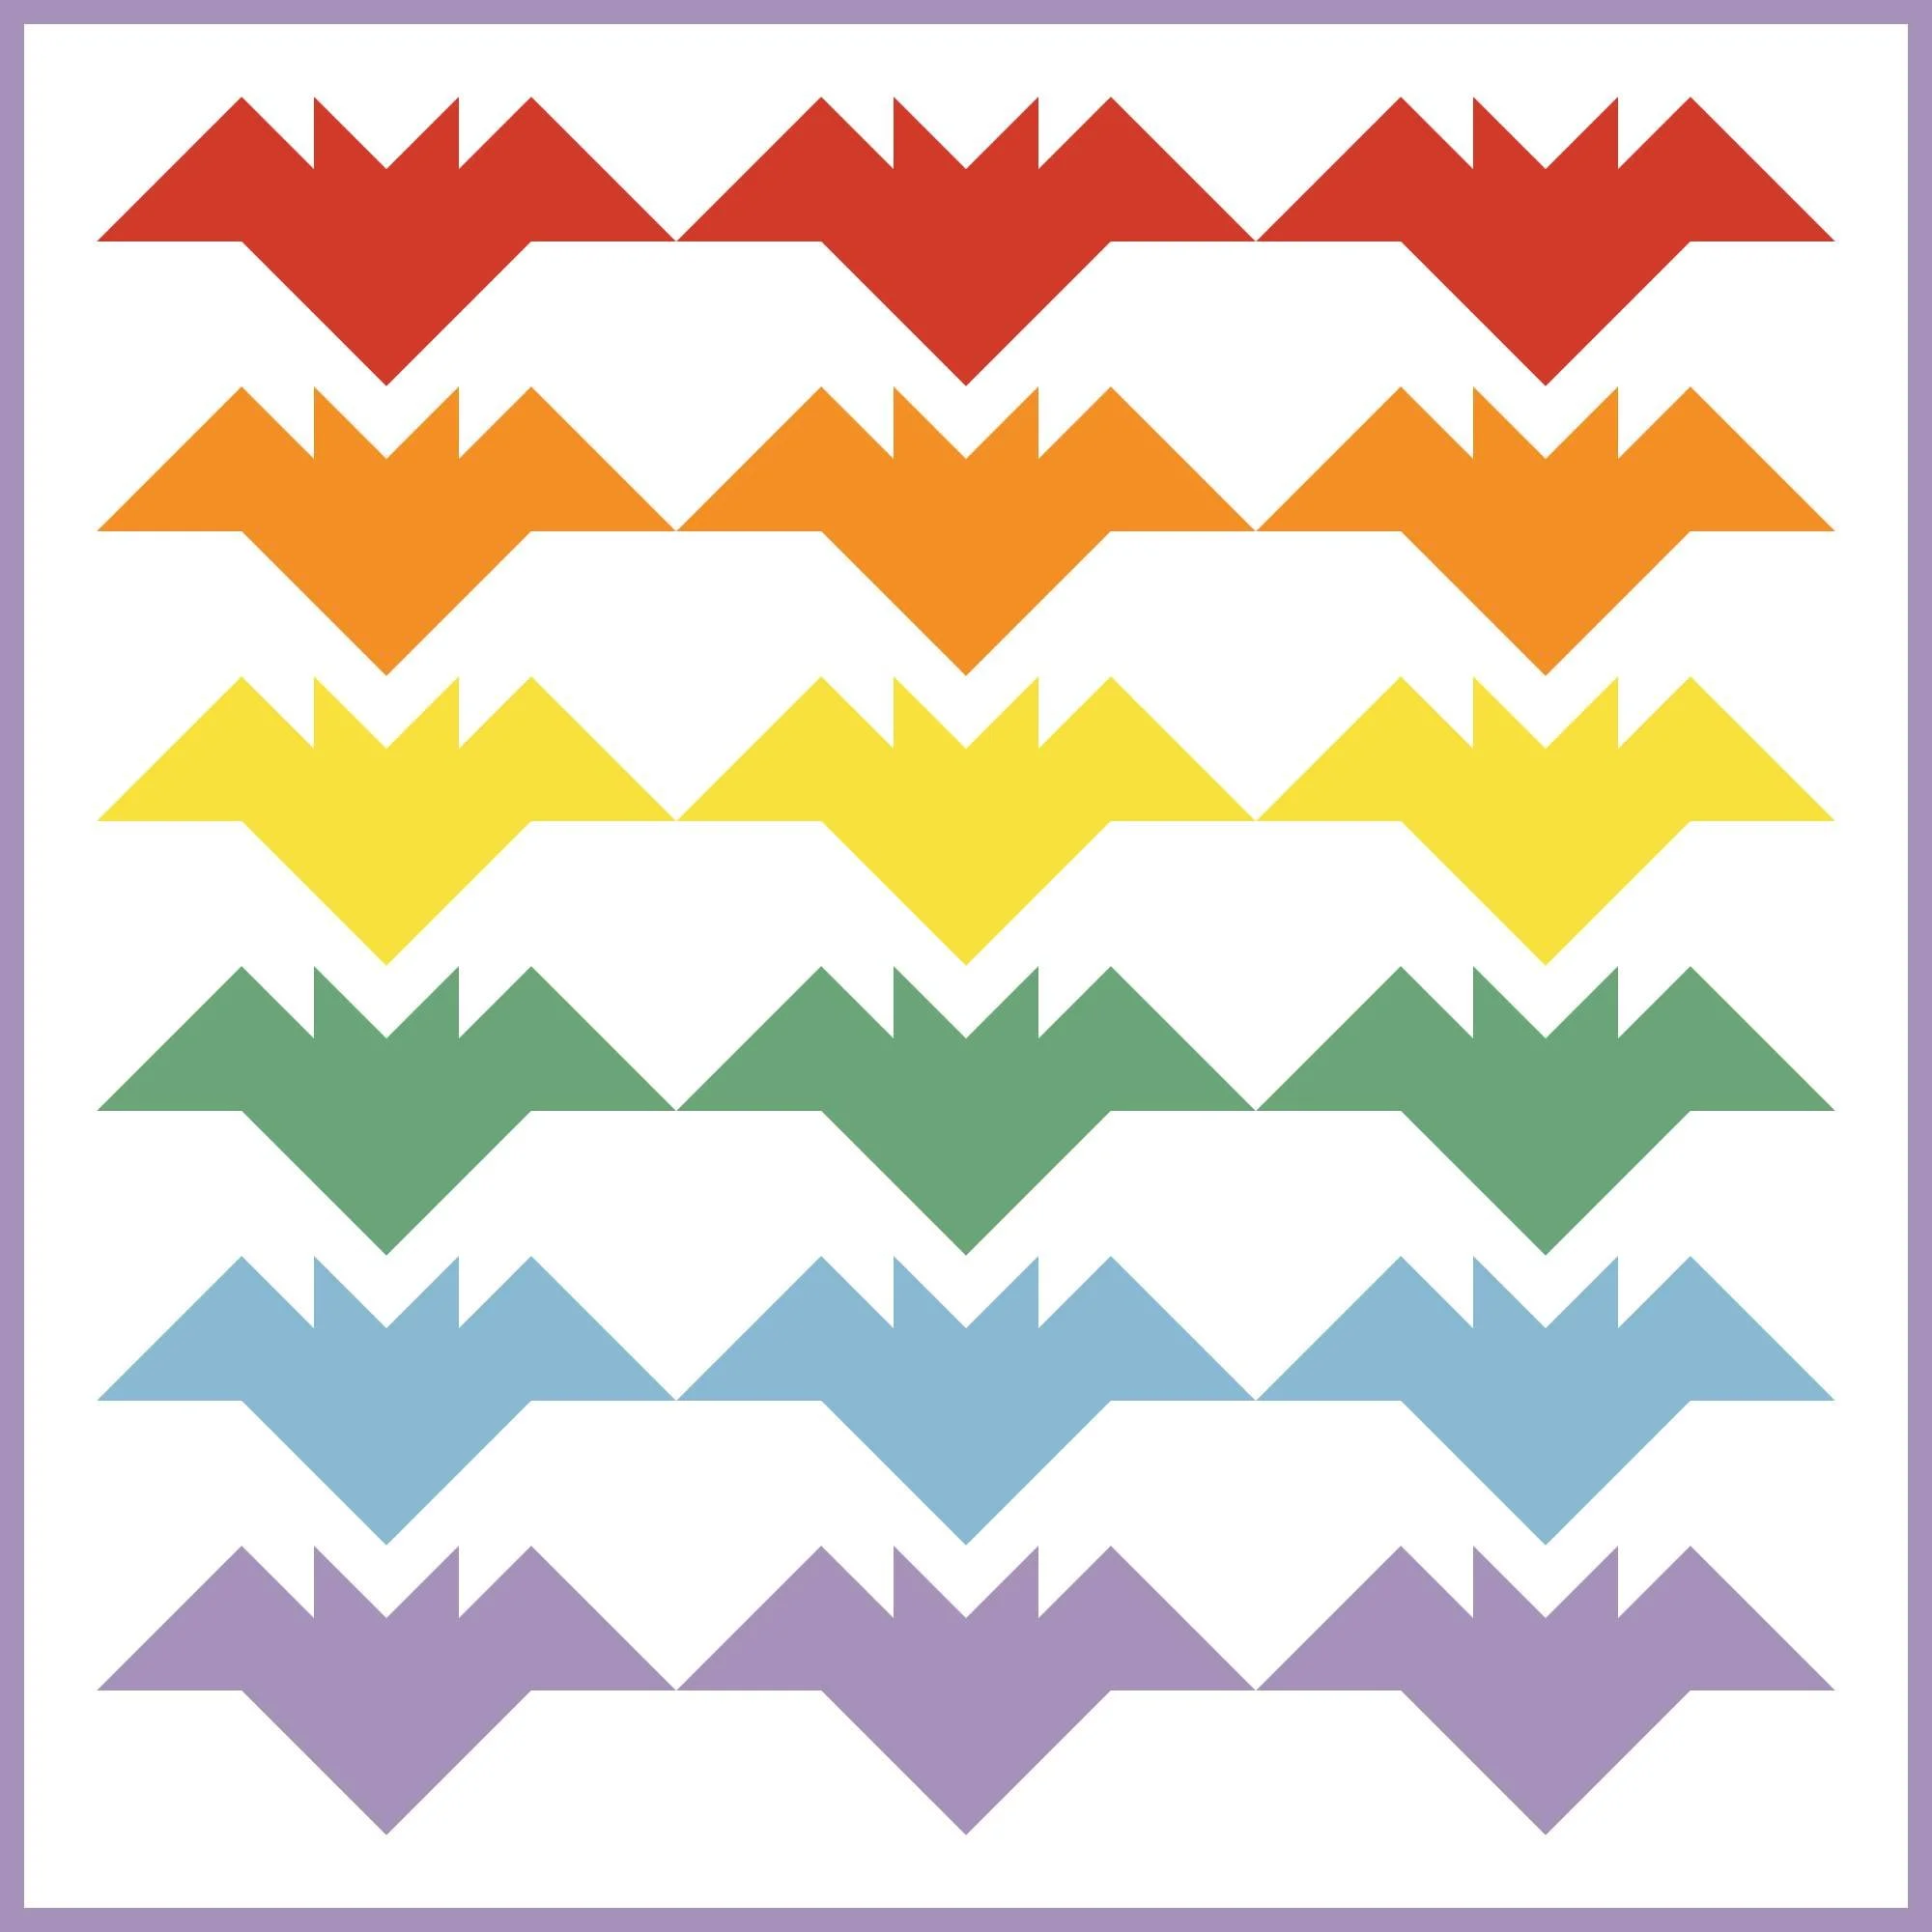
It wouldn’t be a Flower Child design without a rainbow version.
Bat Disco Quilt Along Schedule
Here’s what’s coming up over the next 6 weeks:
Week 1 – Fabric Pull
Show off your spooky (or not-so-spooky!) fabric picks.
Week 2 – Cutting
Get those fabrics prepped and organized.
Week 3 – Half-Square Triangles
Lots of HSTs = lots of disco magic!
Week 4 – Snowball Blocks
Cute, simple, and oh-so-satisfying.
Week 5 – Bat Blocks
Cute, simple, and oh-so-satisfying.
Week 6 – Quilt Top Assembly
Layout + rows = Bat Disco starting to shine!
Week 7 – Quilting & Finish
Quilting, binding, and celebrating your Bat Disco!
Use #BatDiscoQuiltAlong so we can all follow along and cheer you on!
🦇Bat Fact!
Bats often hang upside down because it’s the easiest way for them to take off into flight — their little legs aren’t built for running, but they’re perfect for hanging out!
Inspired by my favourite time of the year and decorating my home for my family, I created this super beginner friendly Halloween quilt. These cute bats can be made in any colours, monochrome and you could even add embroidery onto their faces. Have lots of spooky fun!
I always go above and beyond on my patterns including detailed step-by-step instructions and tips across this 16 page quilt pattern.
The introductory offer ends next Monday 8th September at 8pm GMT.
The QAL starts on 4th September and everyone who has purchased the pattern. Please let me know in your purchase notes if you wish to sign up to the free emails.