

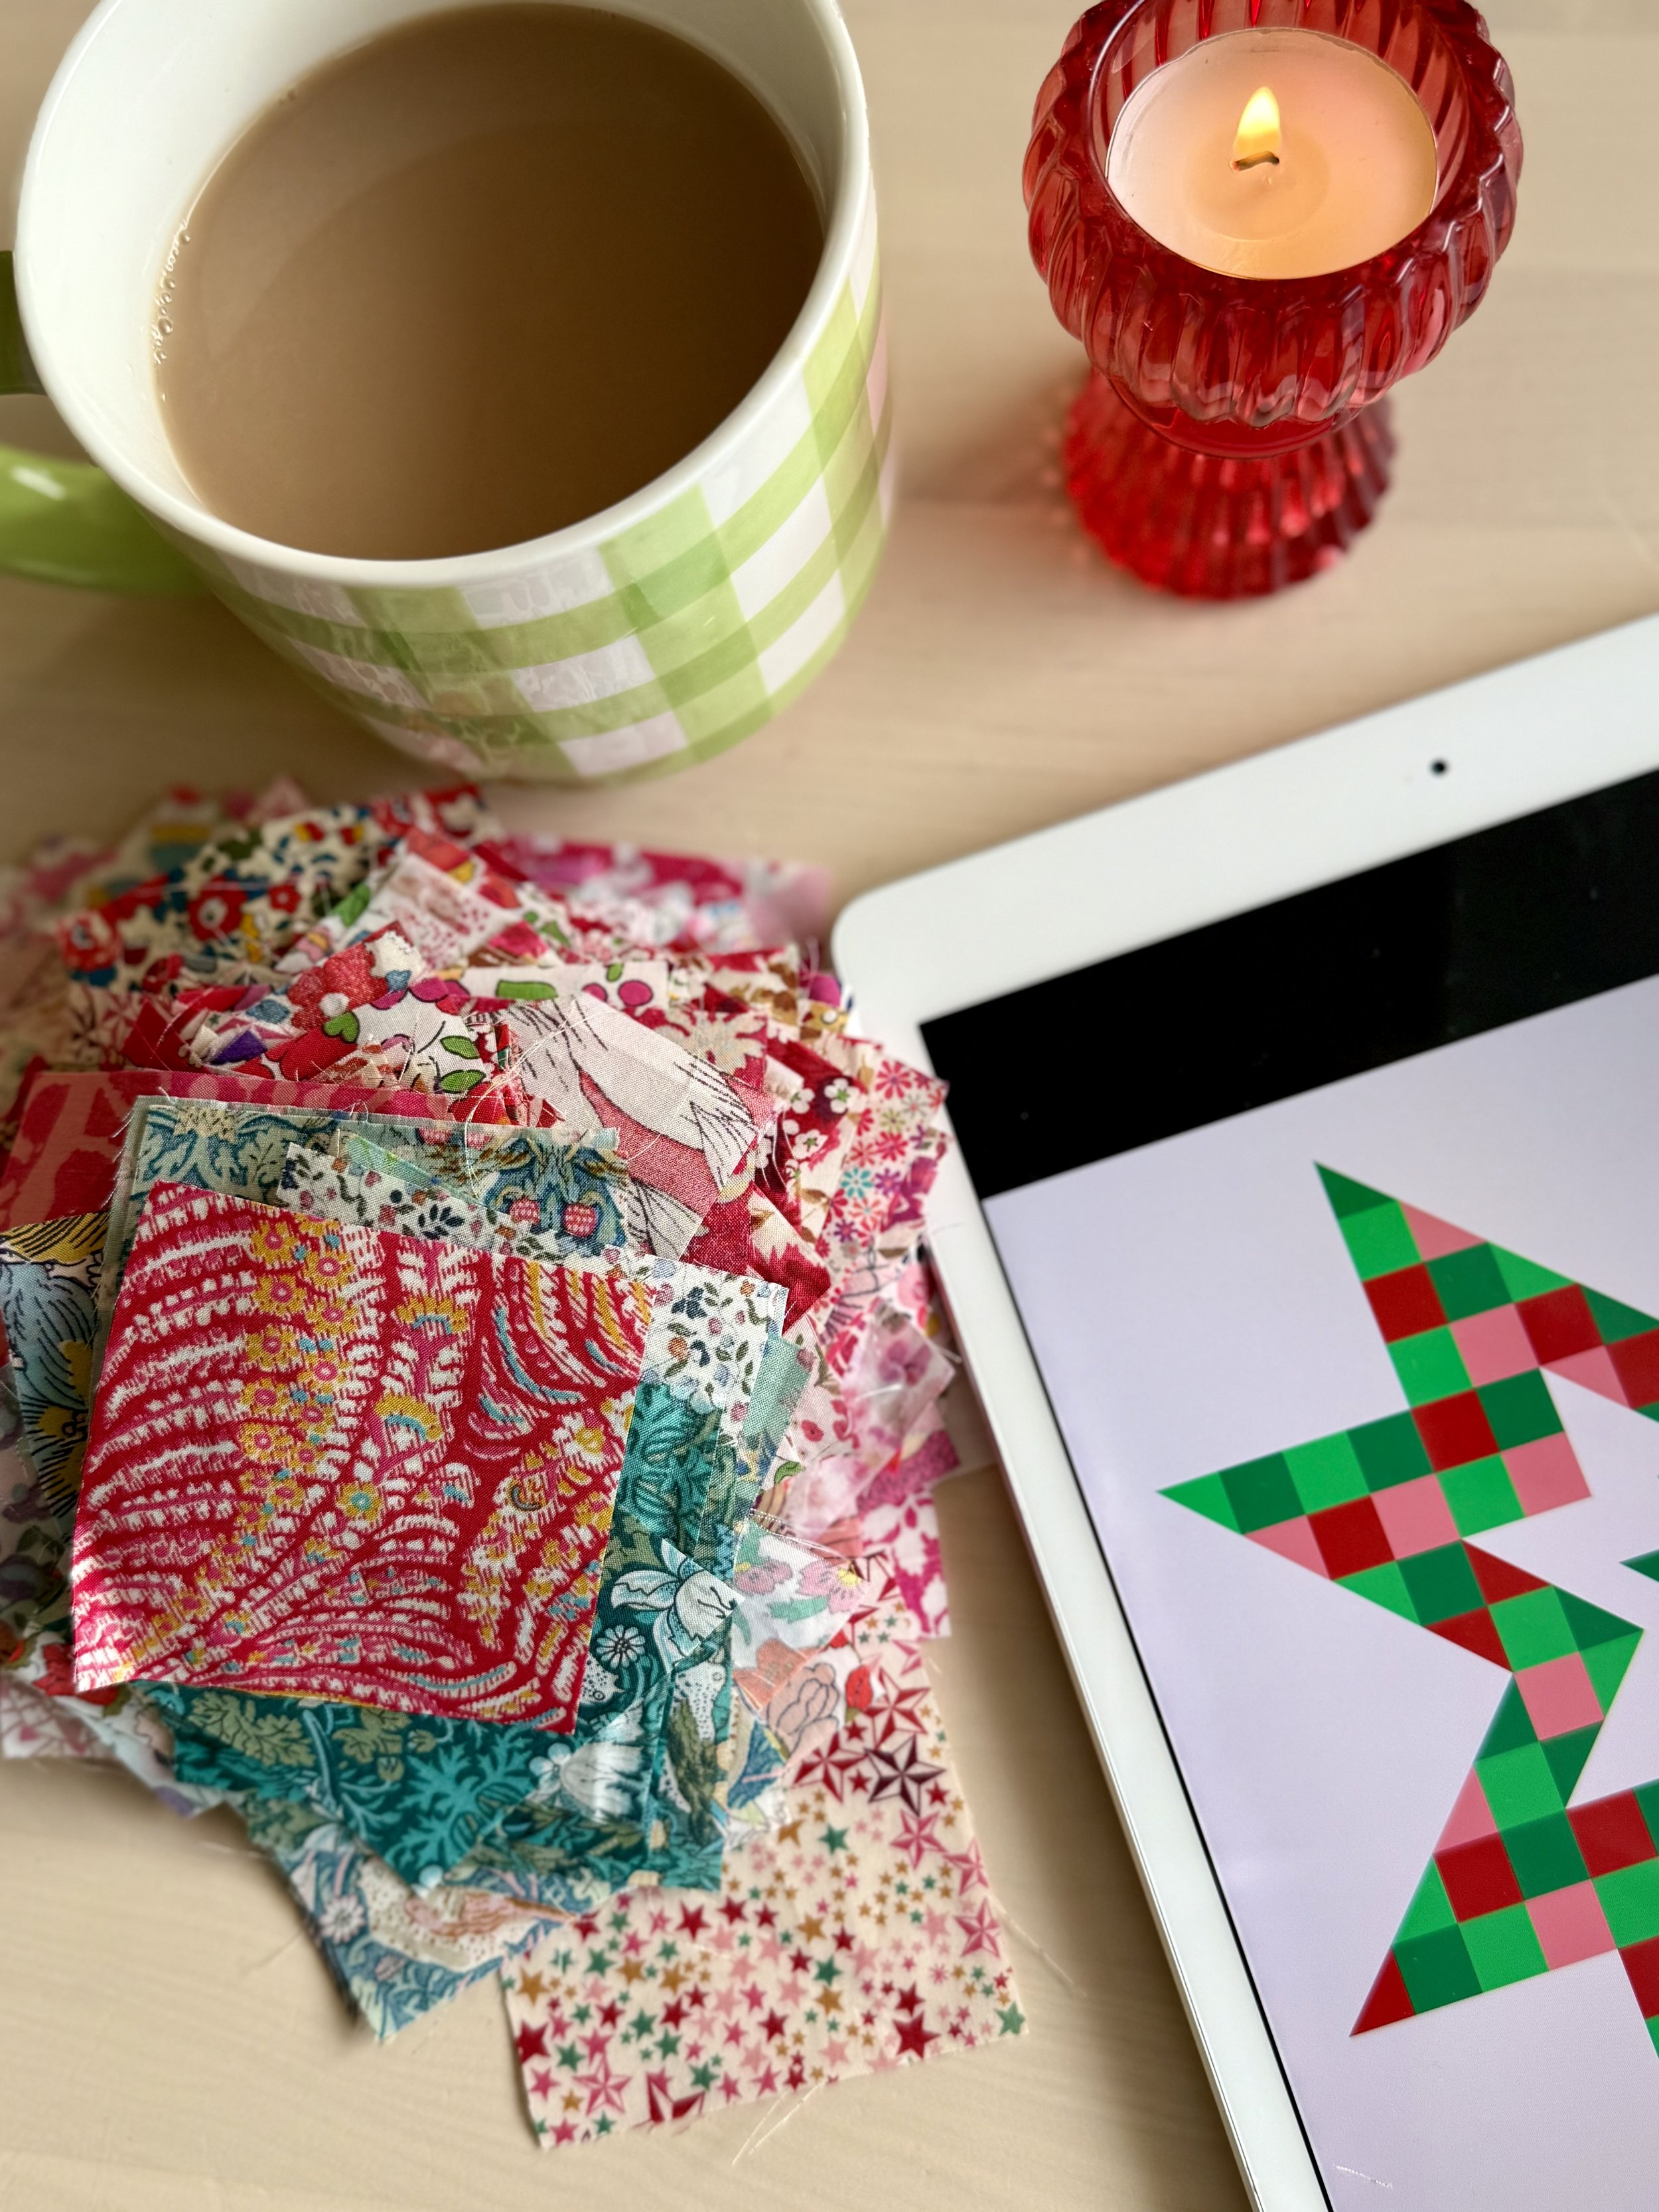
Christmas Three Sisters QAL – Week Three
Christmas Three Sisters Quilt Along - Week Three
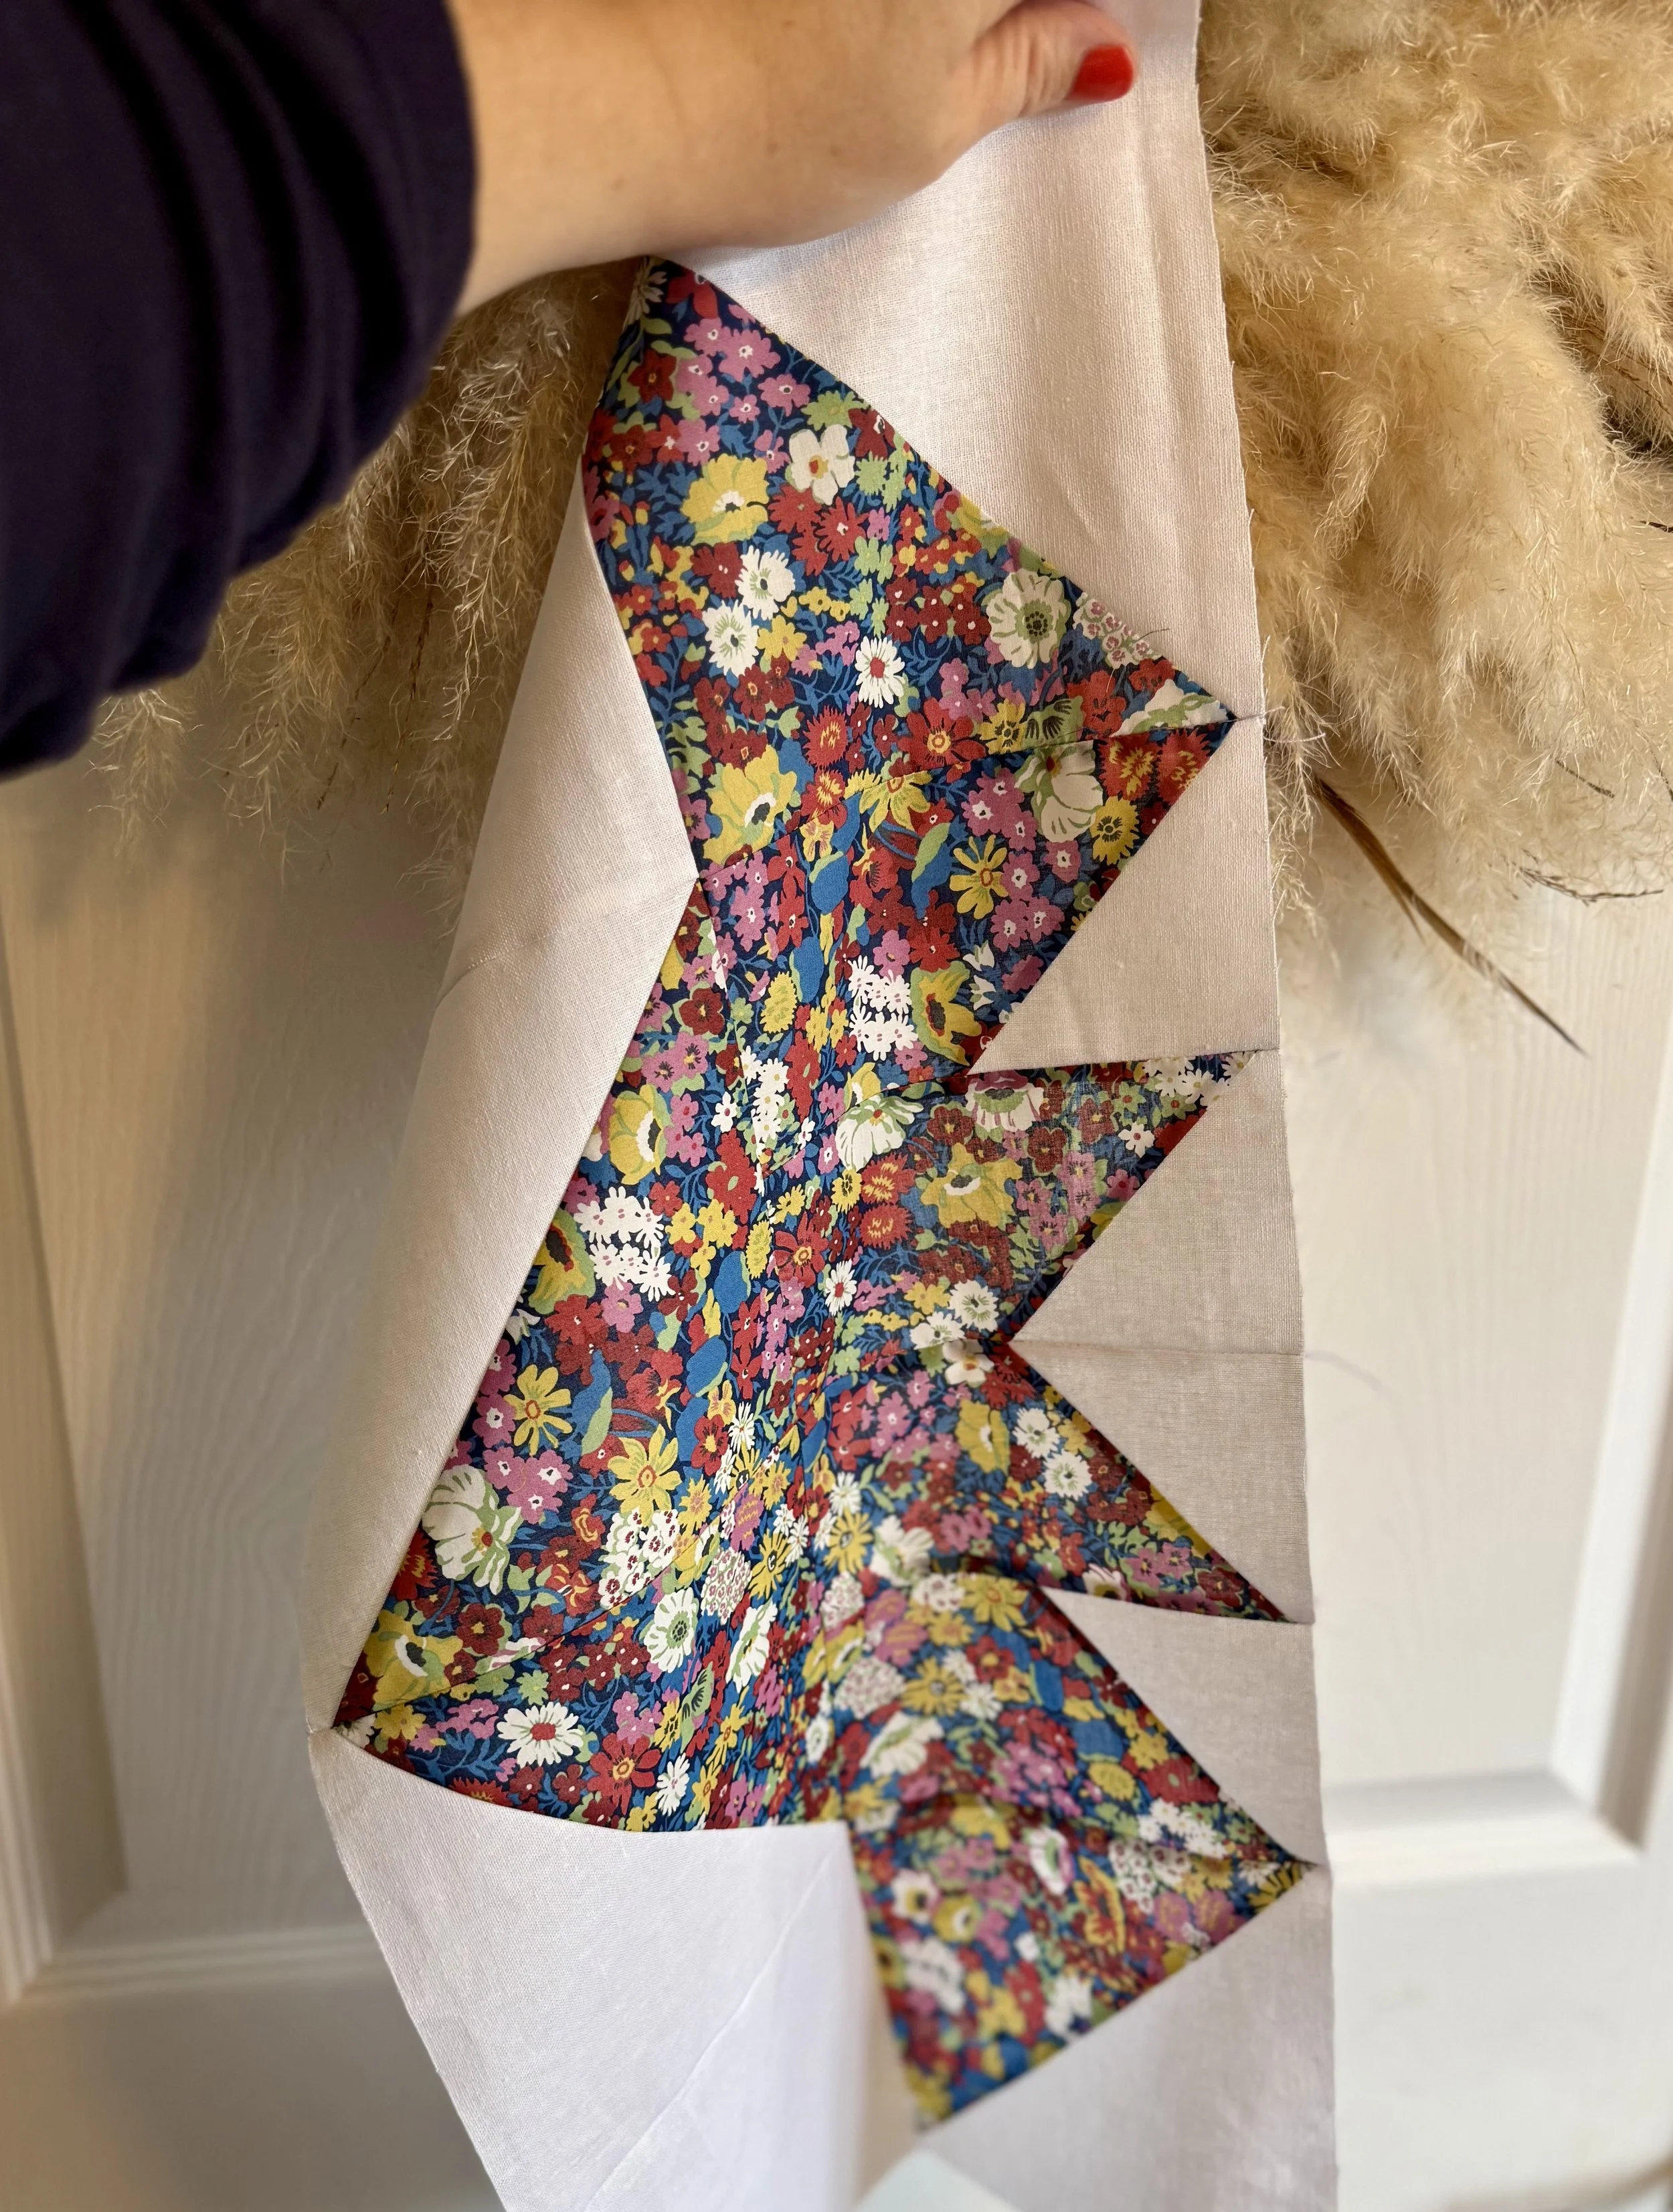
This week we will be getting all the half square triangles together to make the stars shine.
Creating Your HSTs
This week we are crafting the Half-Square Triangles that will form the definition of your stars and create those sharp edges.
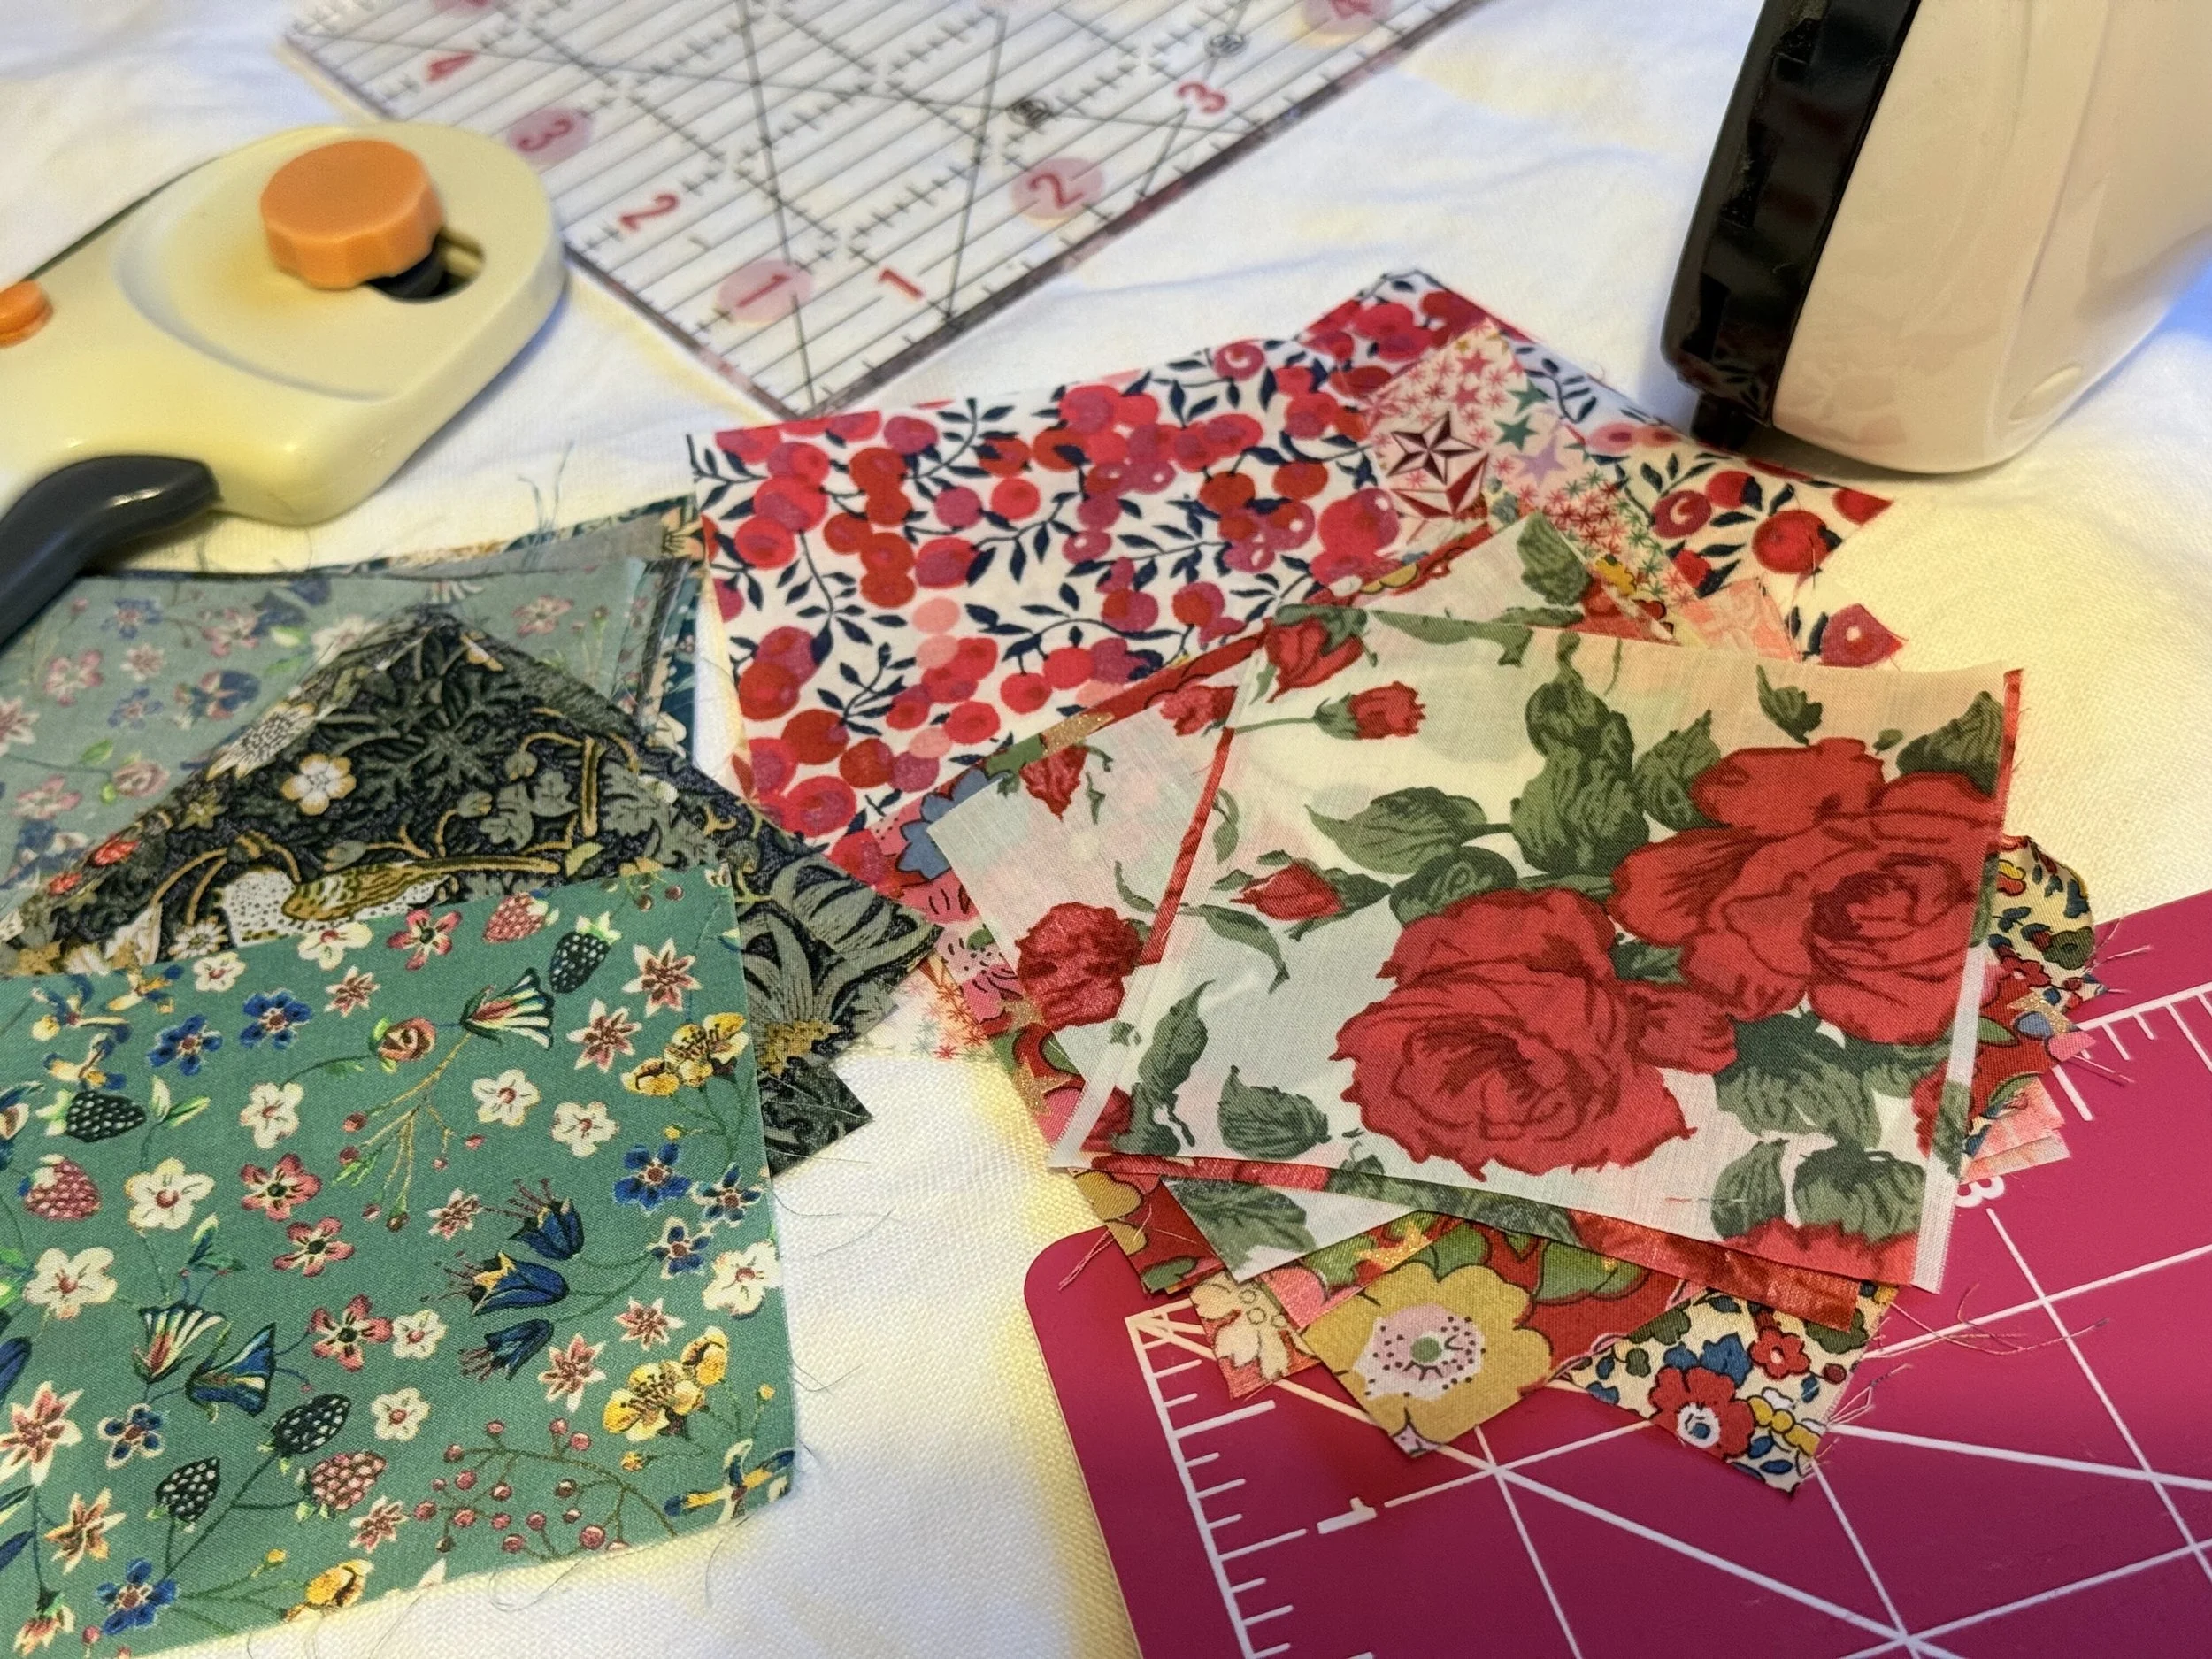
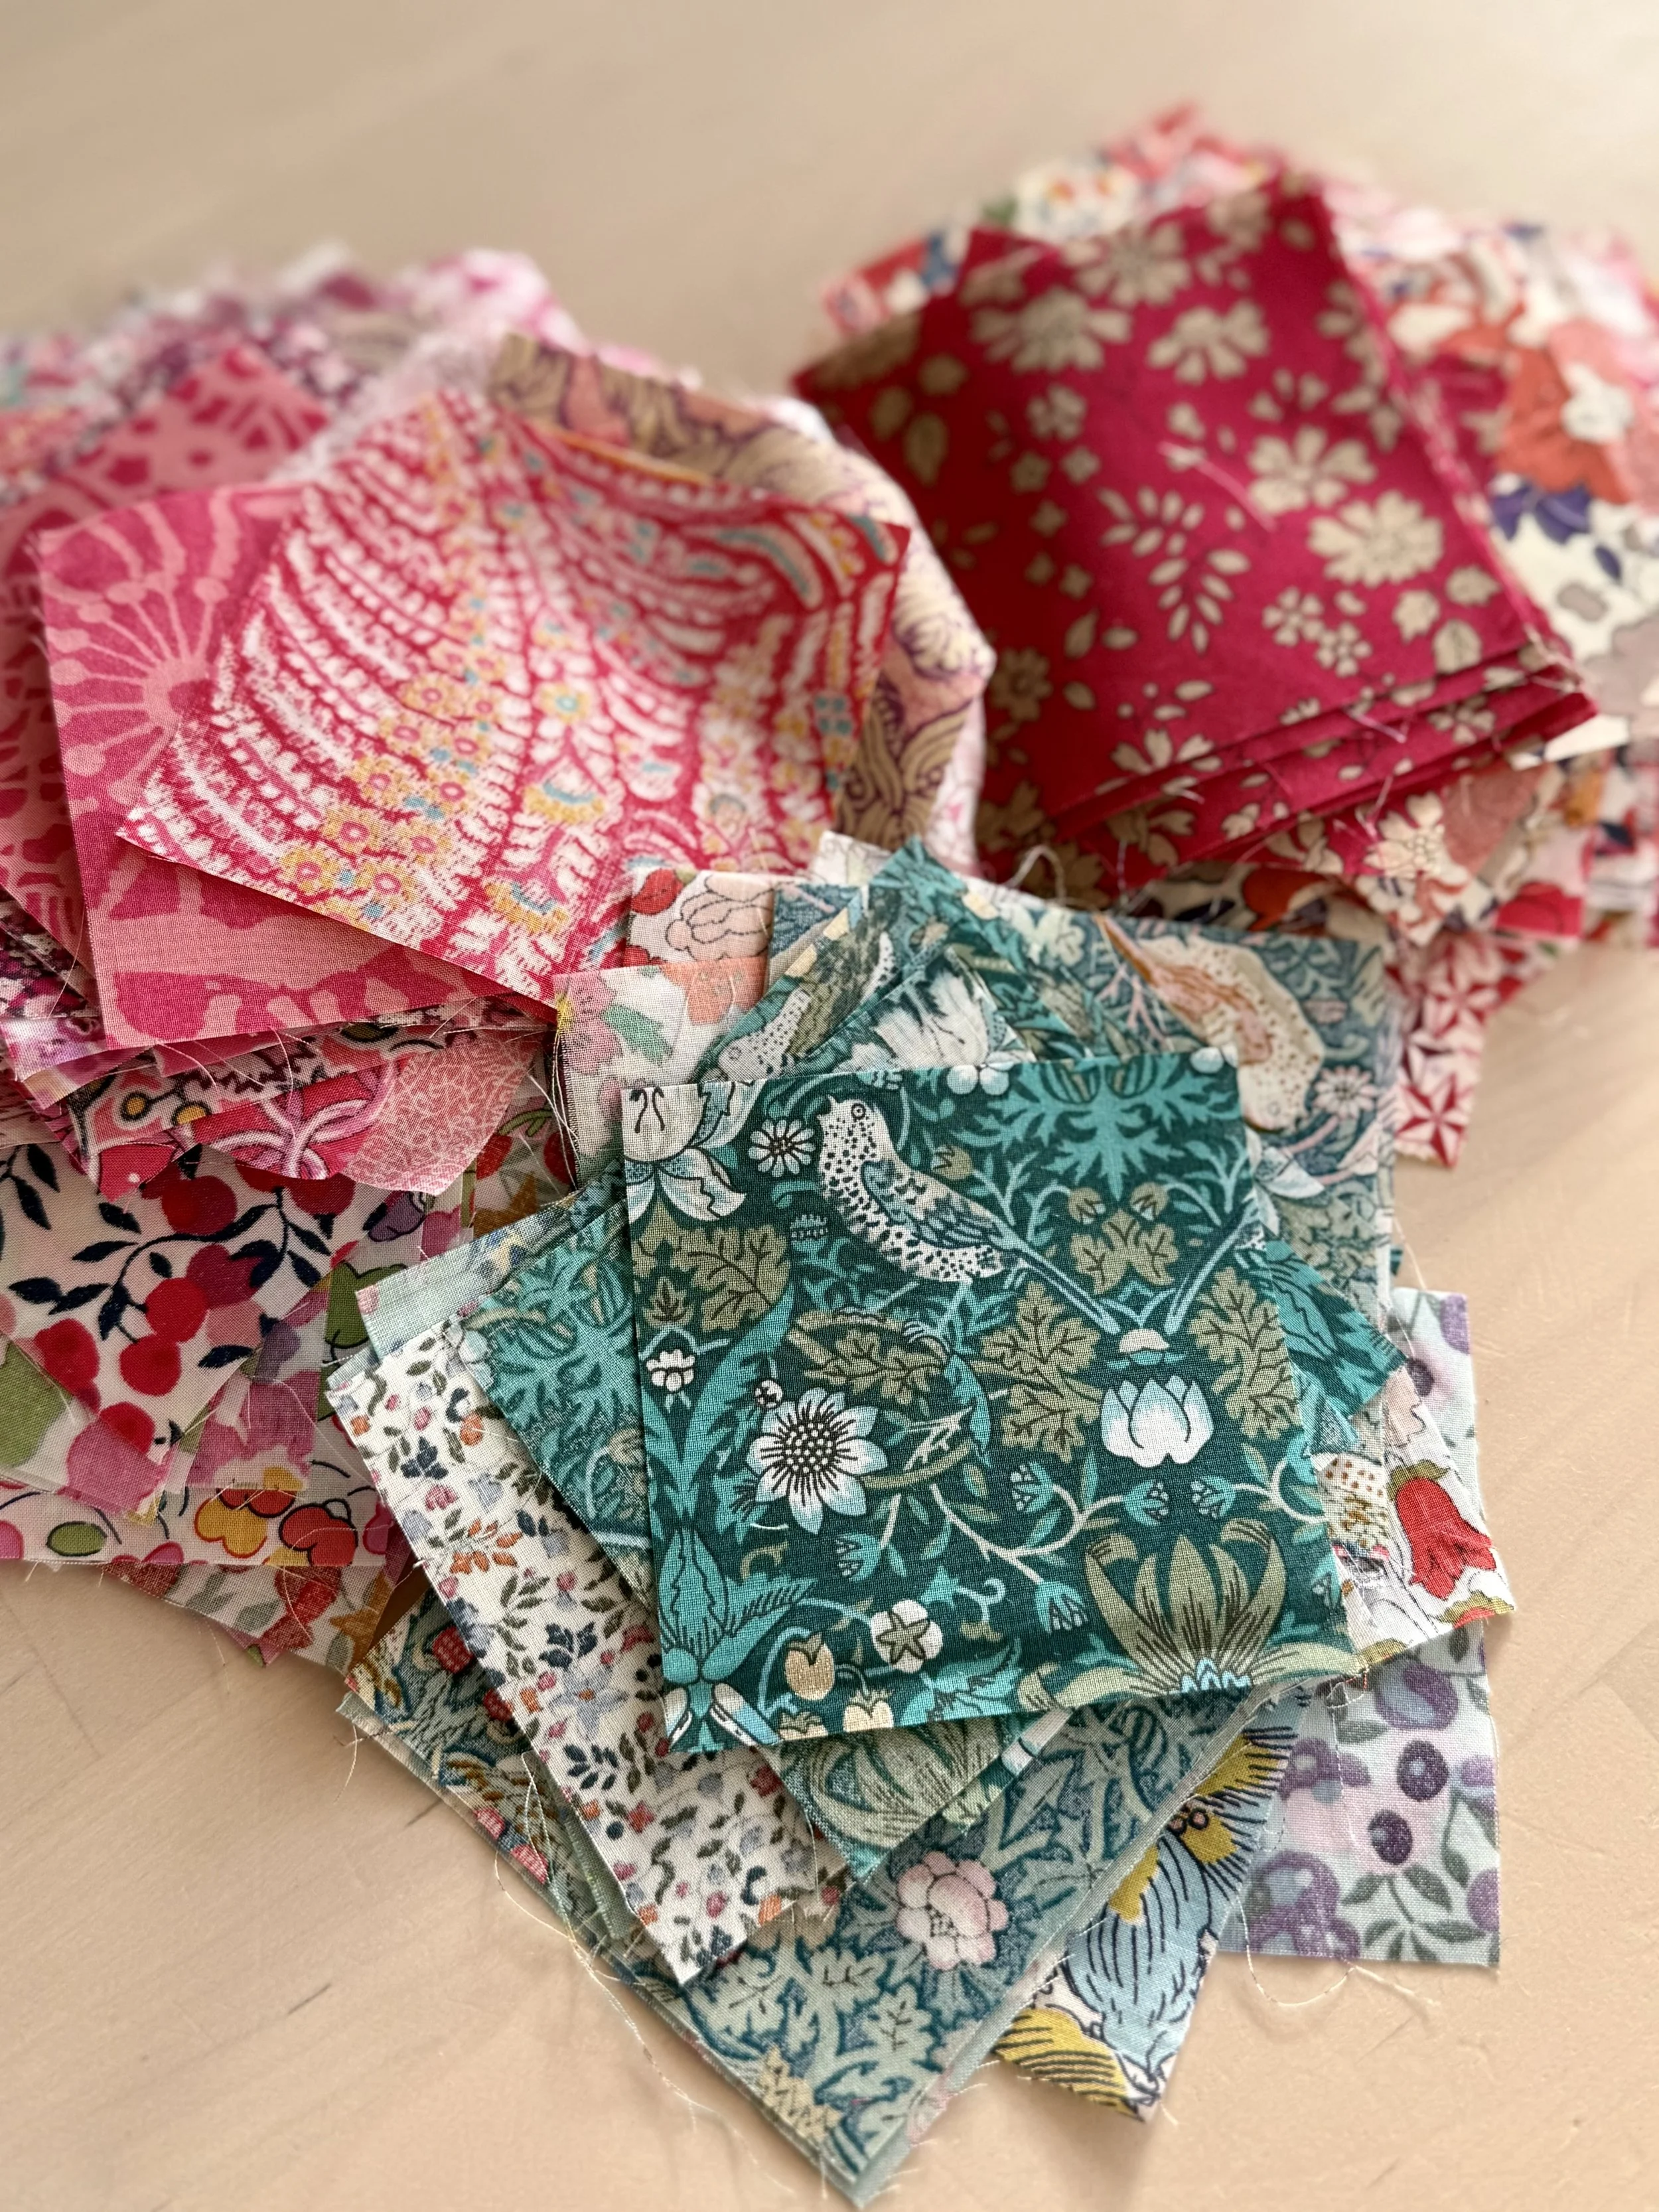
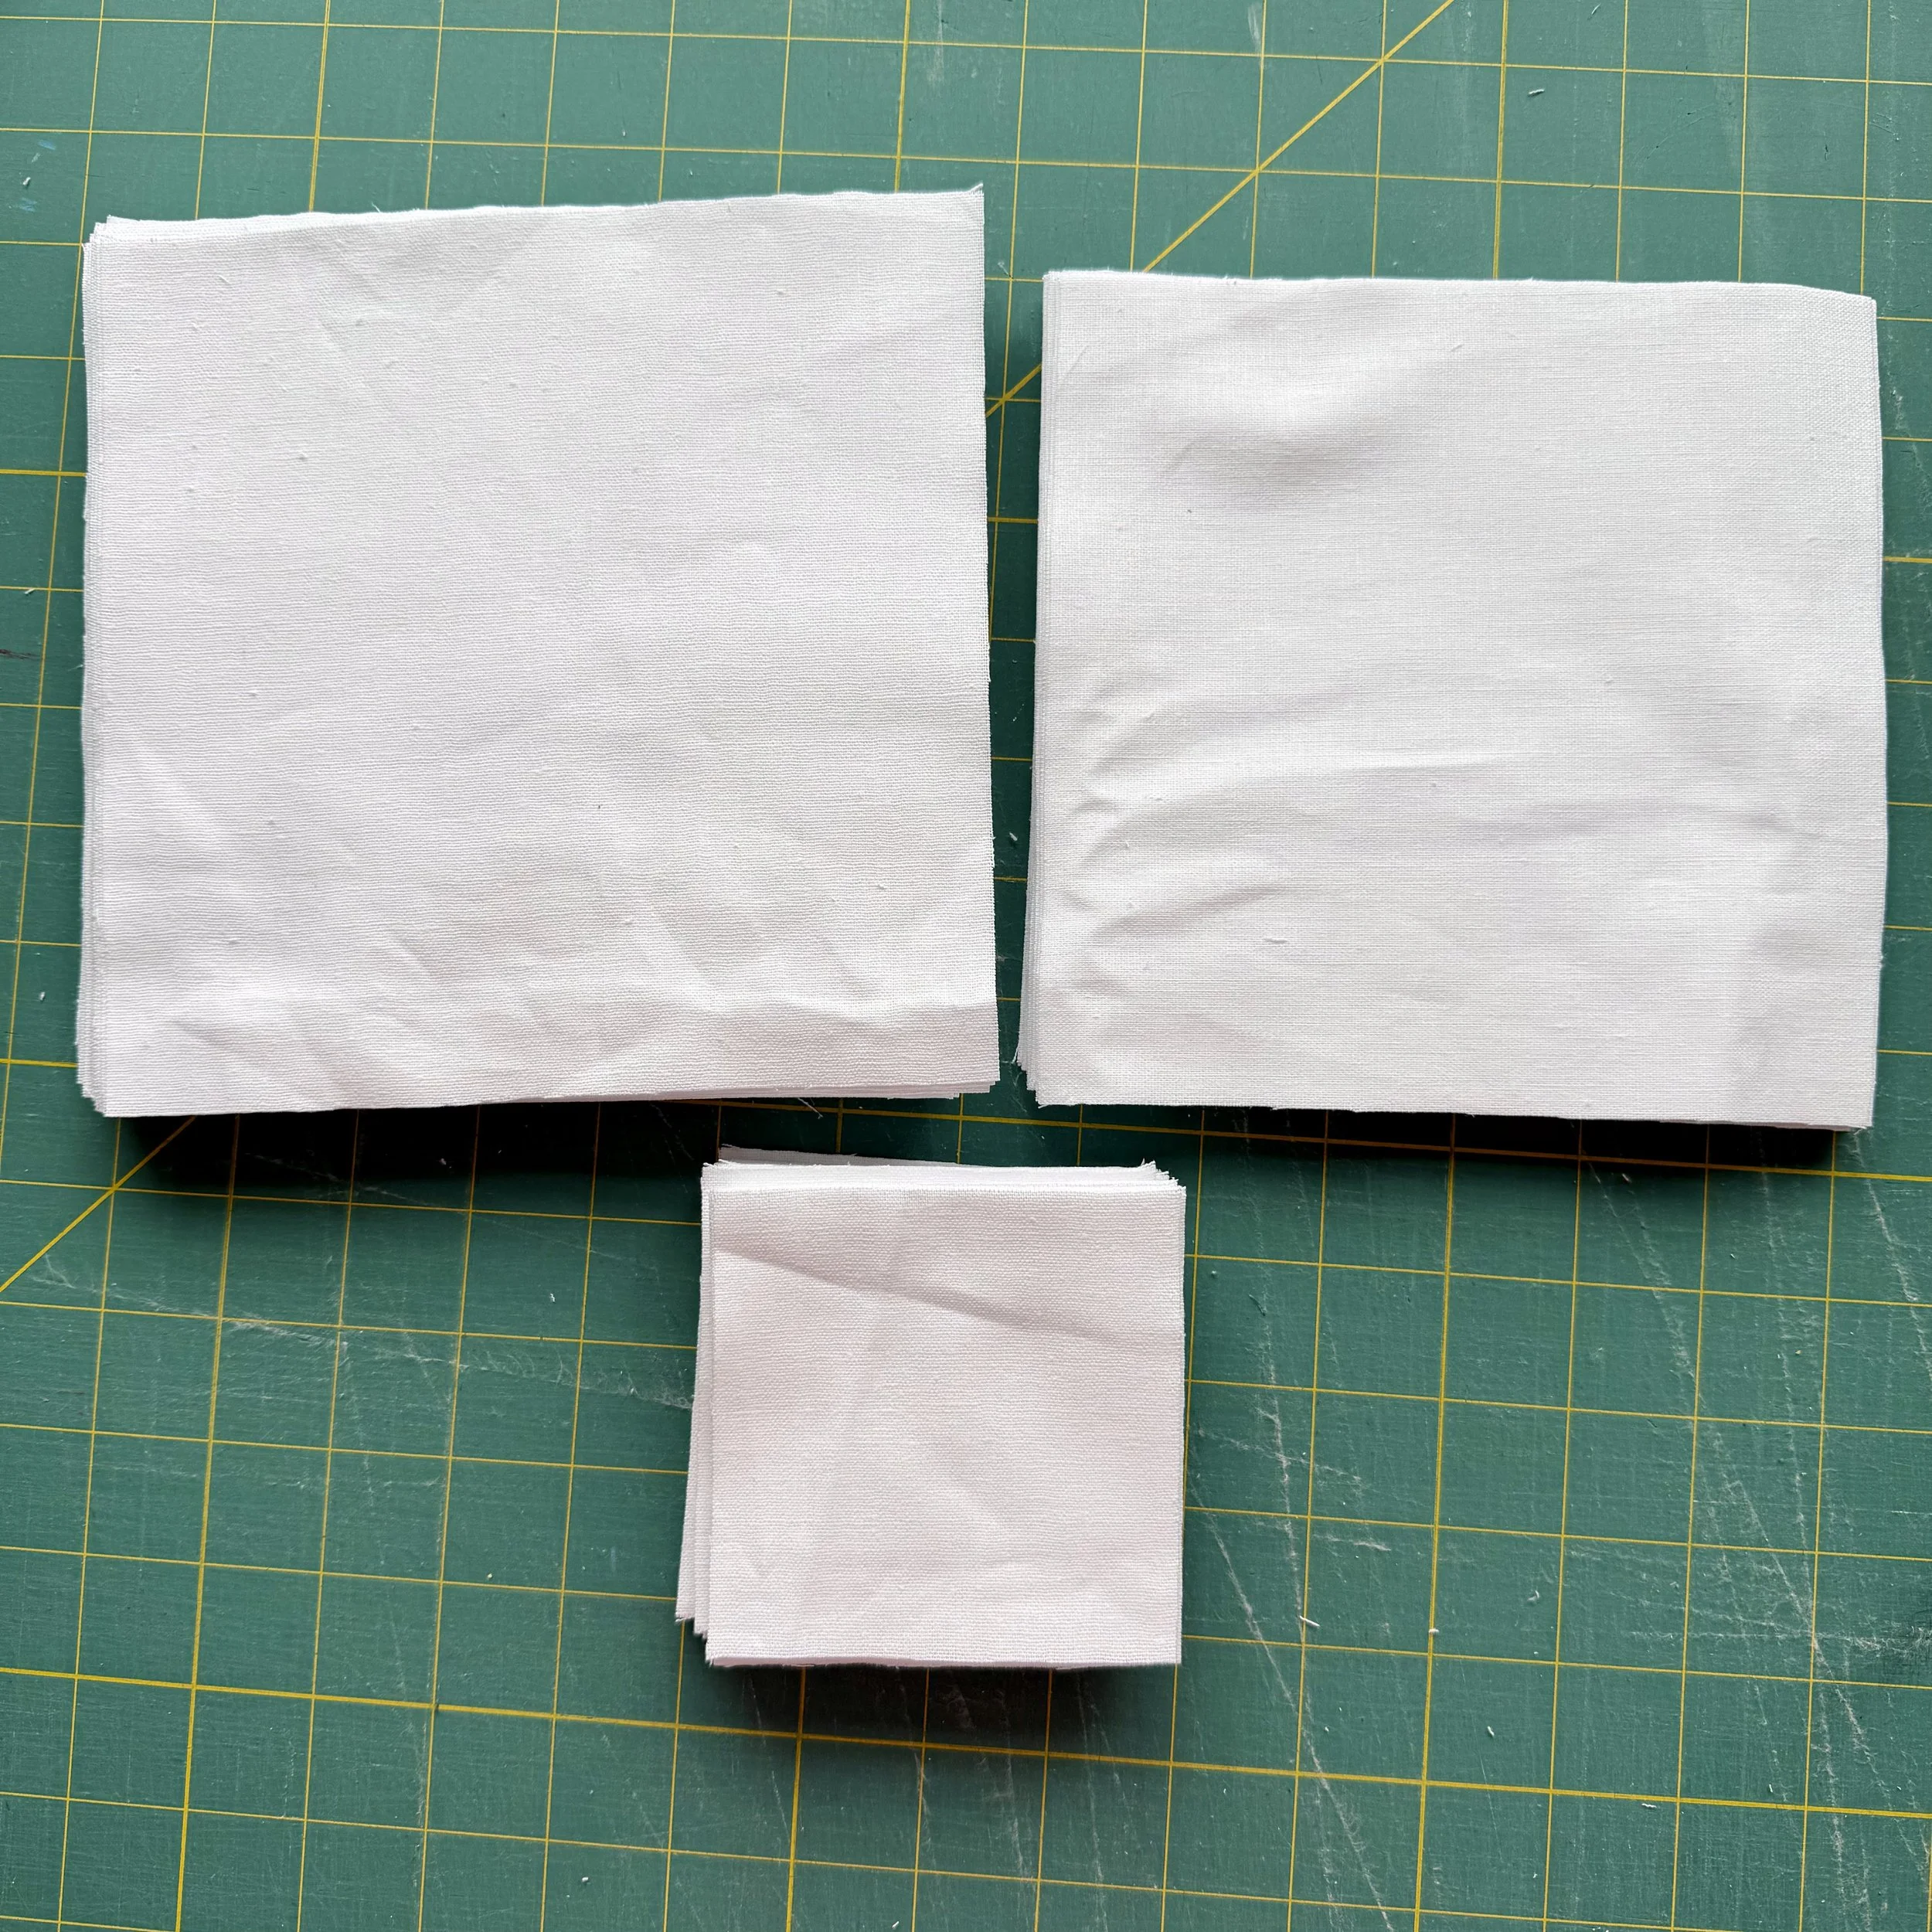
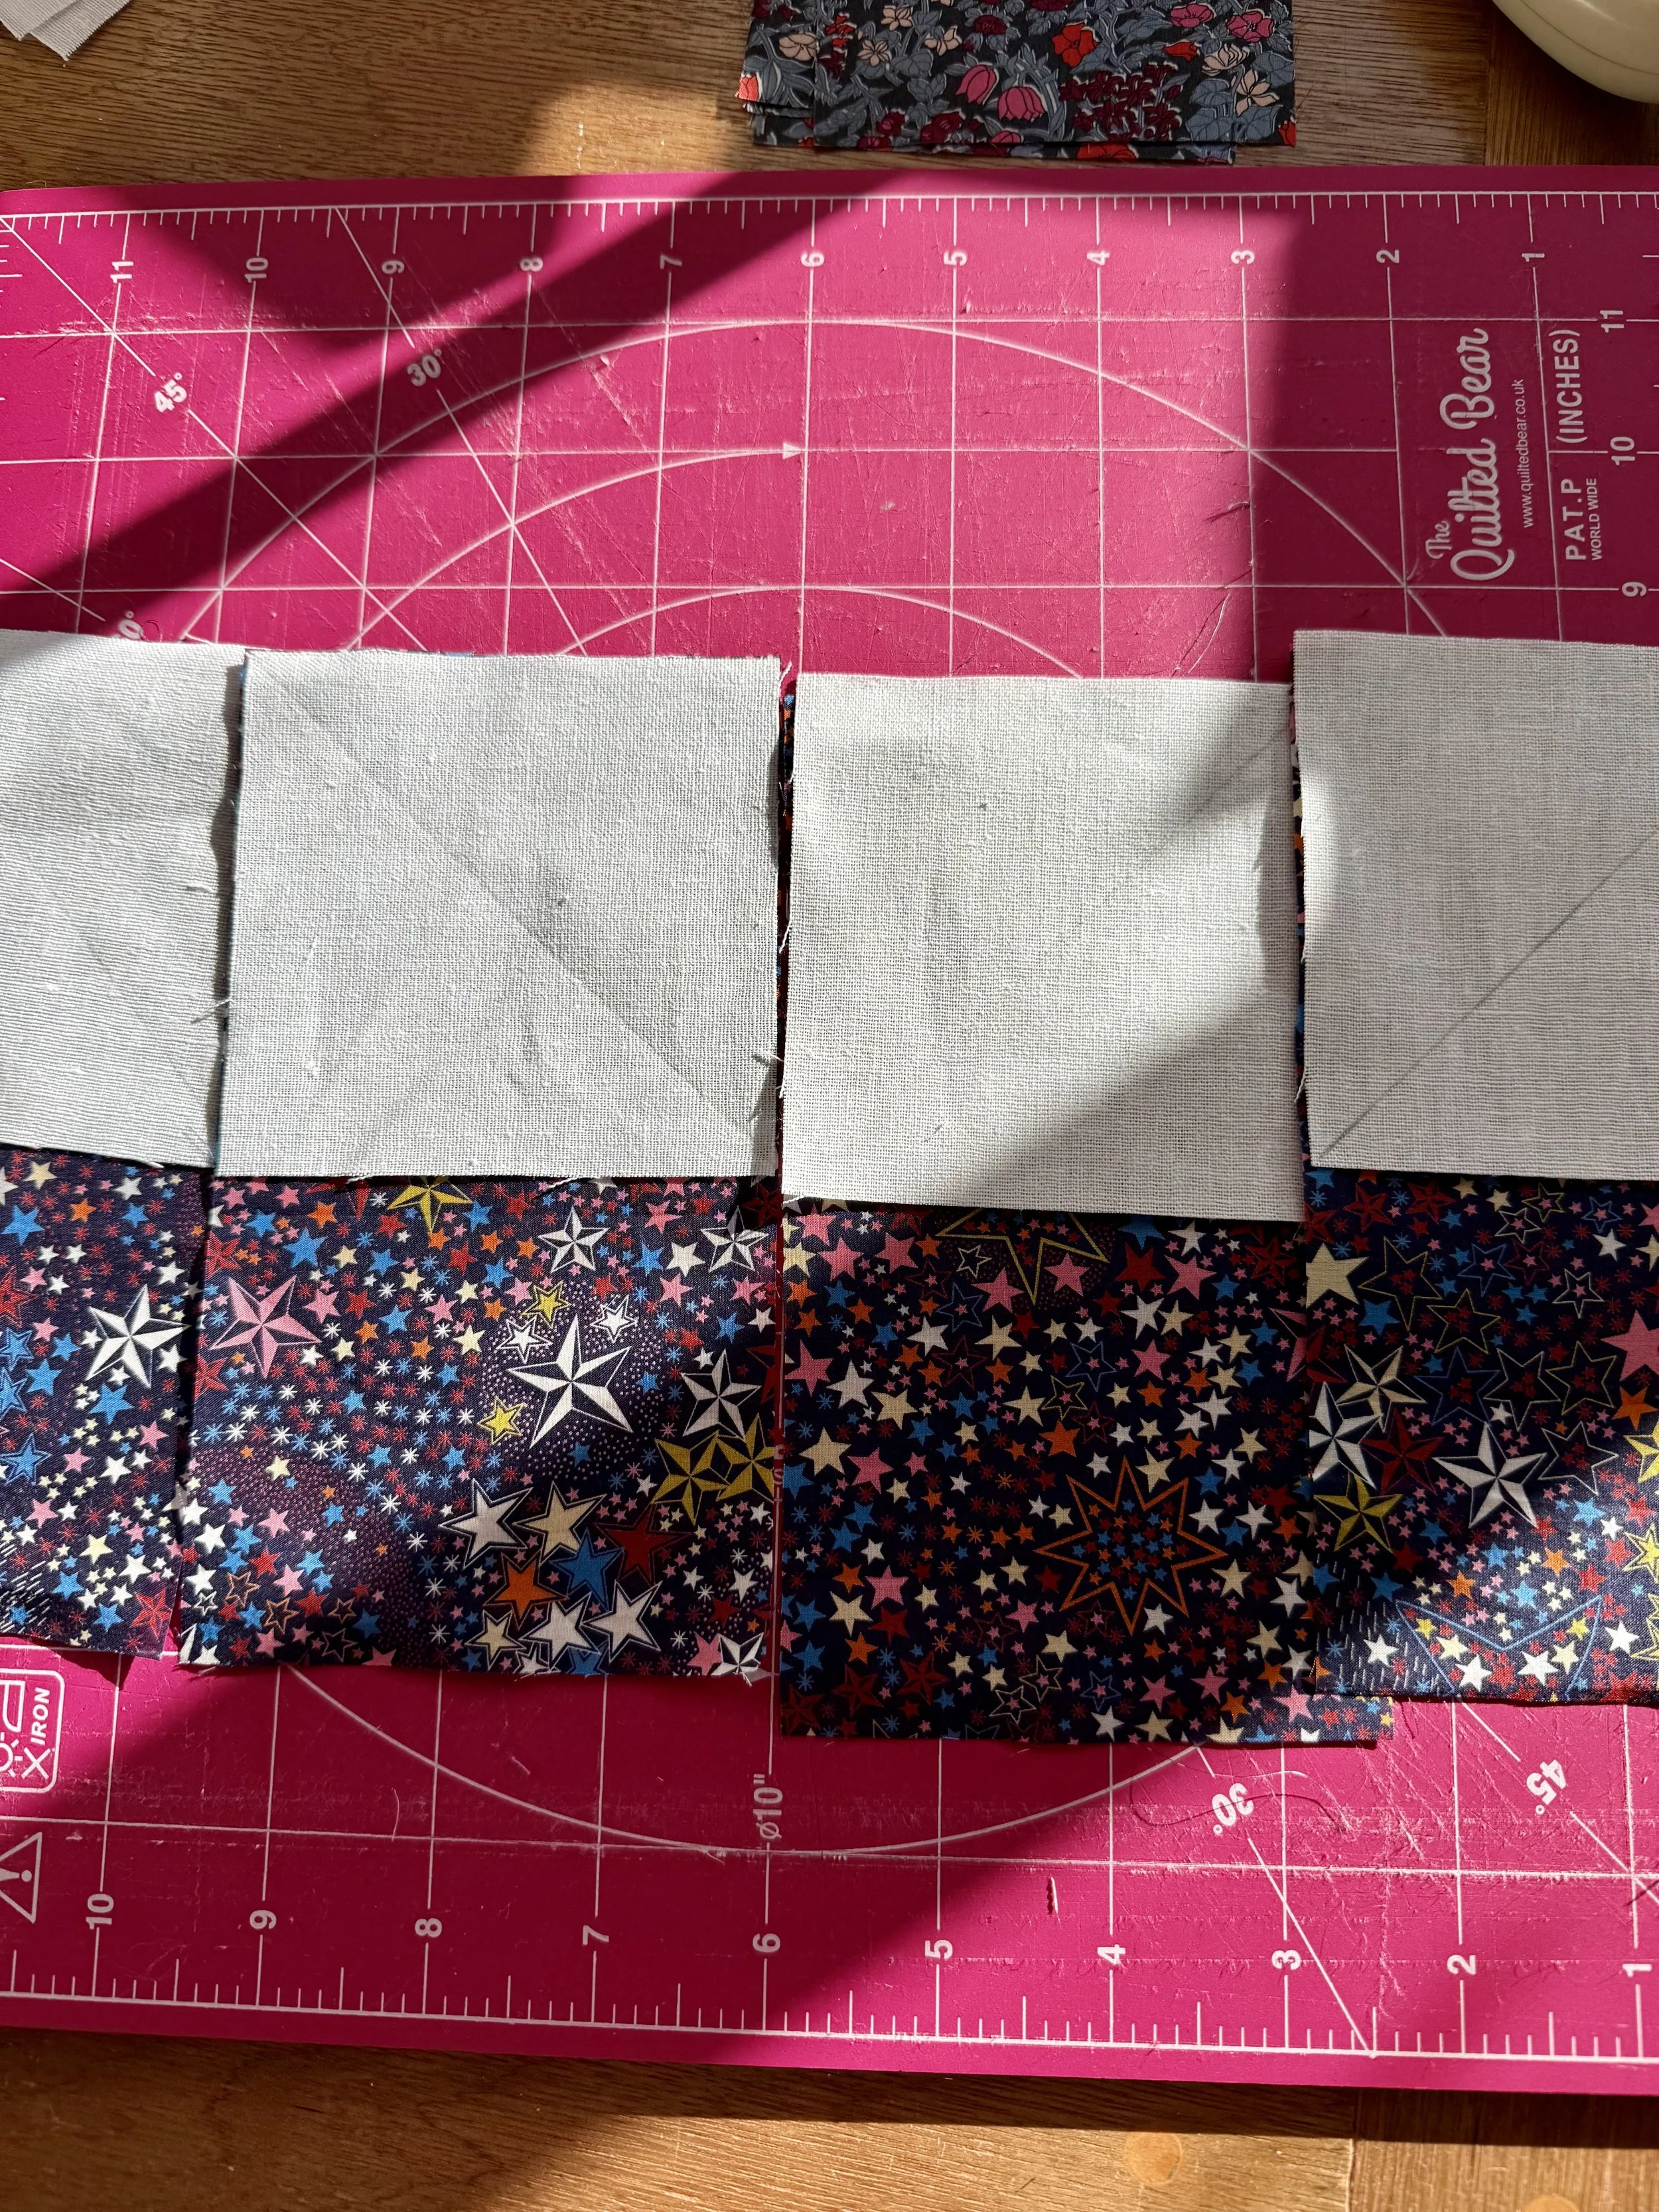
You will be using the bigger squares to create your HSTs
Sewing Focus
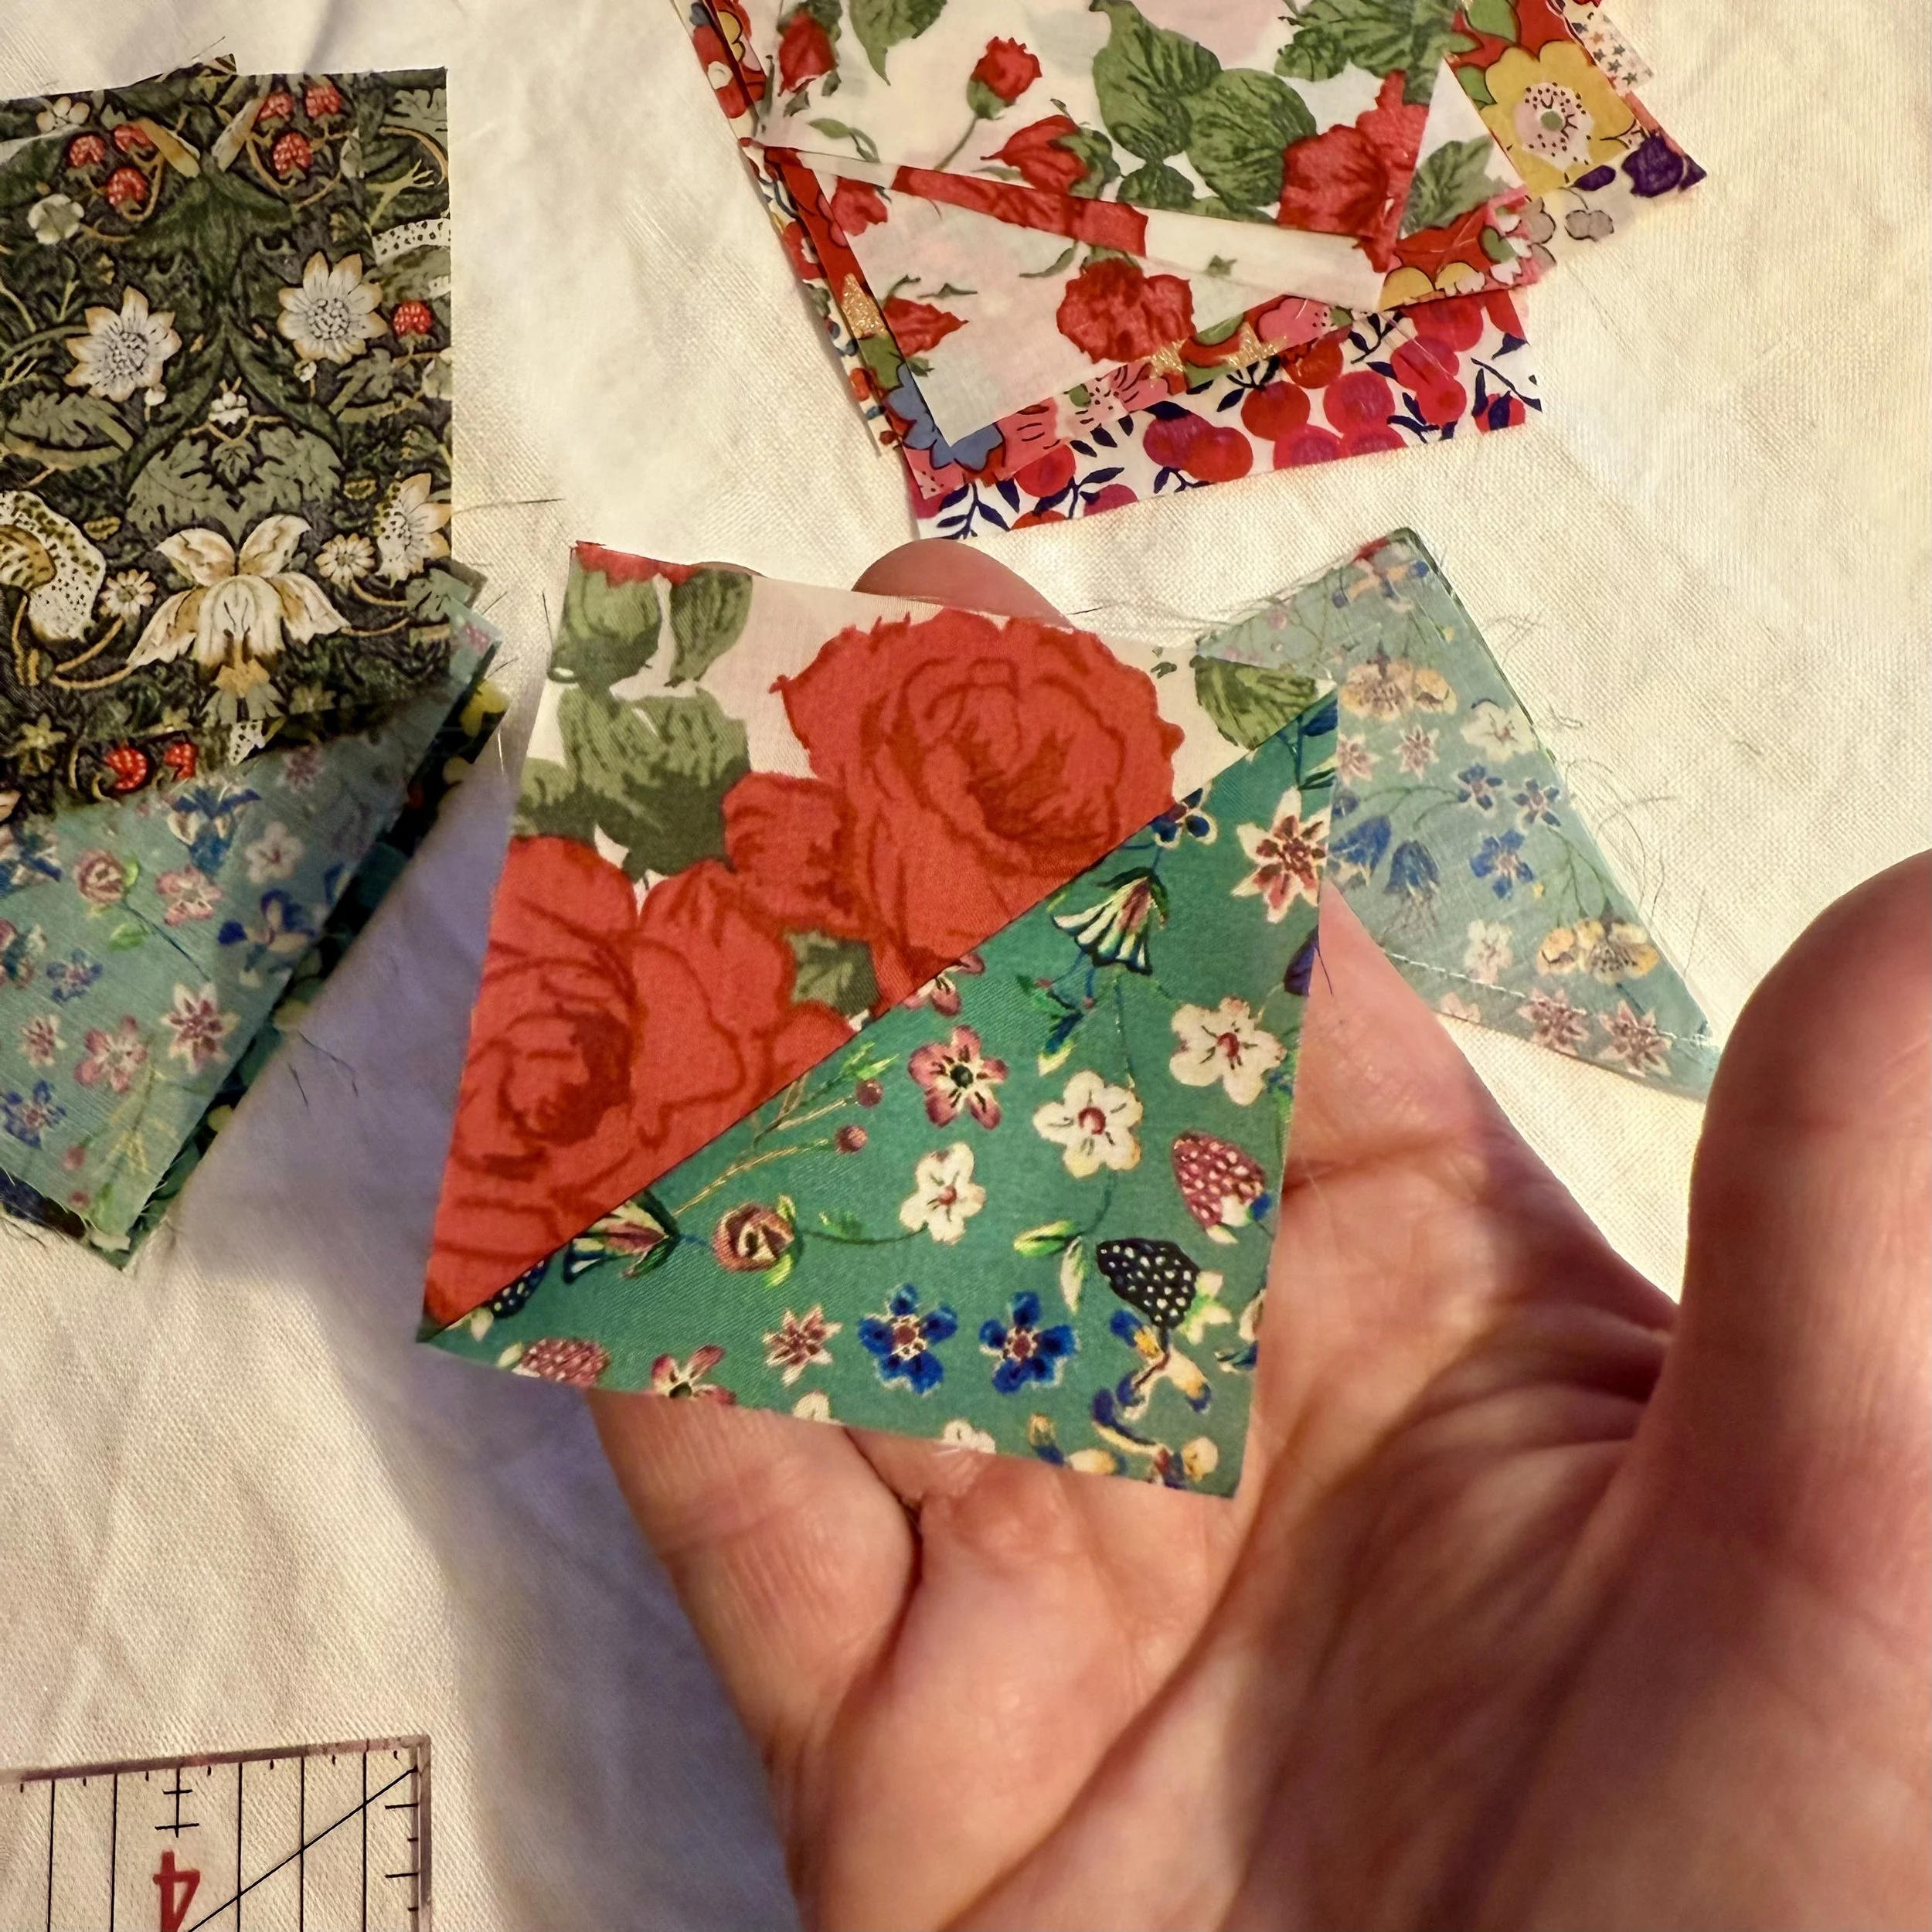
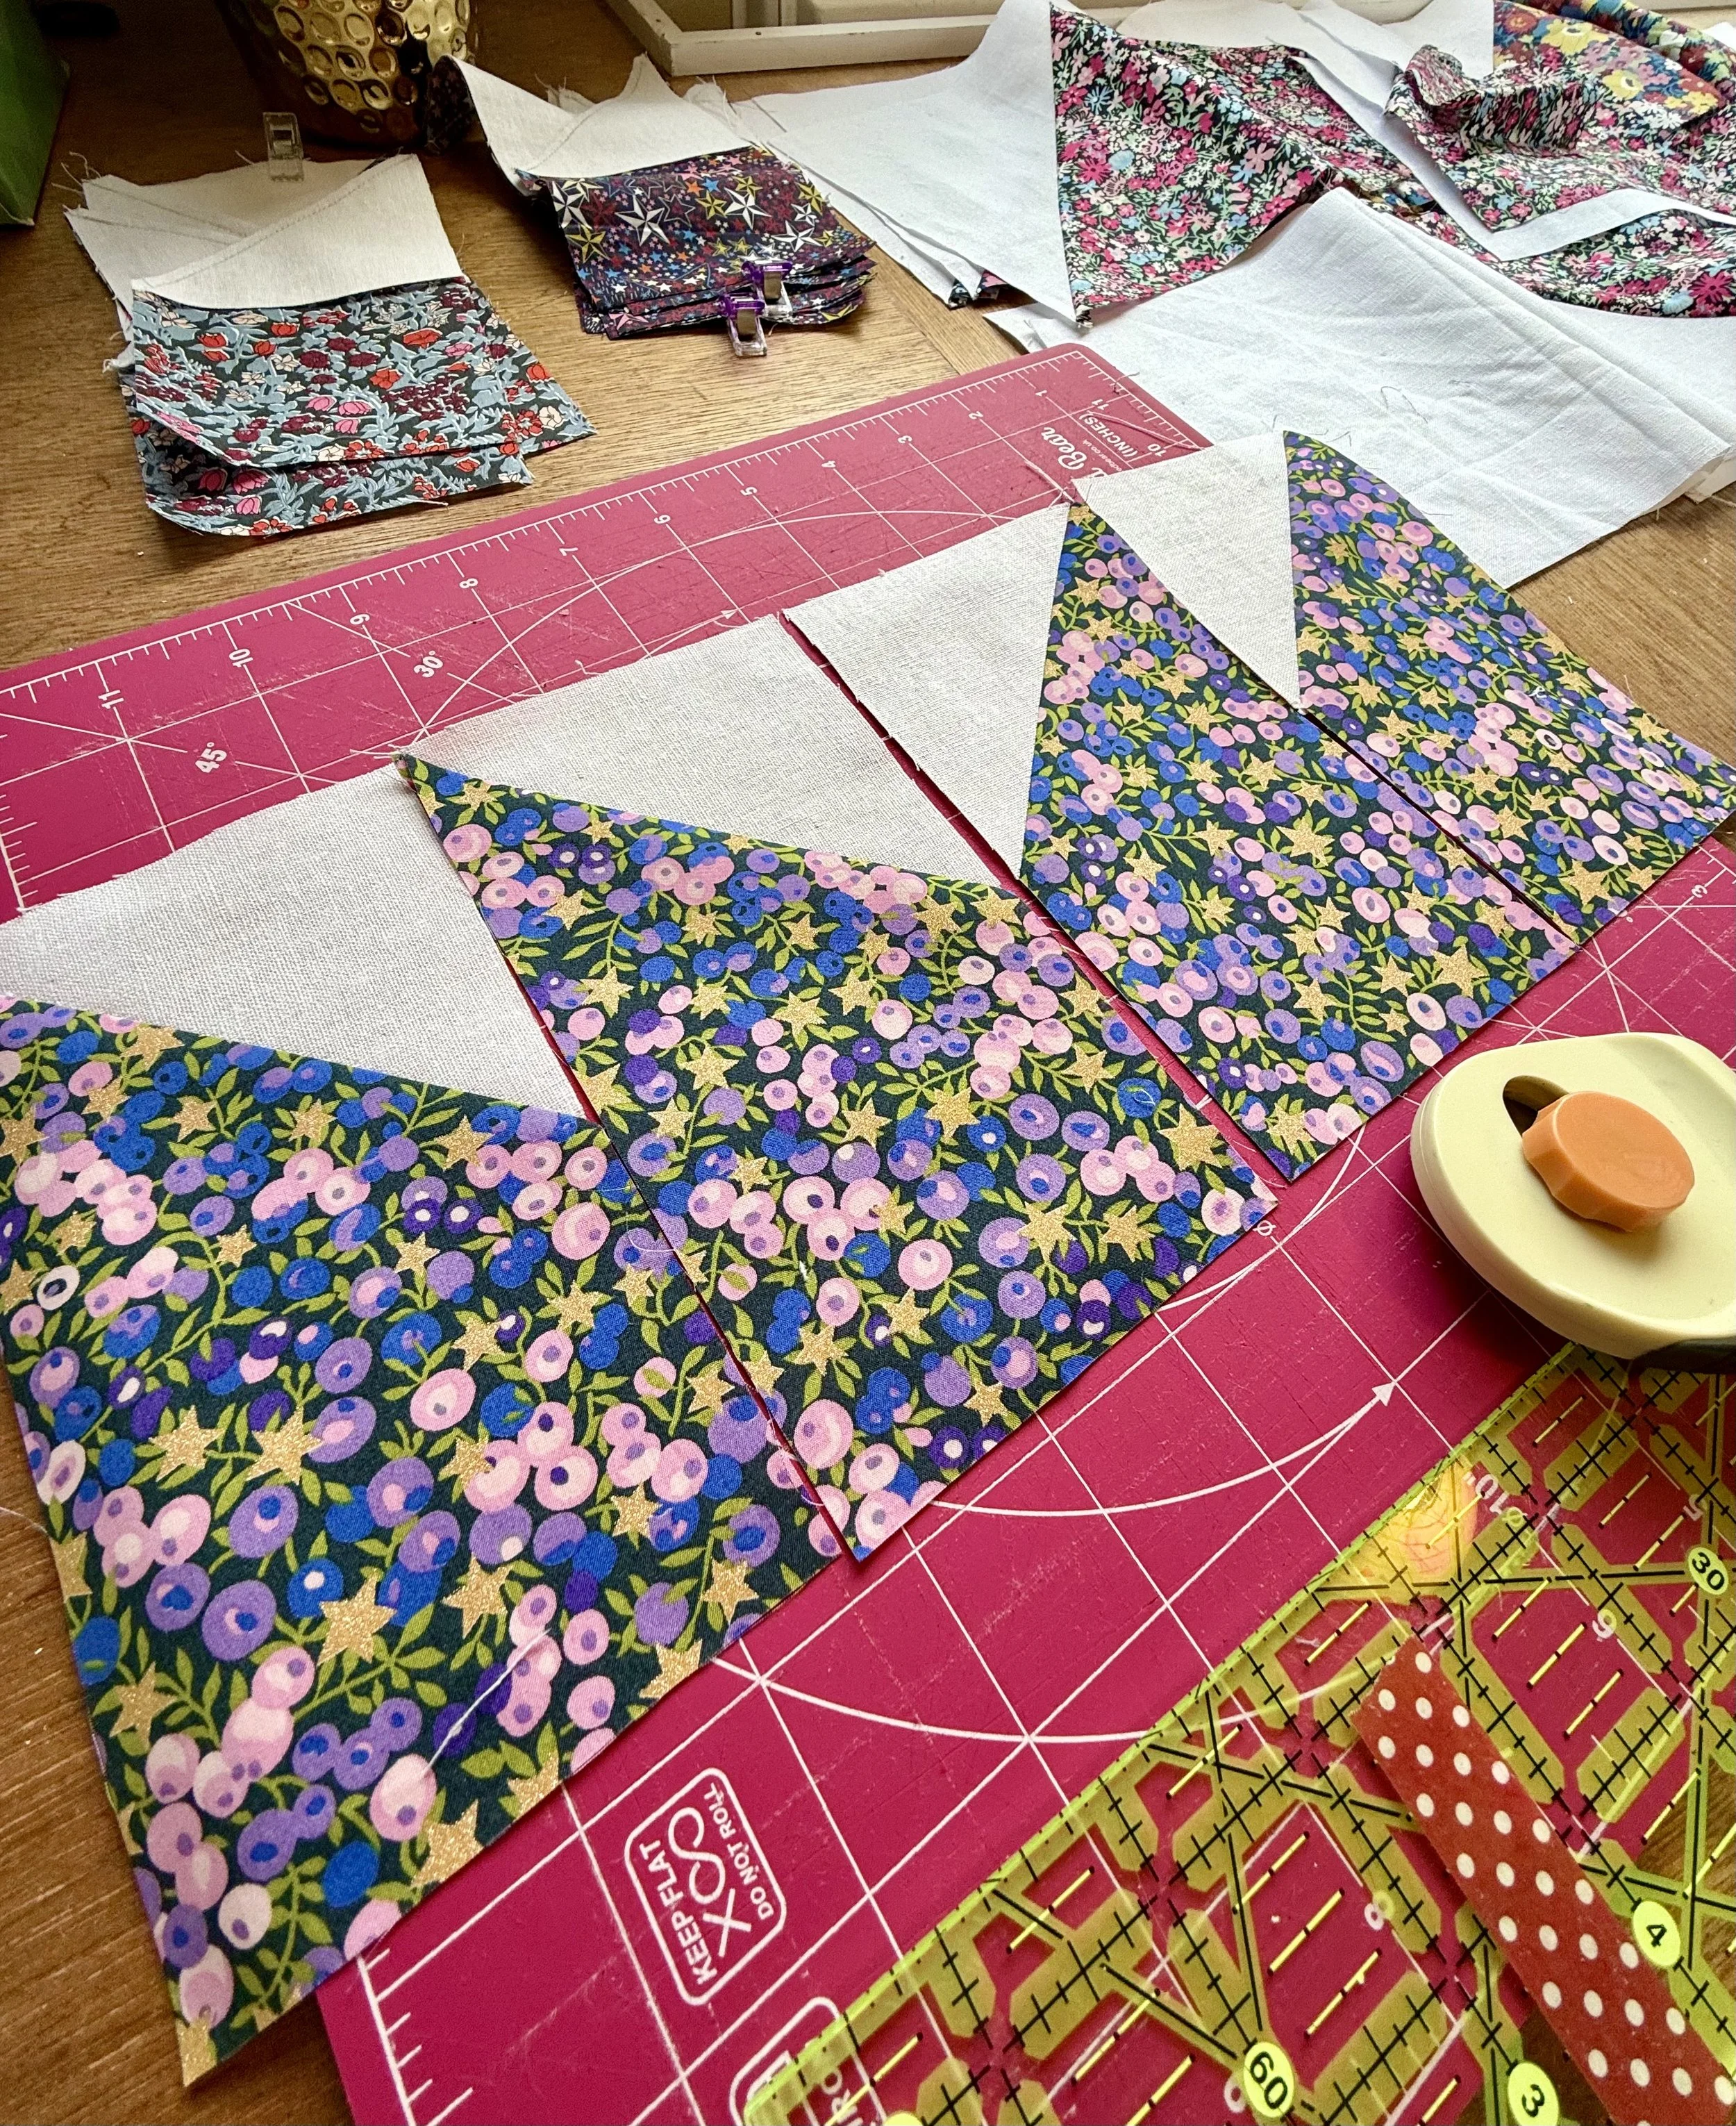
For the HSTs in this pattern we will be using the two-at-a-time method, this works great when using multiple scrap pieces.
-Using the larger squares pick one background and one accent fabric.
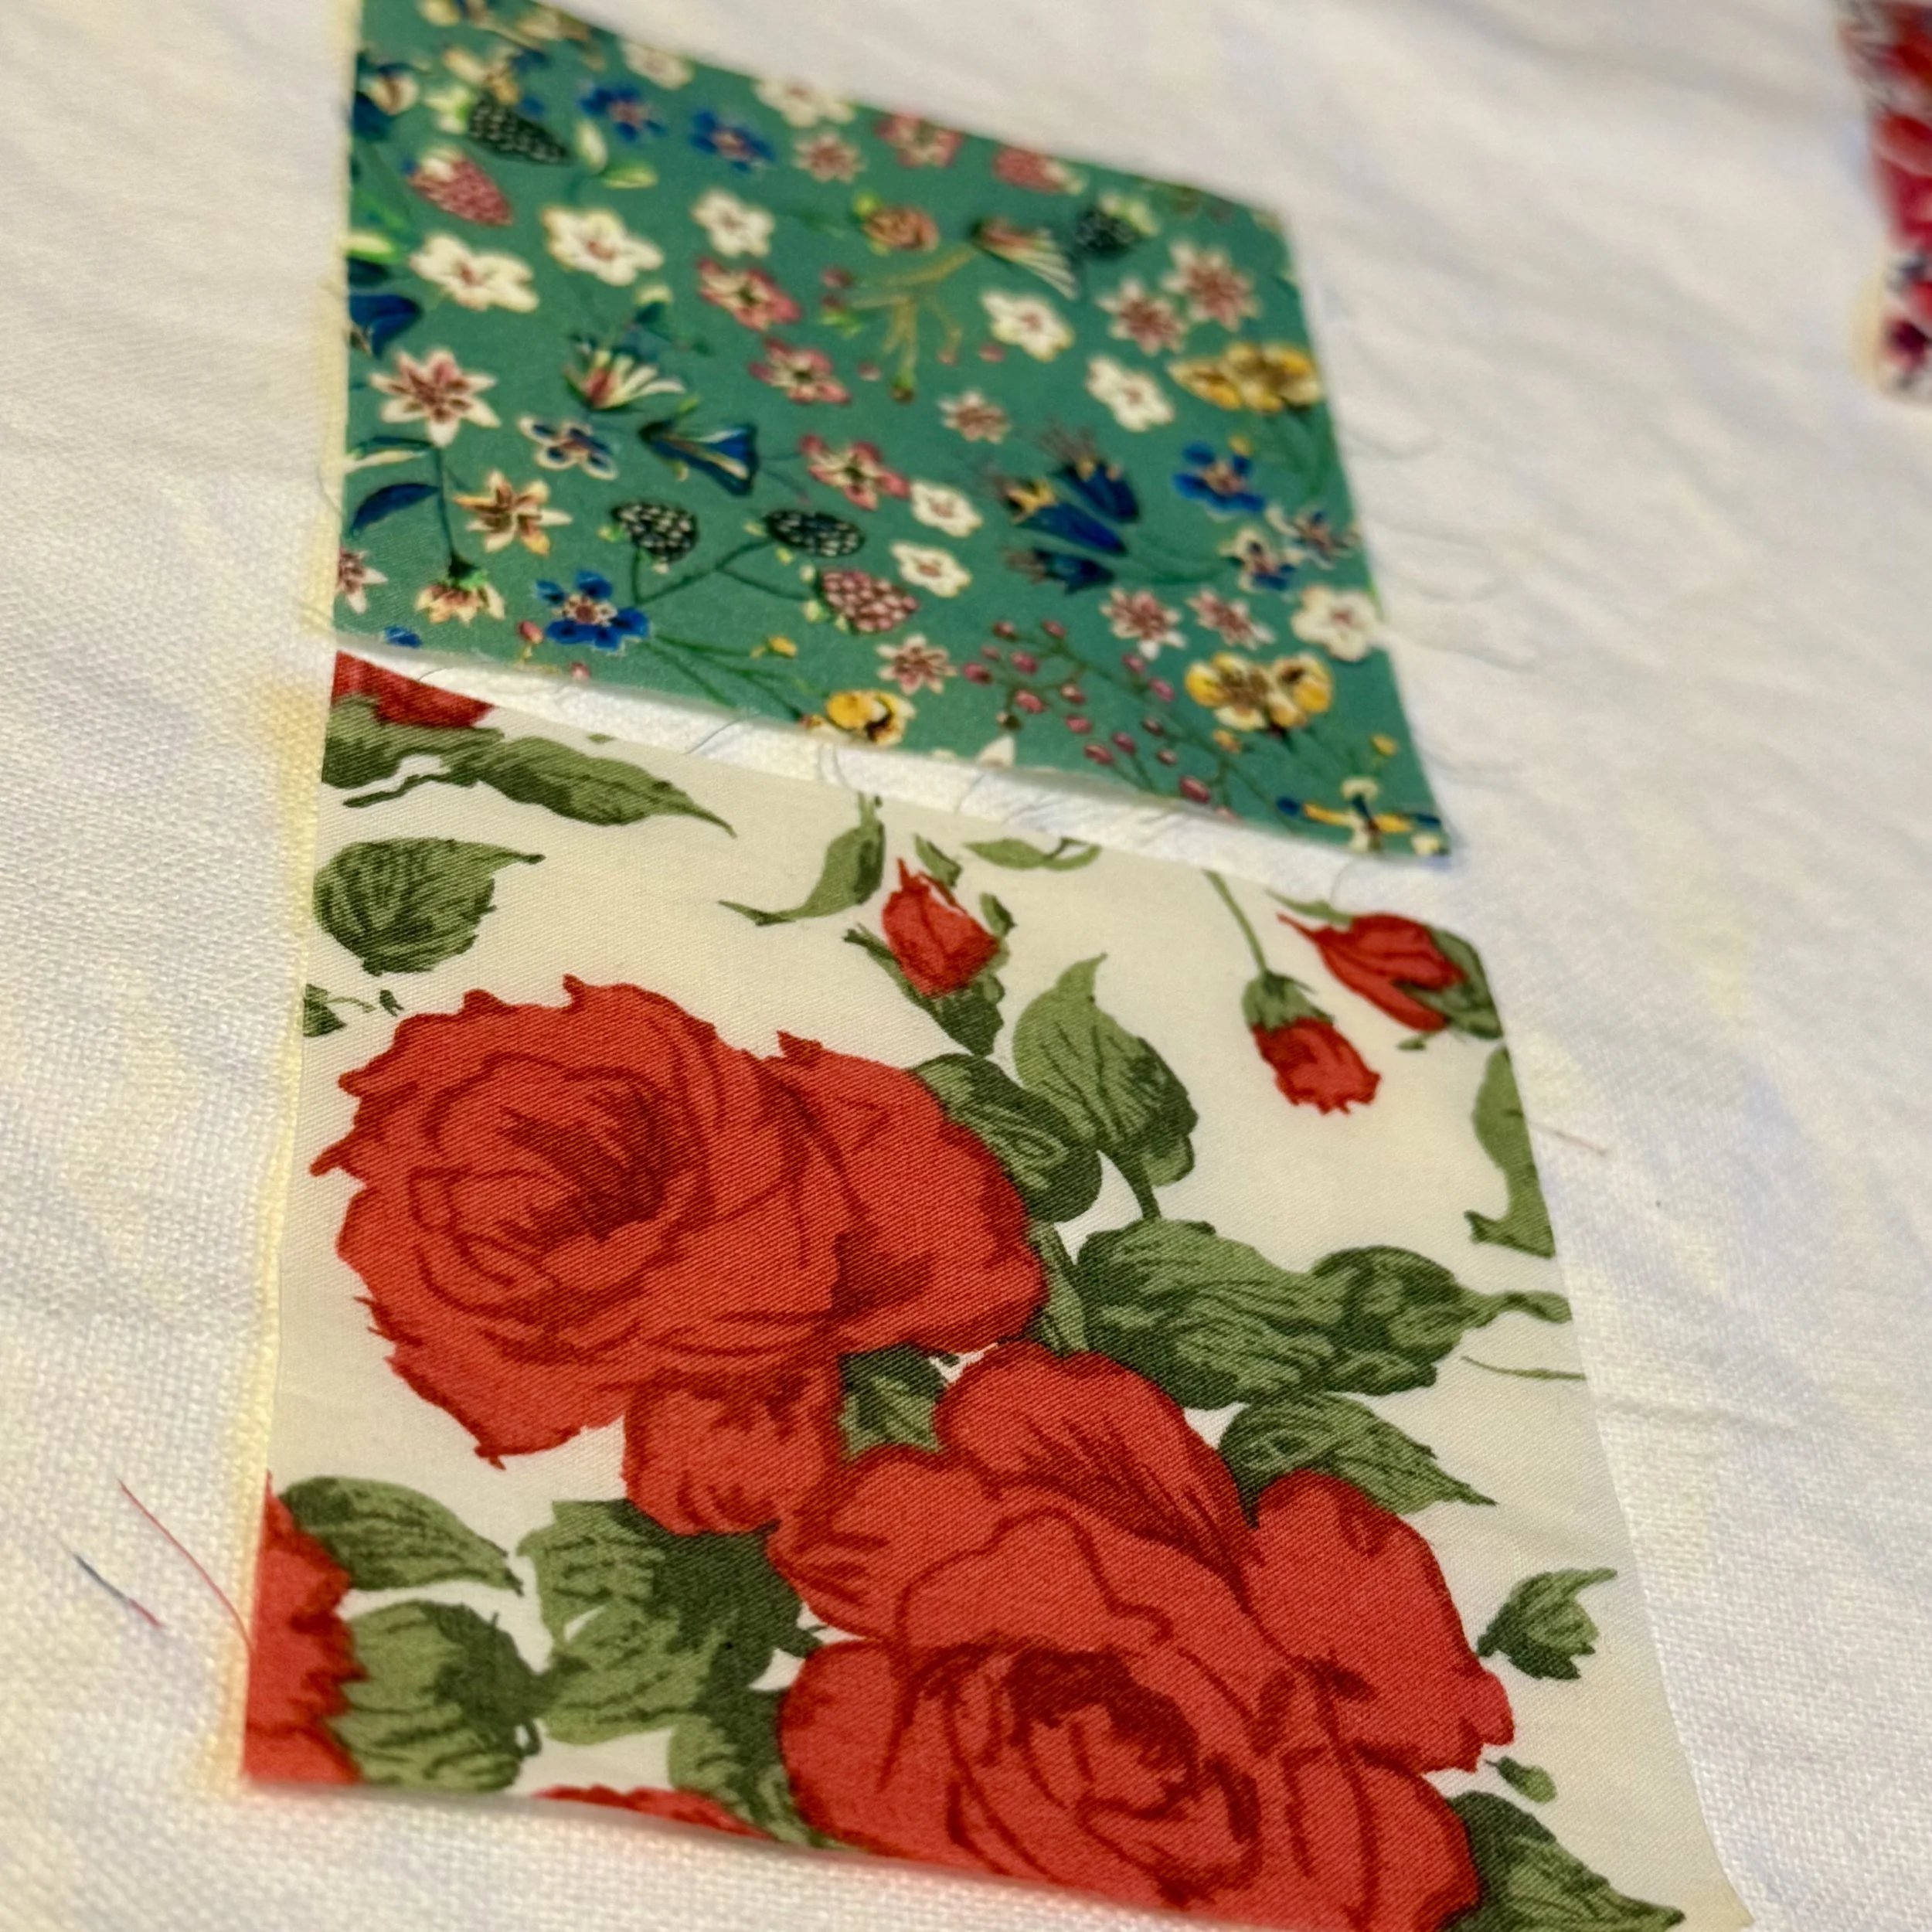
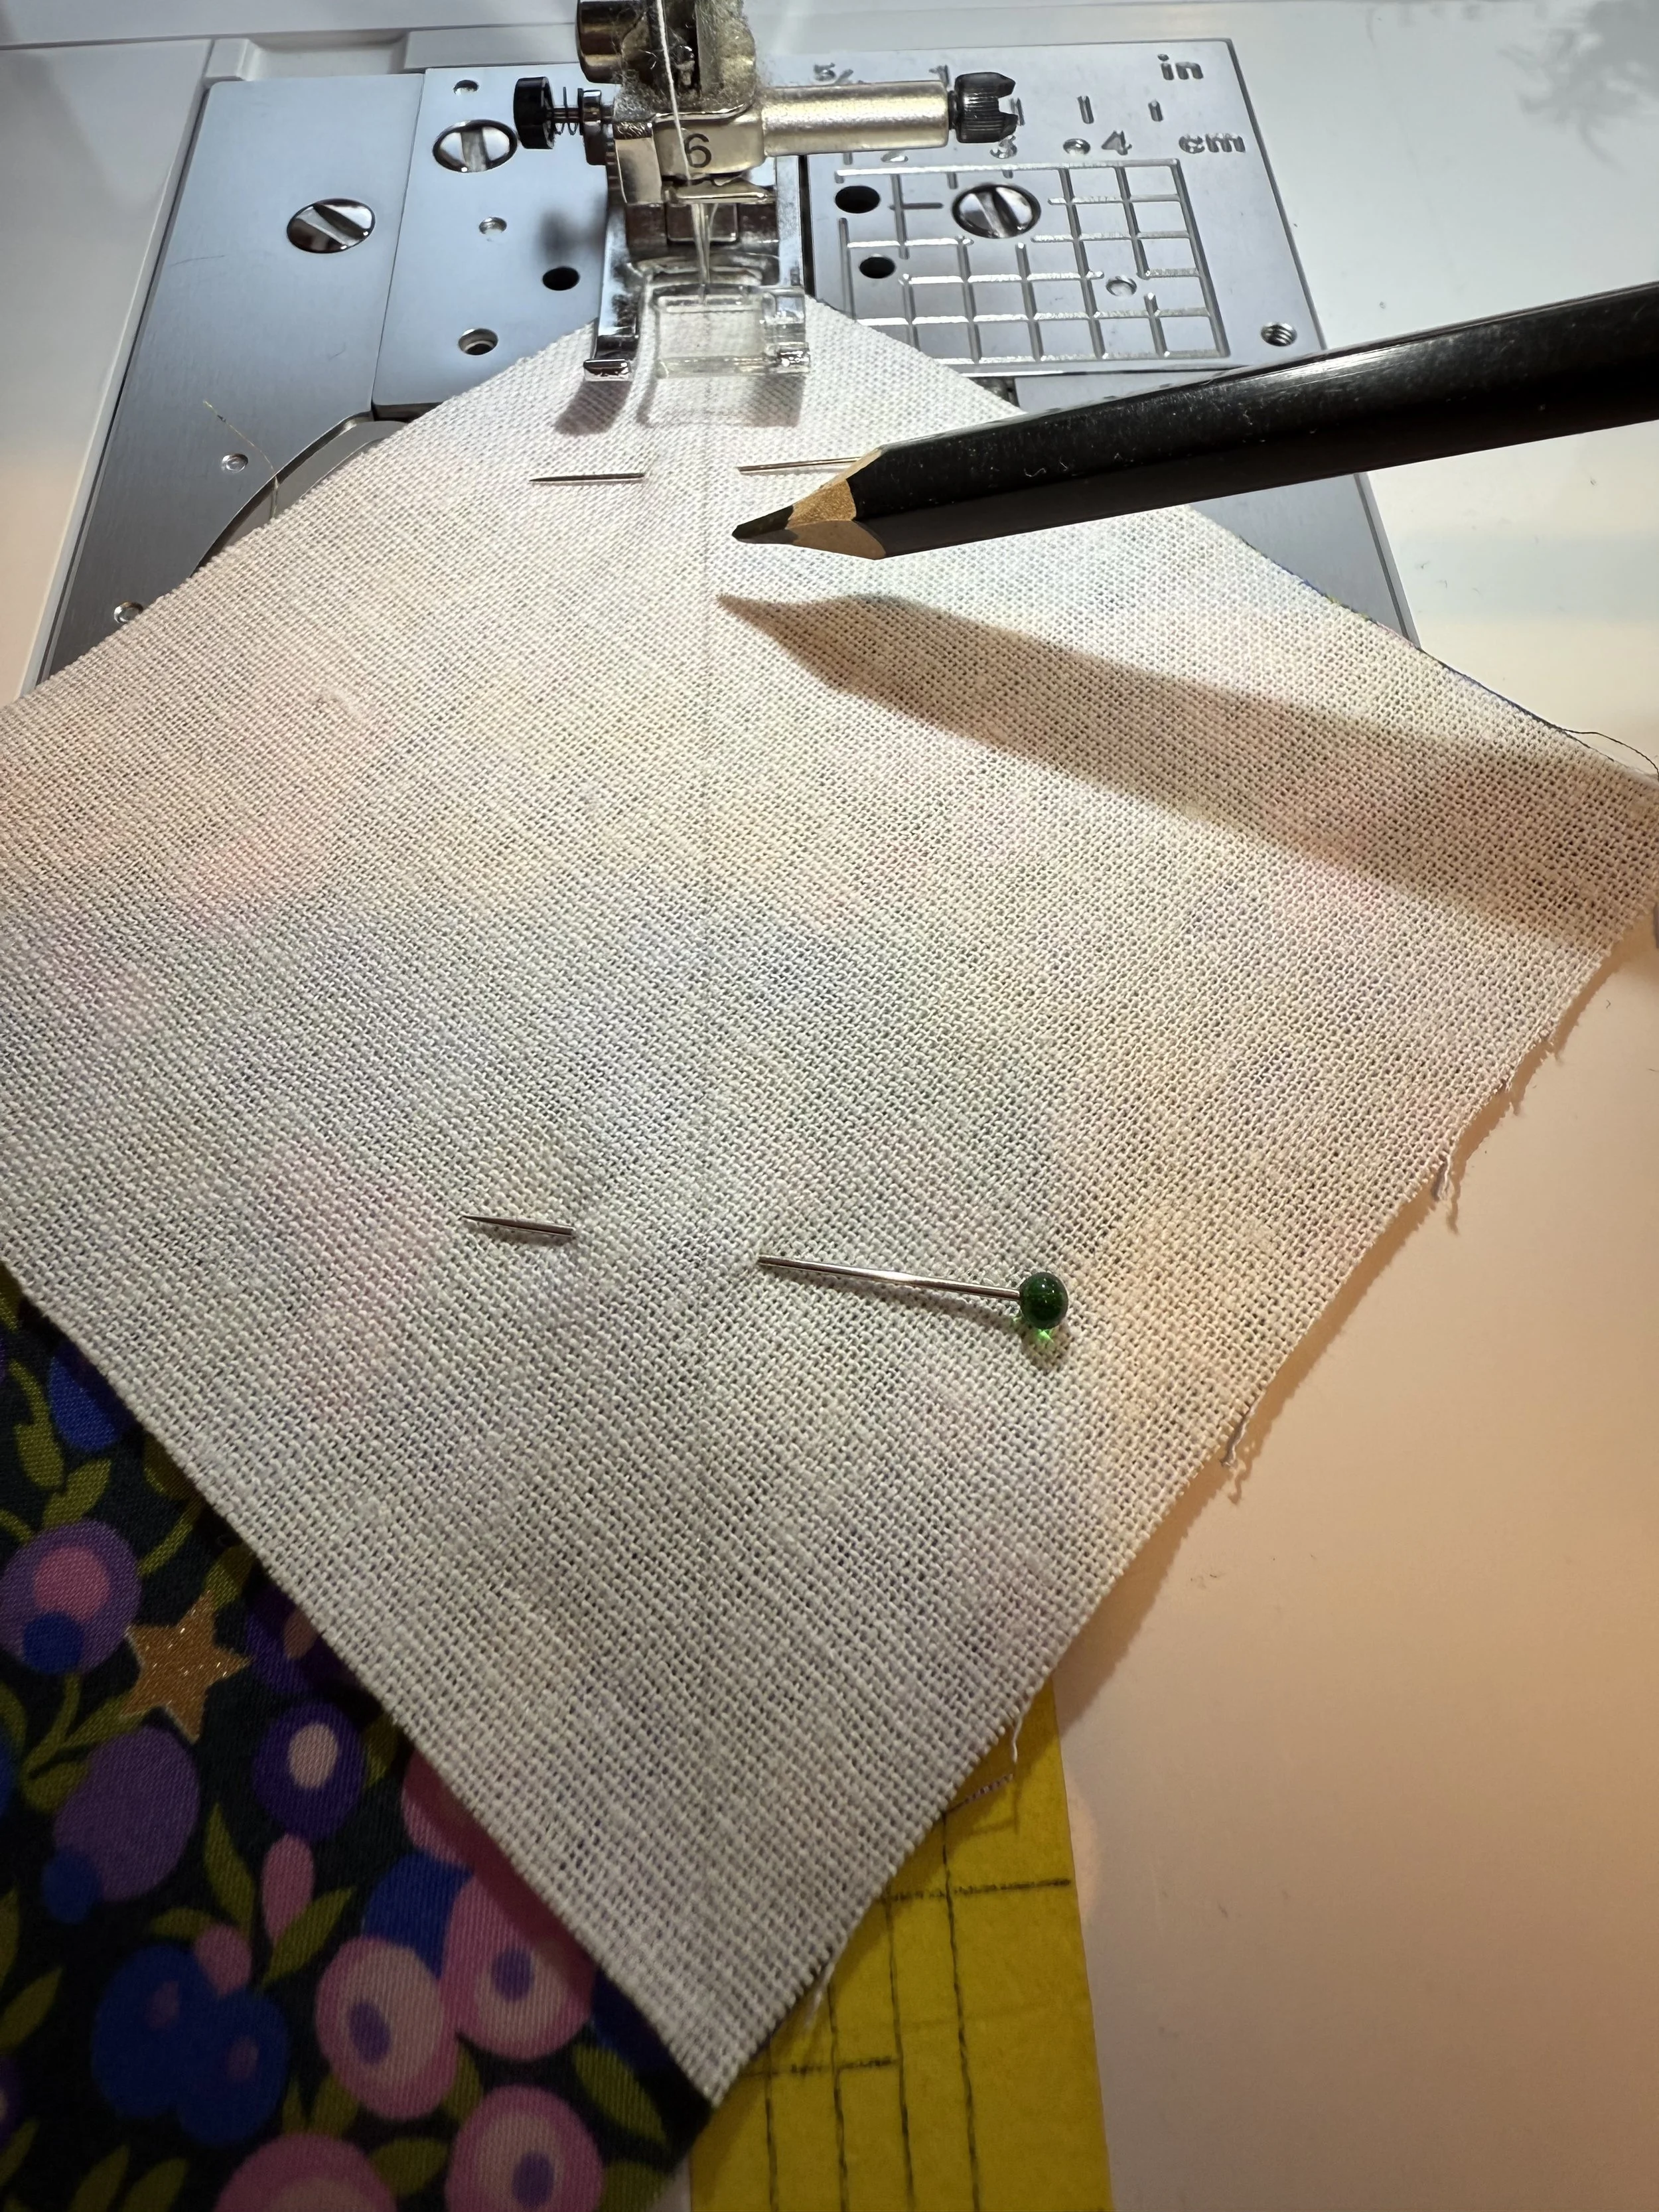
-Place right sides to right sides.
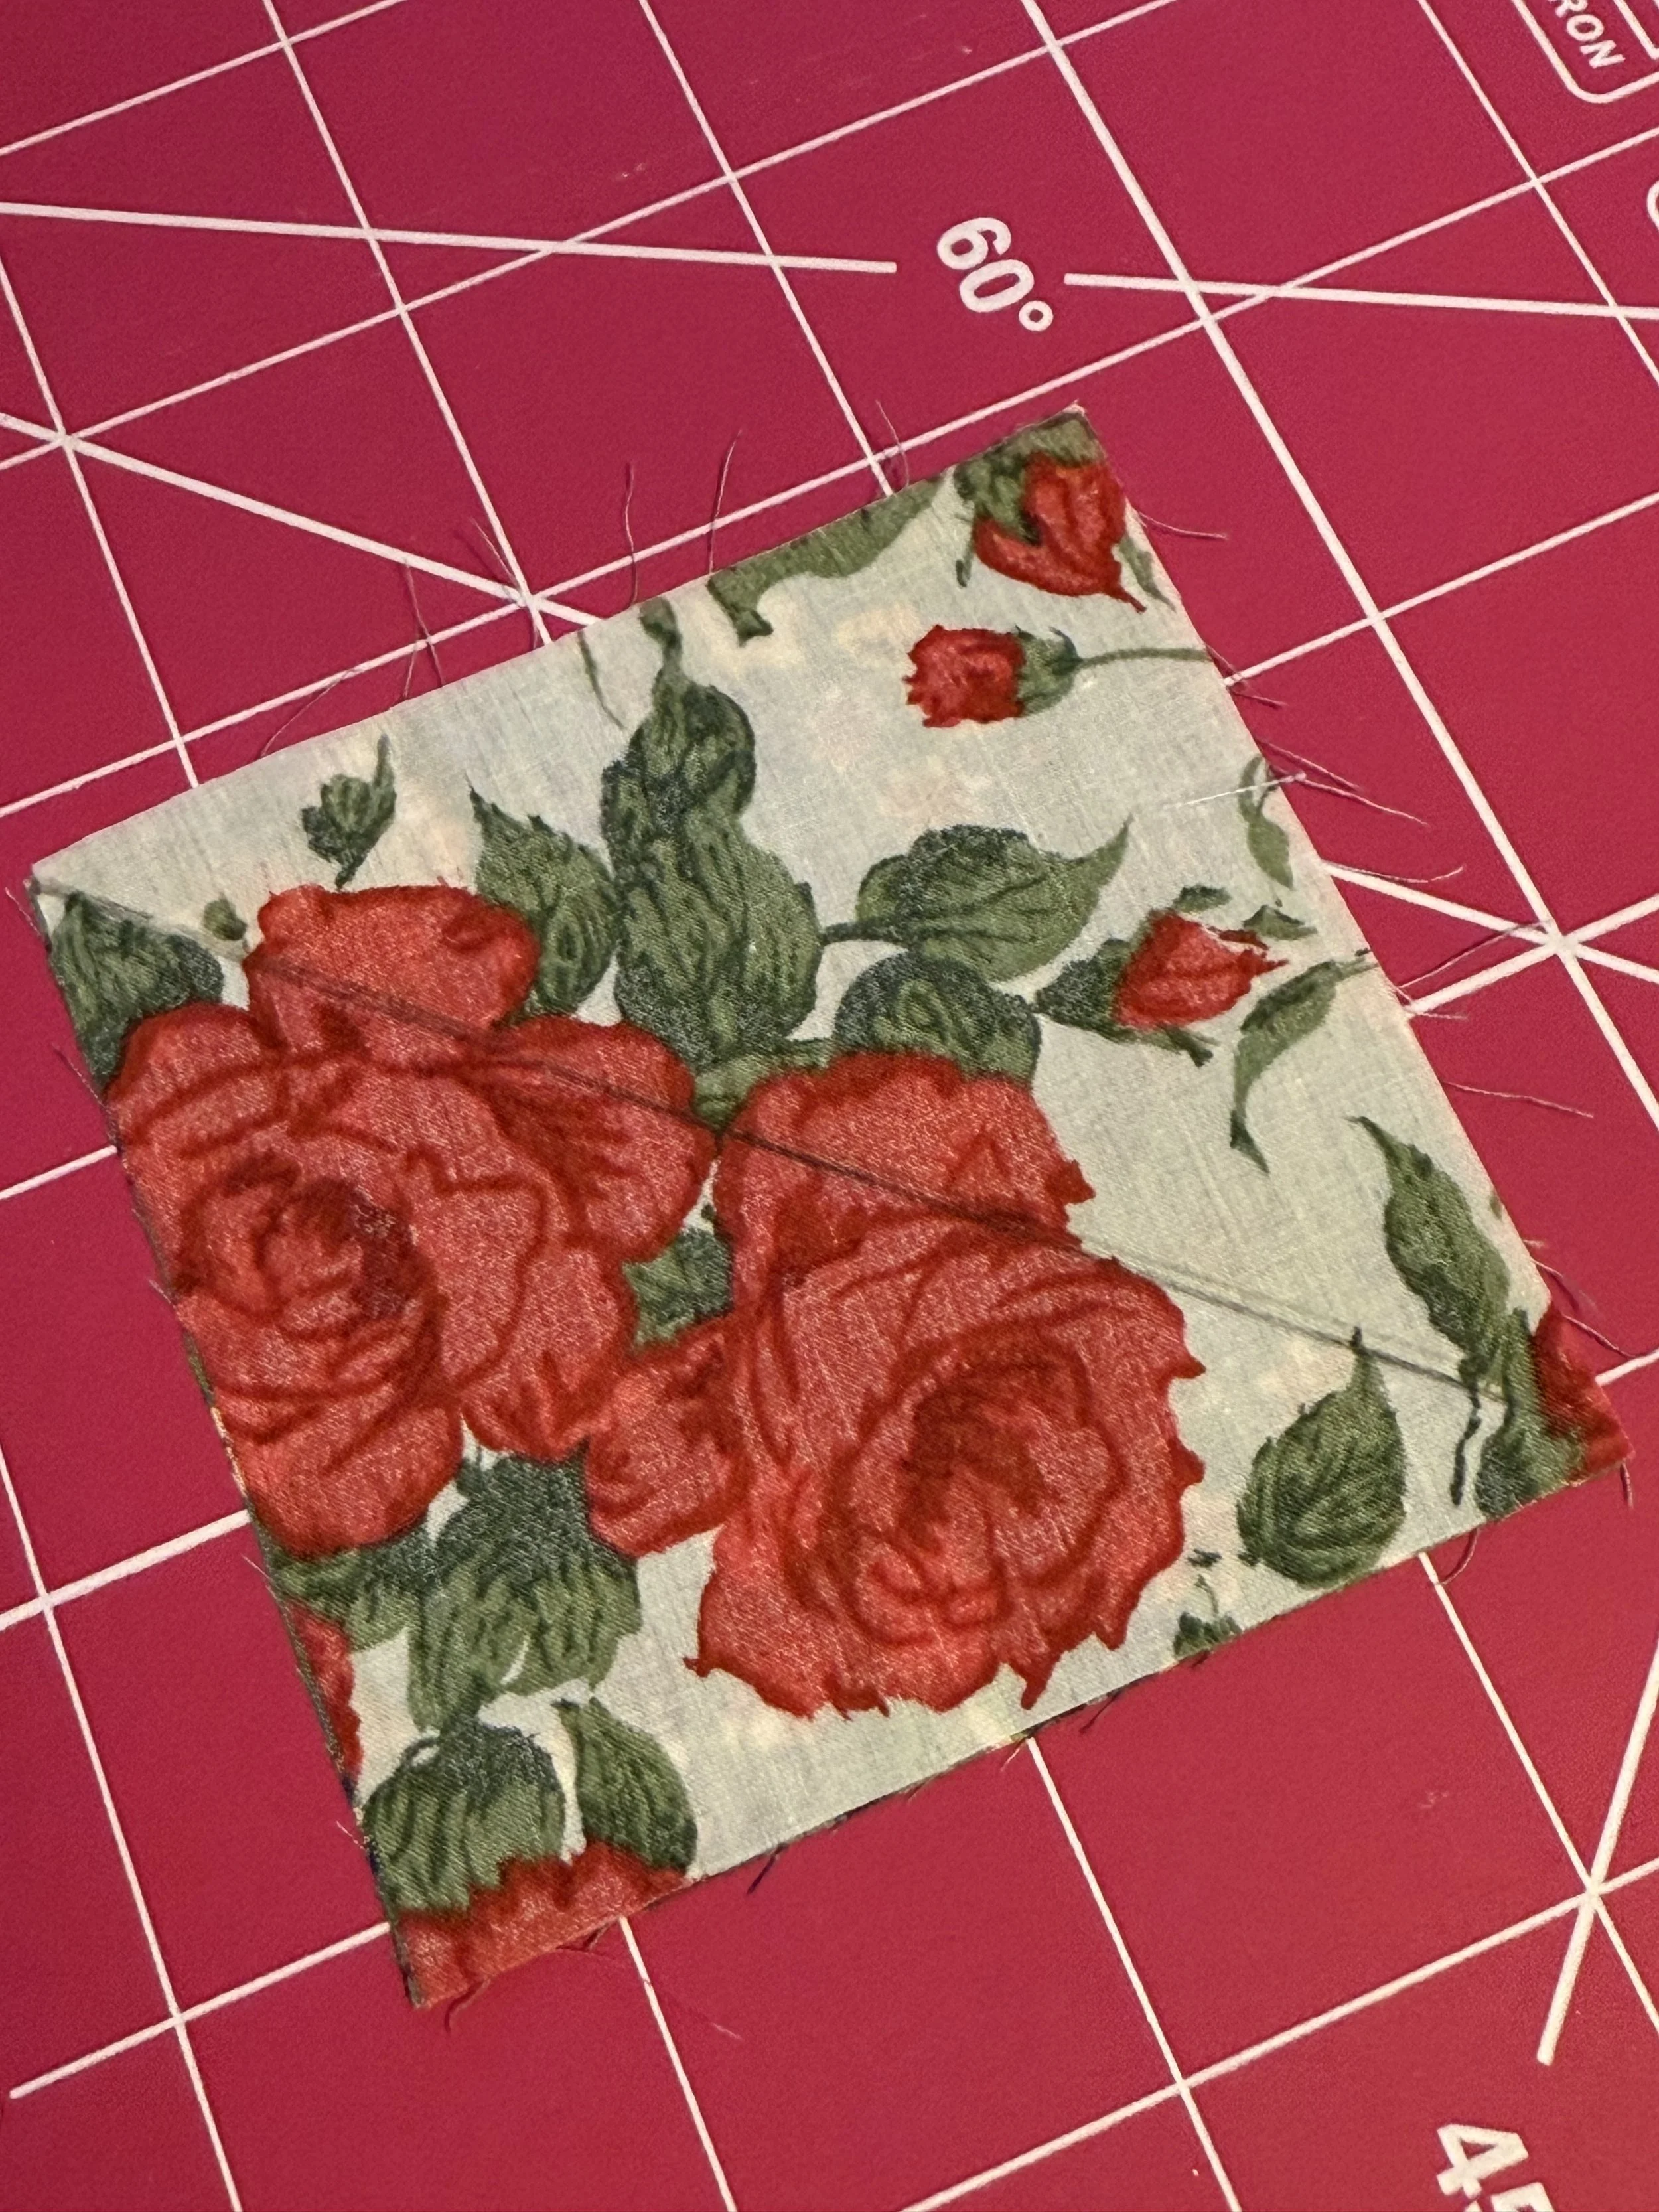
-Draw a diagonal line with a pen or pencil.
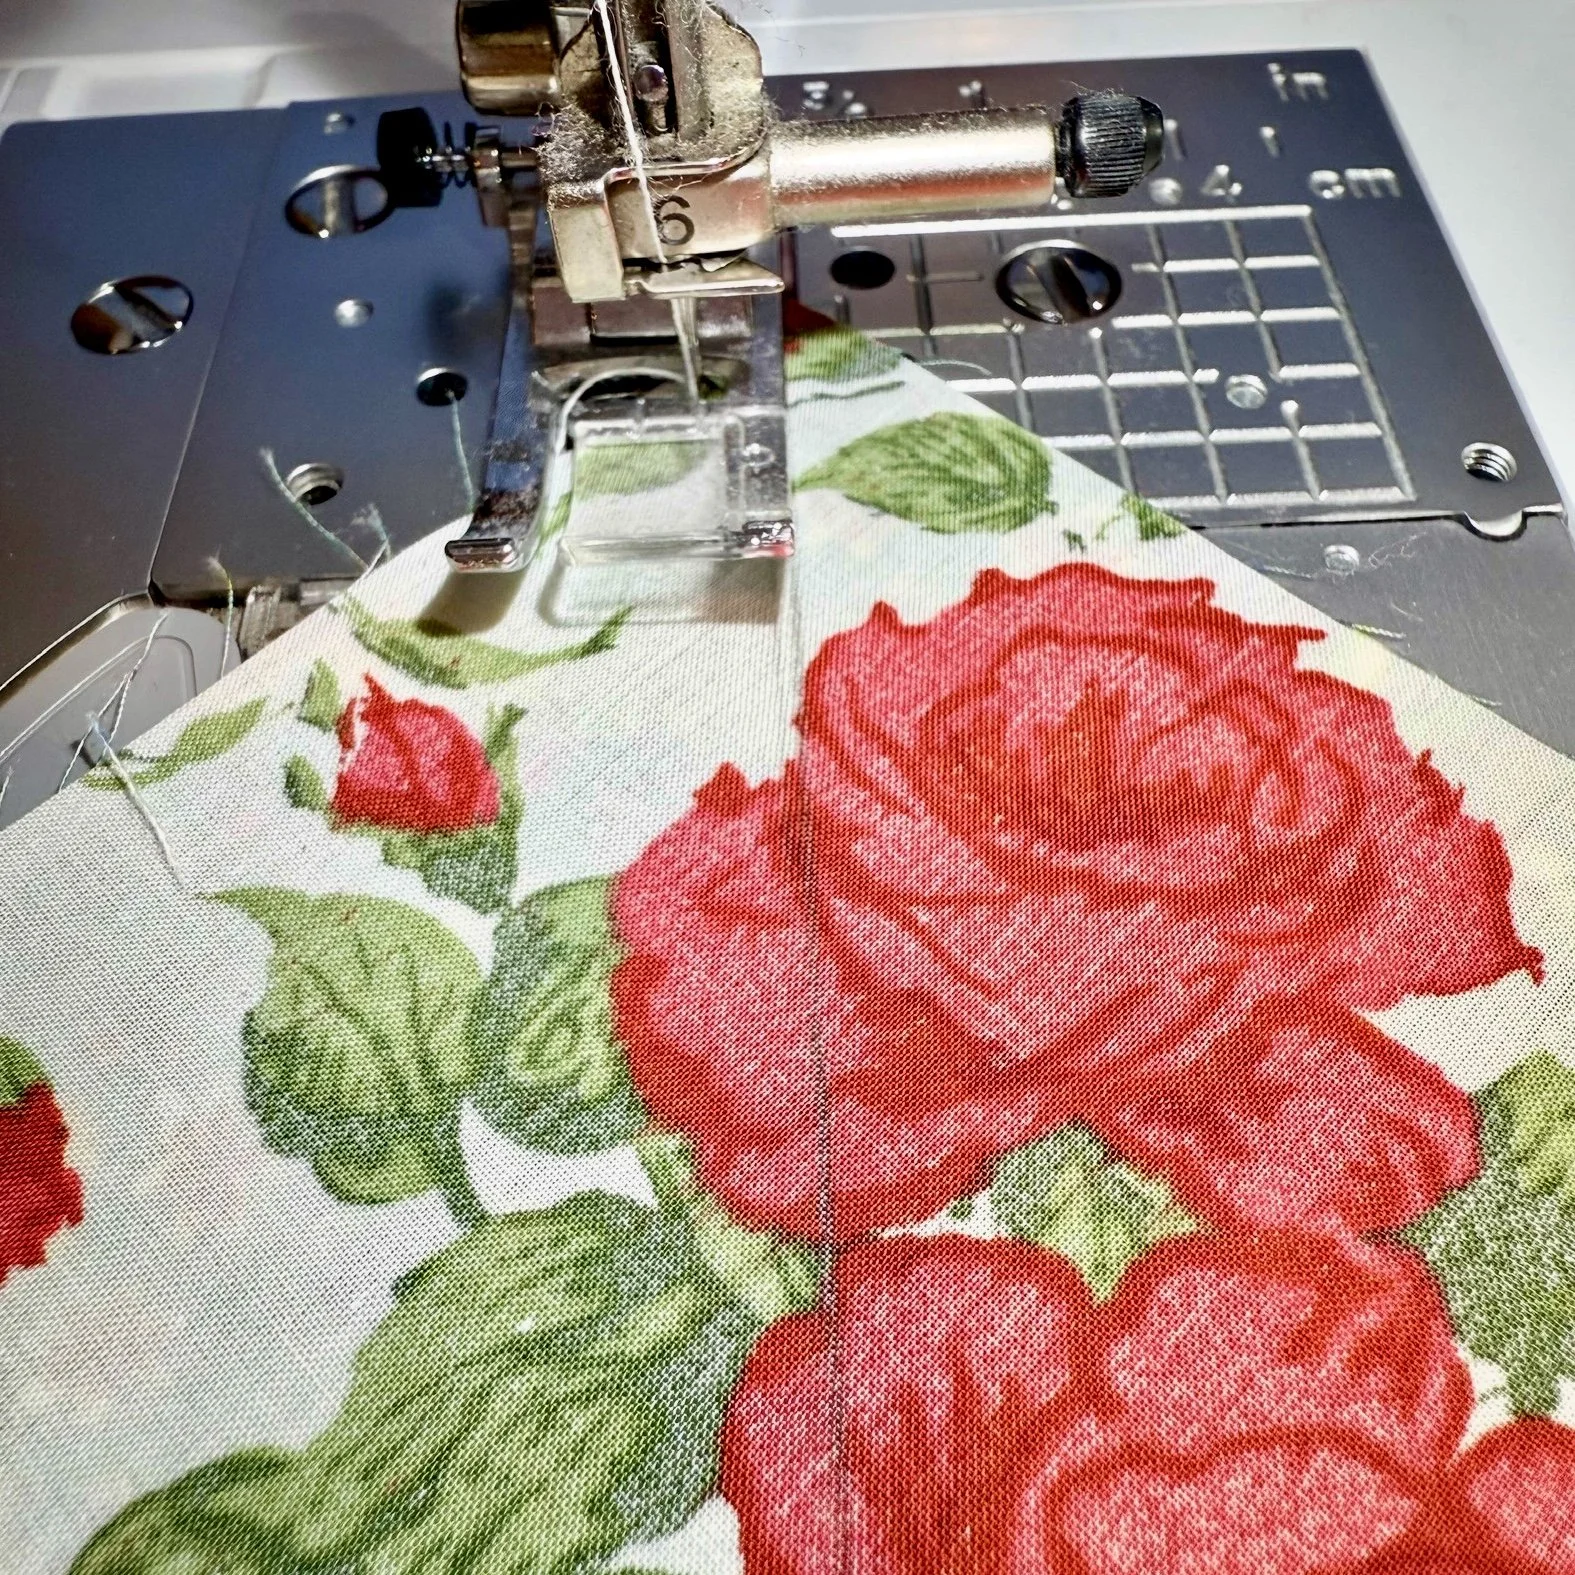
-Keep a consistent ¼” seam for every HST pair and stitch either side of the line.

-Cut along the drawn line to create two triangles.
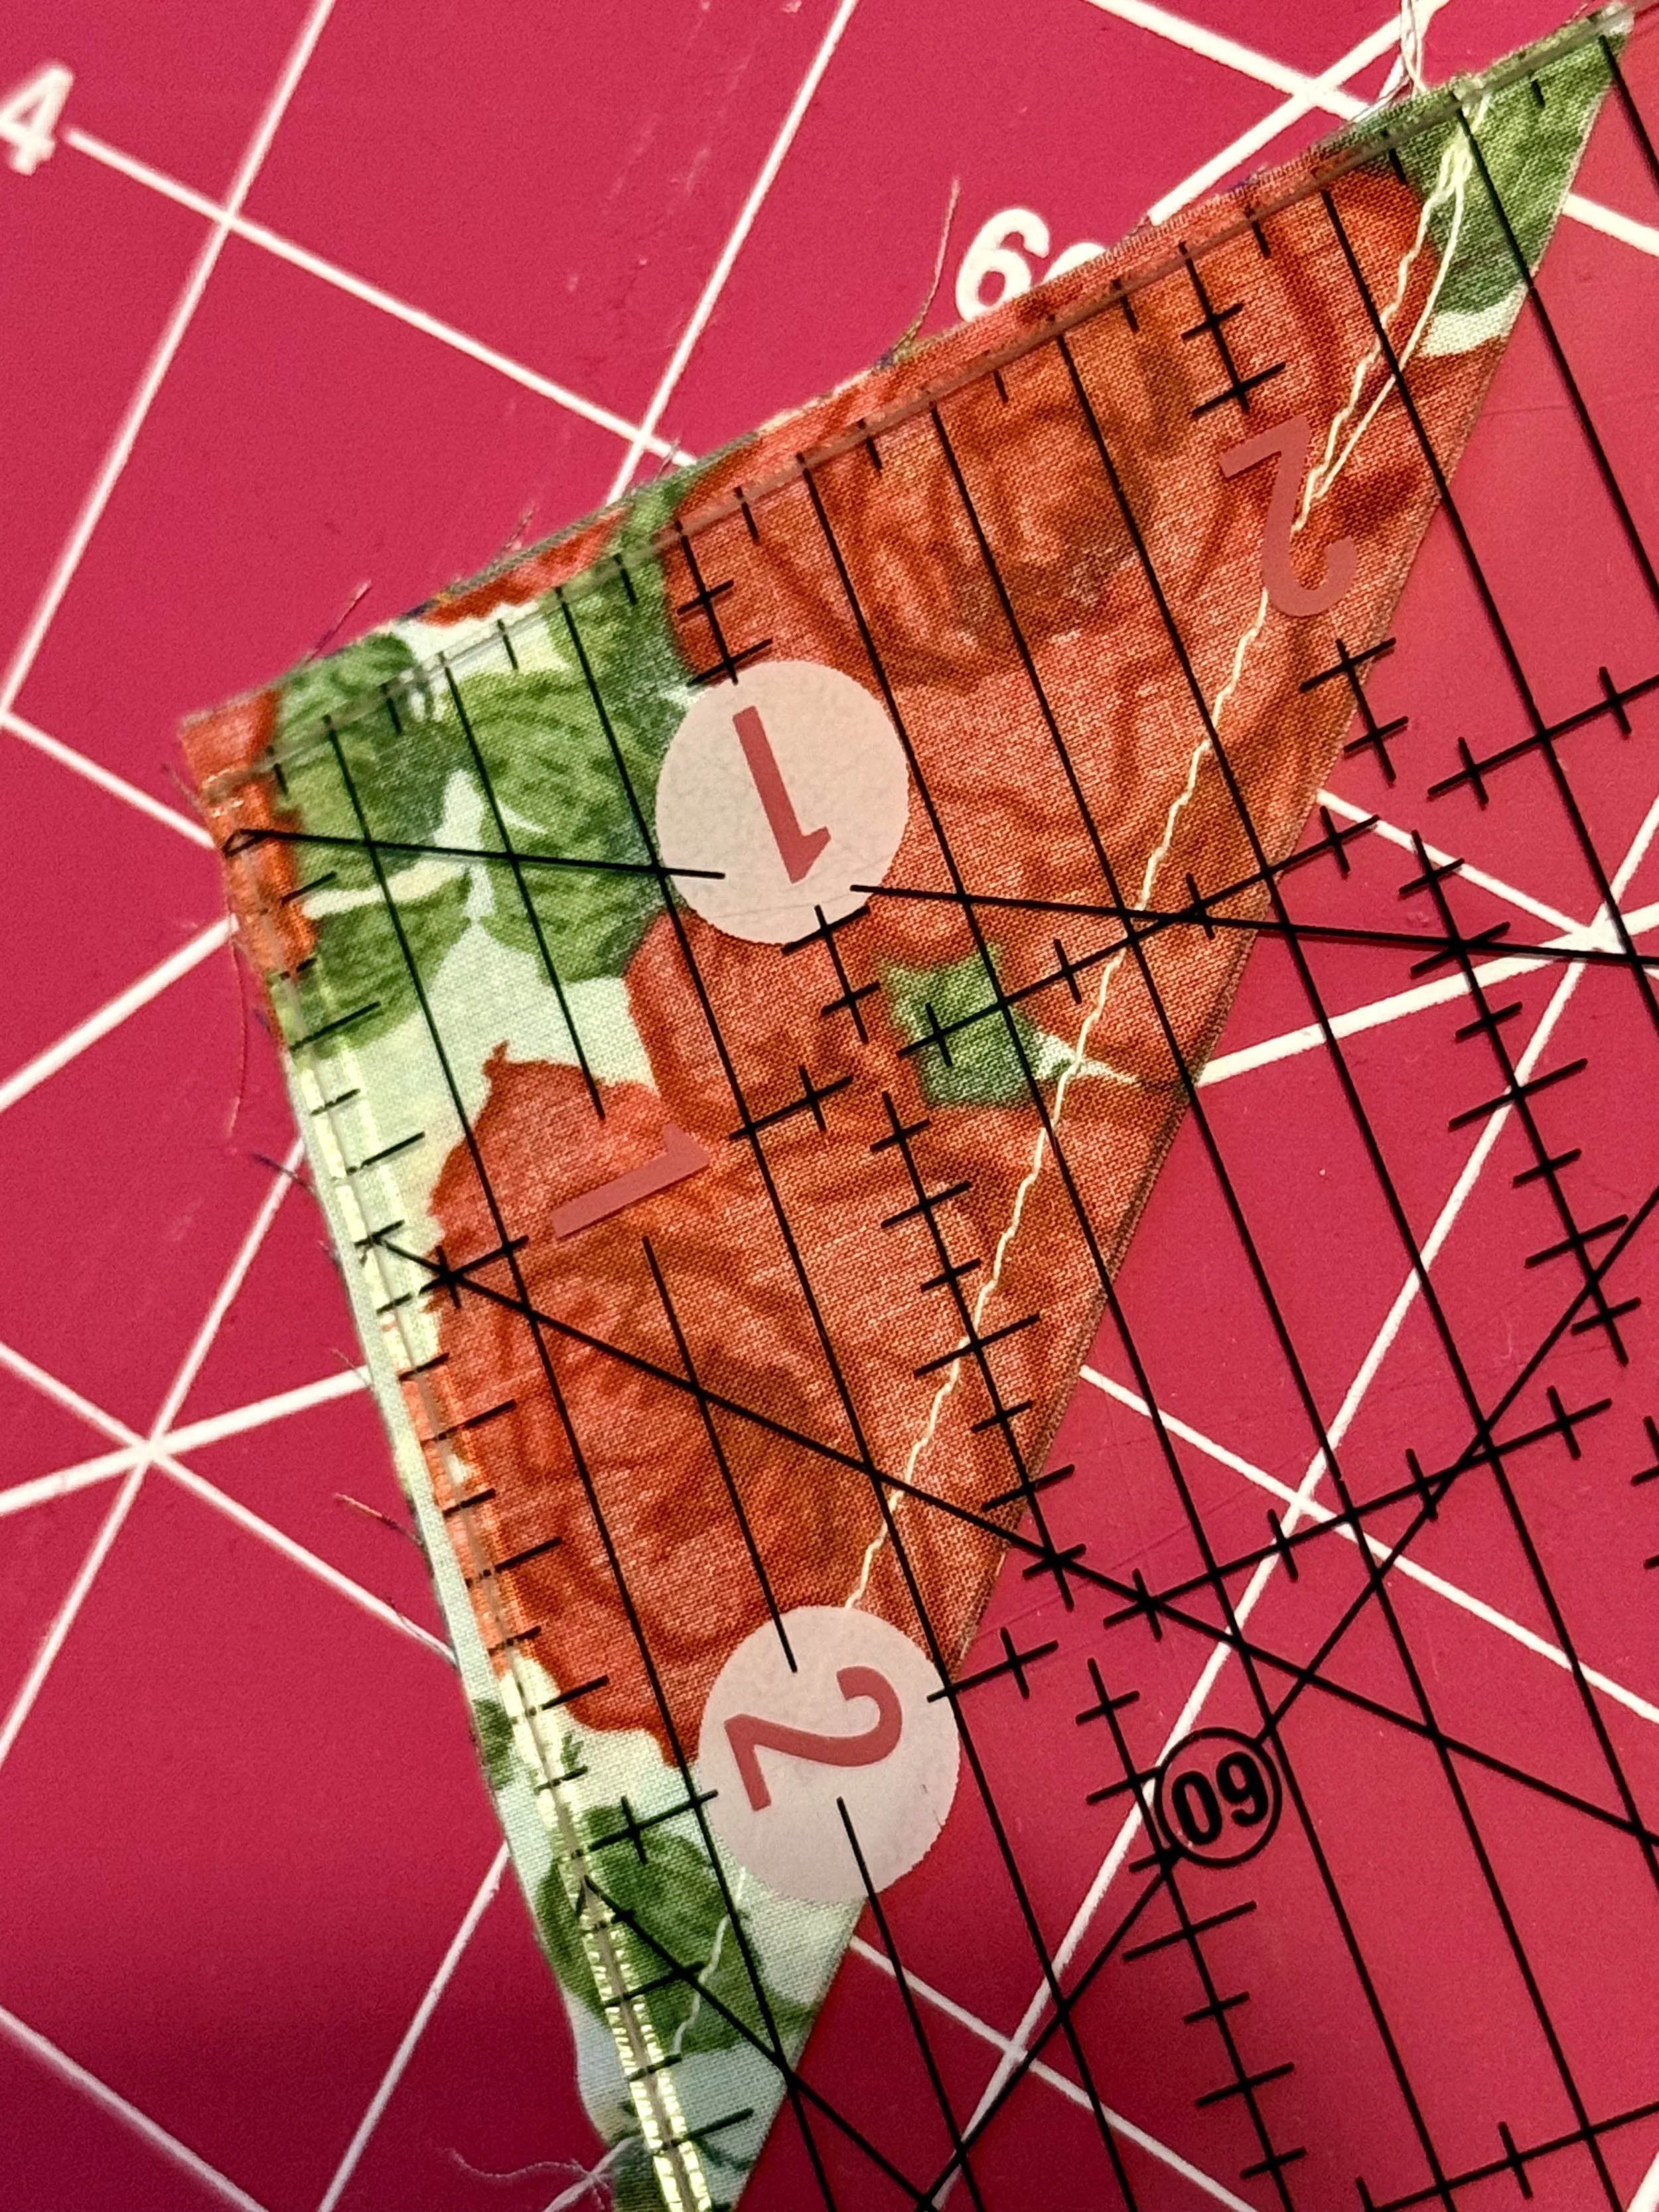
-Press before trimming, it keeps the units stable.
-Trim every HST according to the pattern and your chosen size.
-Press seams open for flatness or towards the darker fabric for strength.
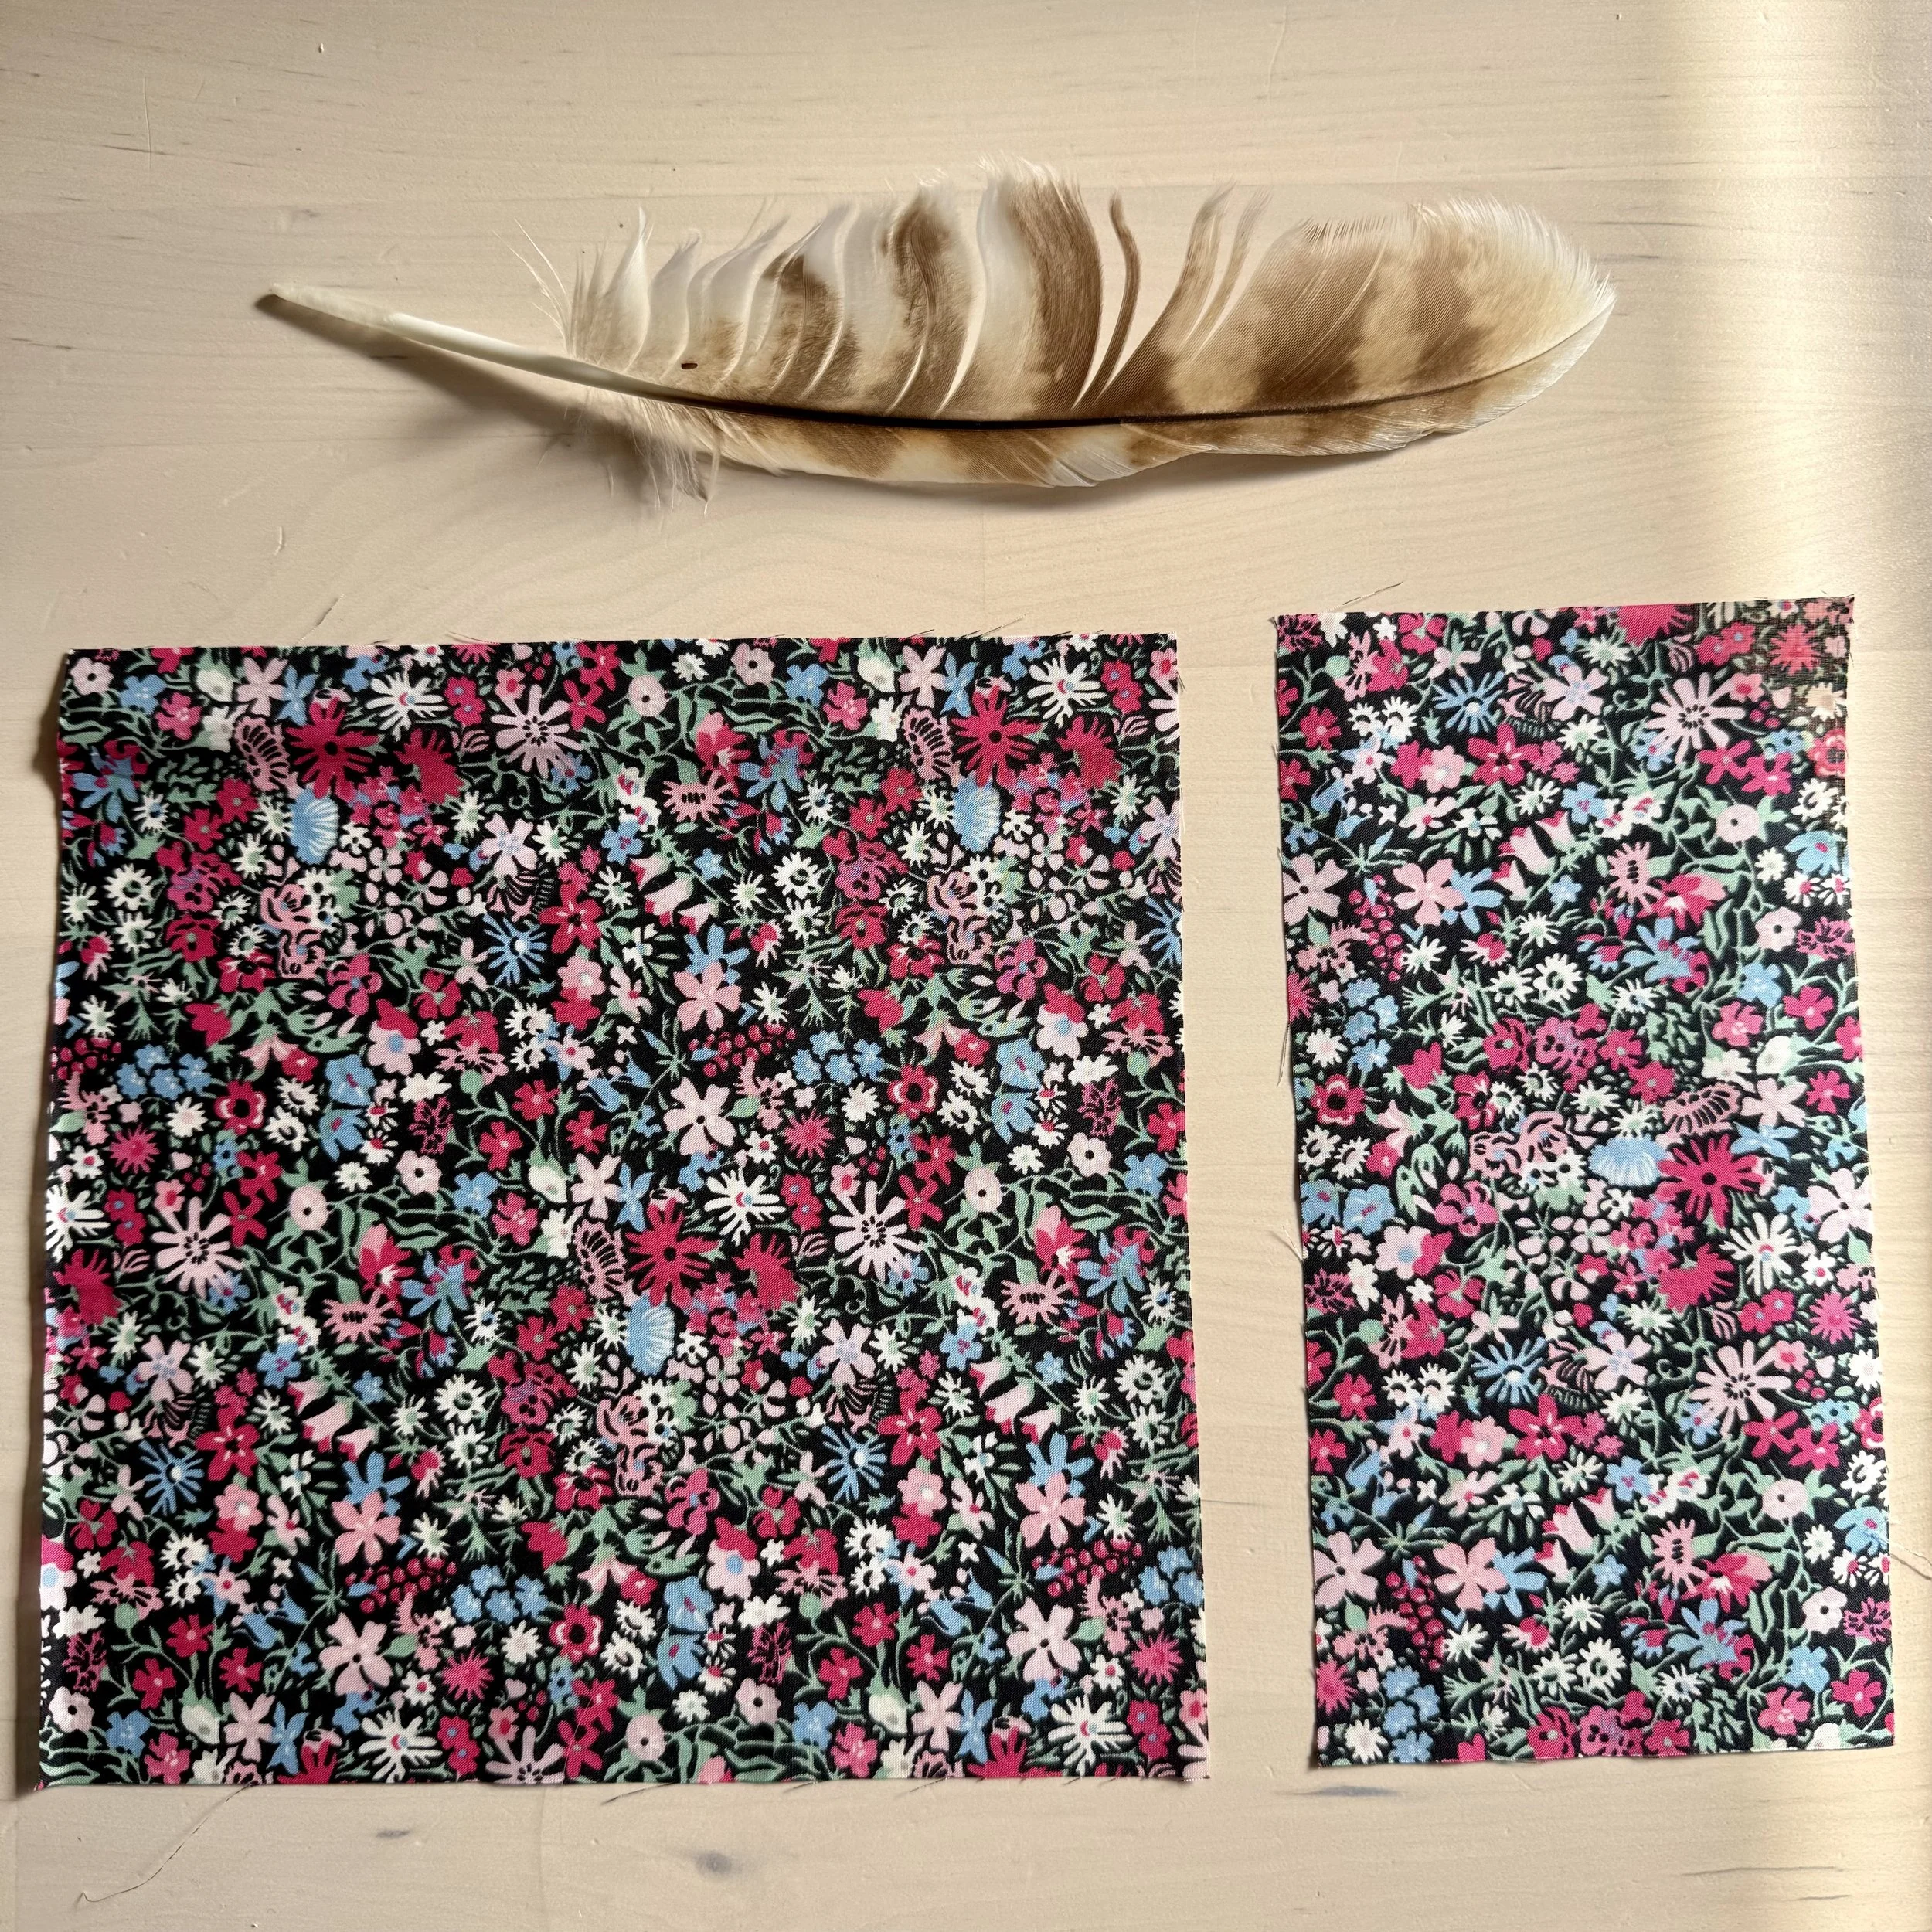
Fabric Contrast
Strong contrast is what makes your star stand out.
Aim for:
Light background + darker feature fabrics.
Avoid pairing prints that are similar in value, stand back to check.
The greater the difference, the clearer the design.
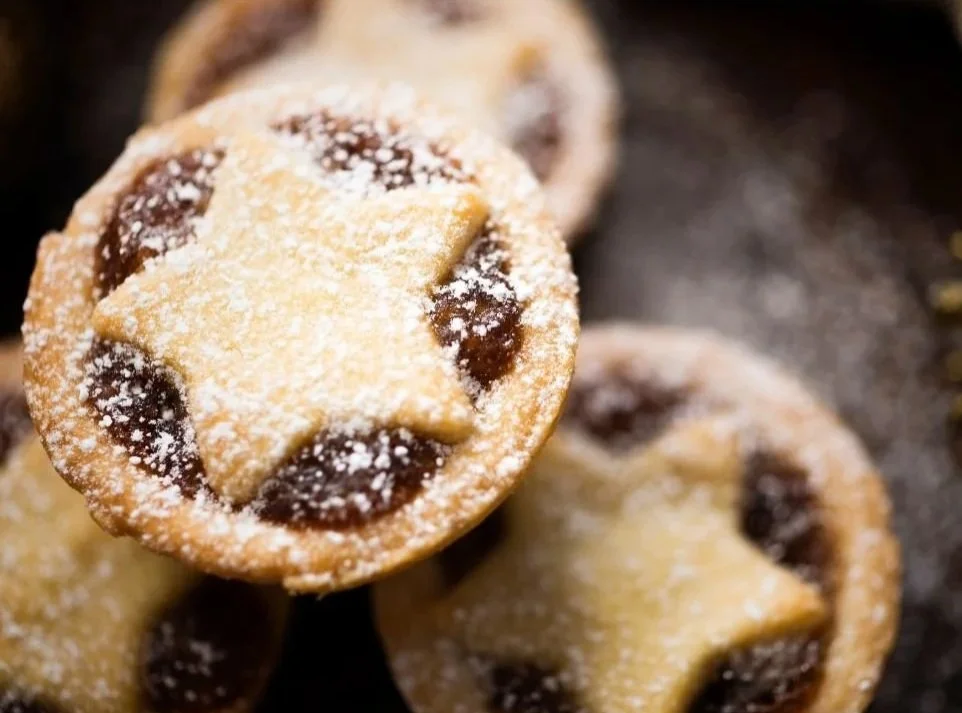
Cosy Snack
A warm mince pie! Perfect for nibbling between pressing and trimming, the scent alone brings on the festive mood.
Nancy Birtwhistle has some excellent tips for keeping batches of homemade mince pies in the freezer over on her Instagram.
Winter Folklore
The Snowdrop Legend
In old folklore, snowdrops, the first flowers of winter, were said to appear when an angel breathed on falling snow to comfort a despairing Eve as she left Eden.
They symbolise hope, renewal, and the quiet promise of brighter days.
Your HSTs are your snowdrops this week, small beginnings that hold the whole quilt’s shape within them.

This version is ideal for scraps and stash busting. If you are a hoarder of every tiny piece of fabric like me this is perfect for you. There are only two sizes of squares to cut but more piecing to do. I love the texture this extra piecing gives and make for easy lines to follow to quilt by. Most economic with fabric and lends itself to upcycled materials.
Join the current Quilt Along for Christmas over on my Blog
Christmas Three Sisters QAL – Week Two
Christmas Three Sisters Quilt Along - Week Two
Time to cut and prepare your pieces. Pace yourself with snacks and breaks, the effort will be worth it.
Cutting & Preparing Your Pieces
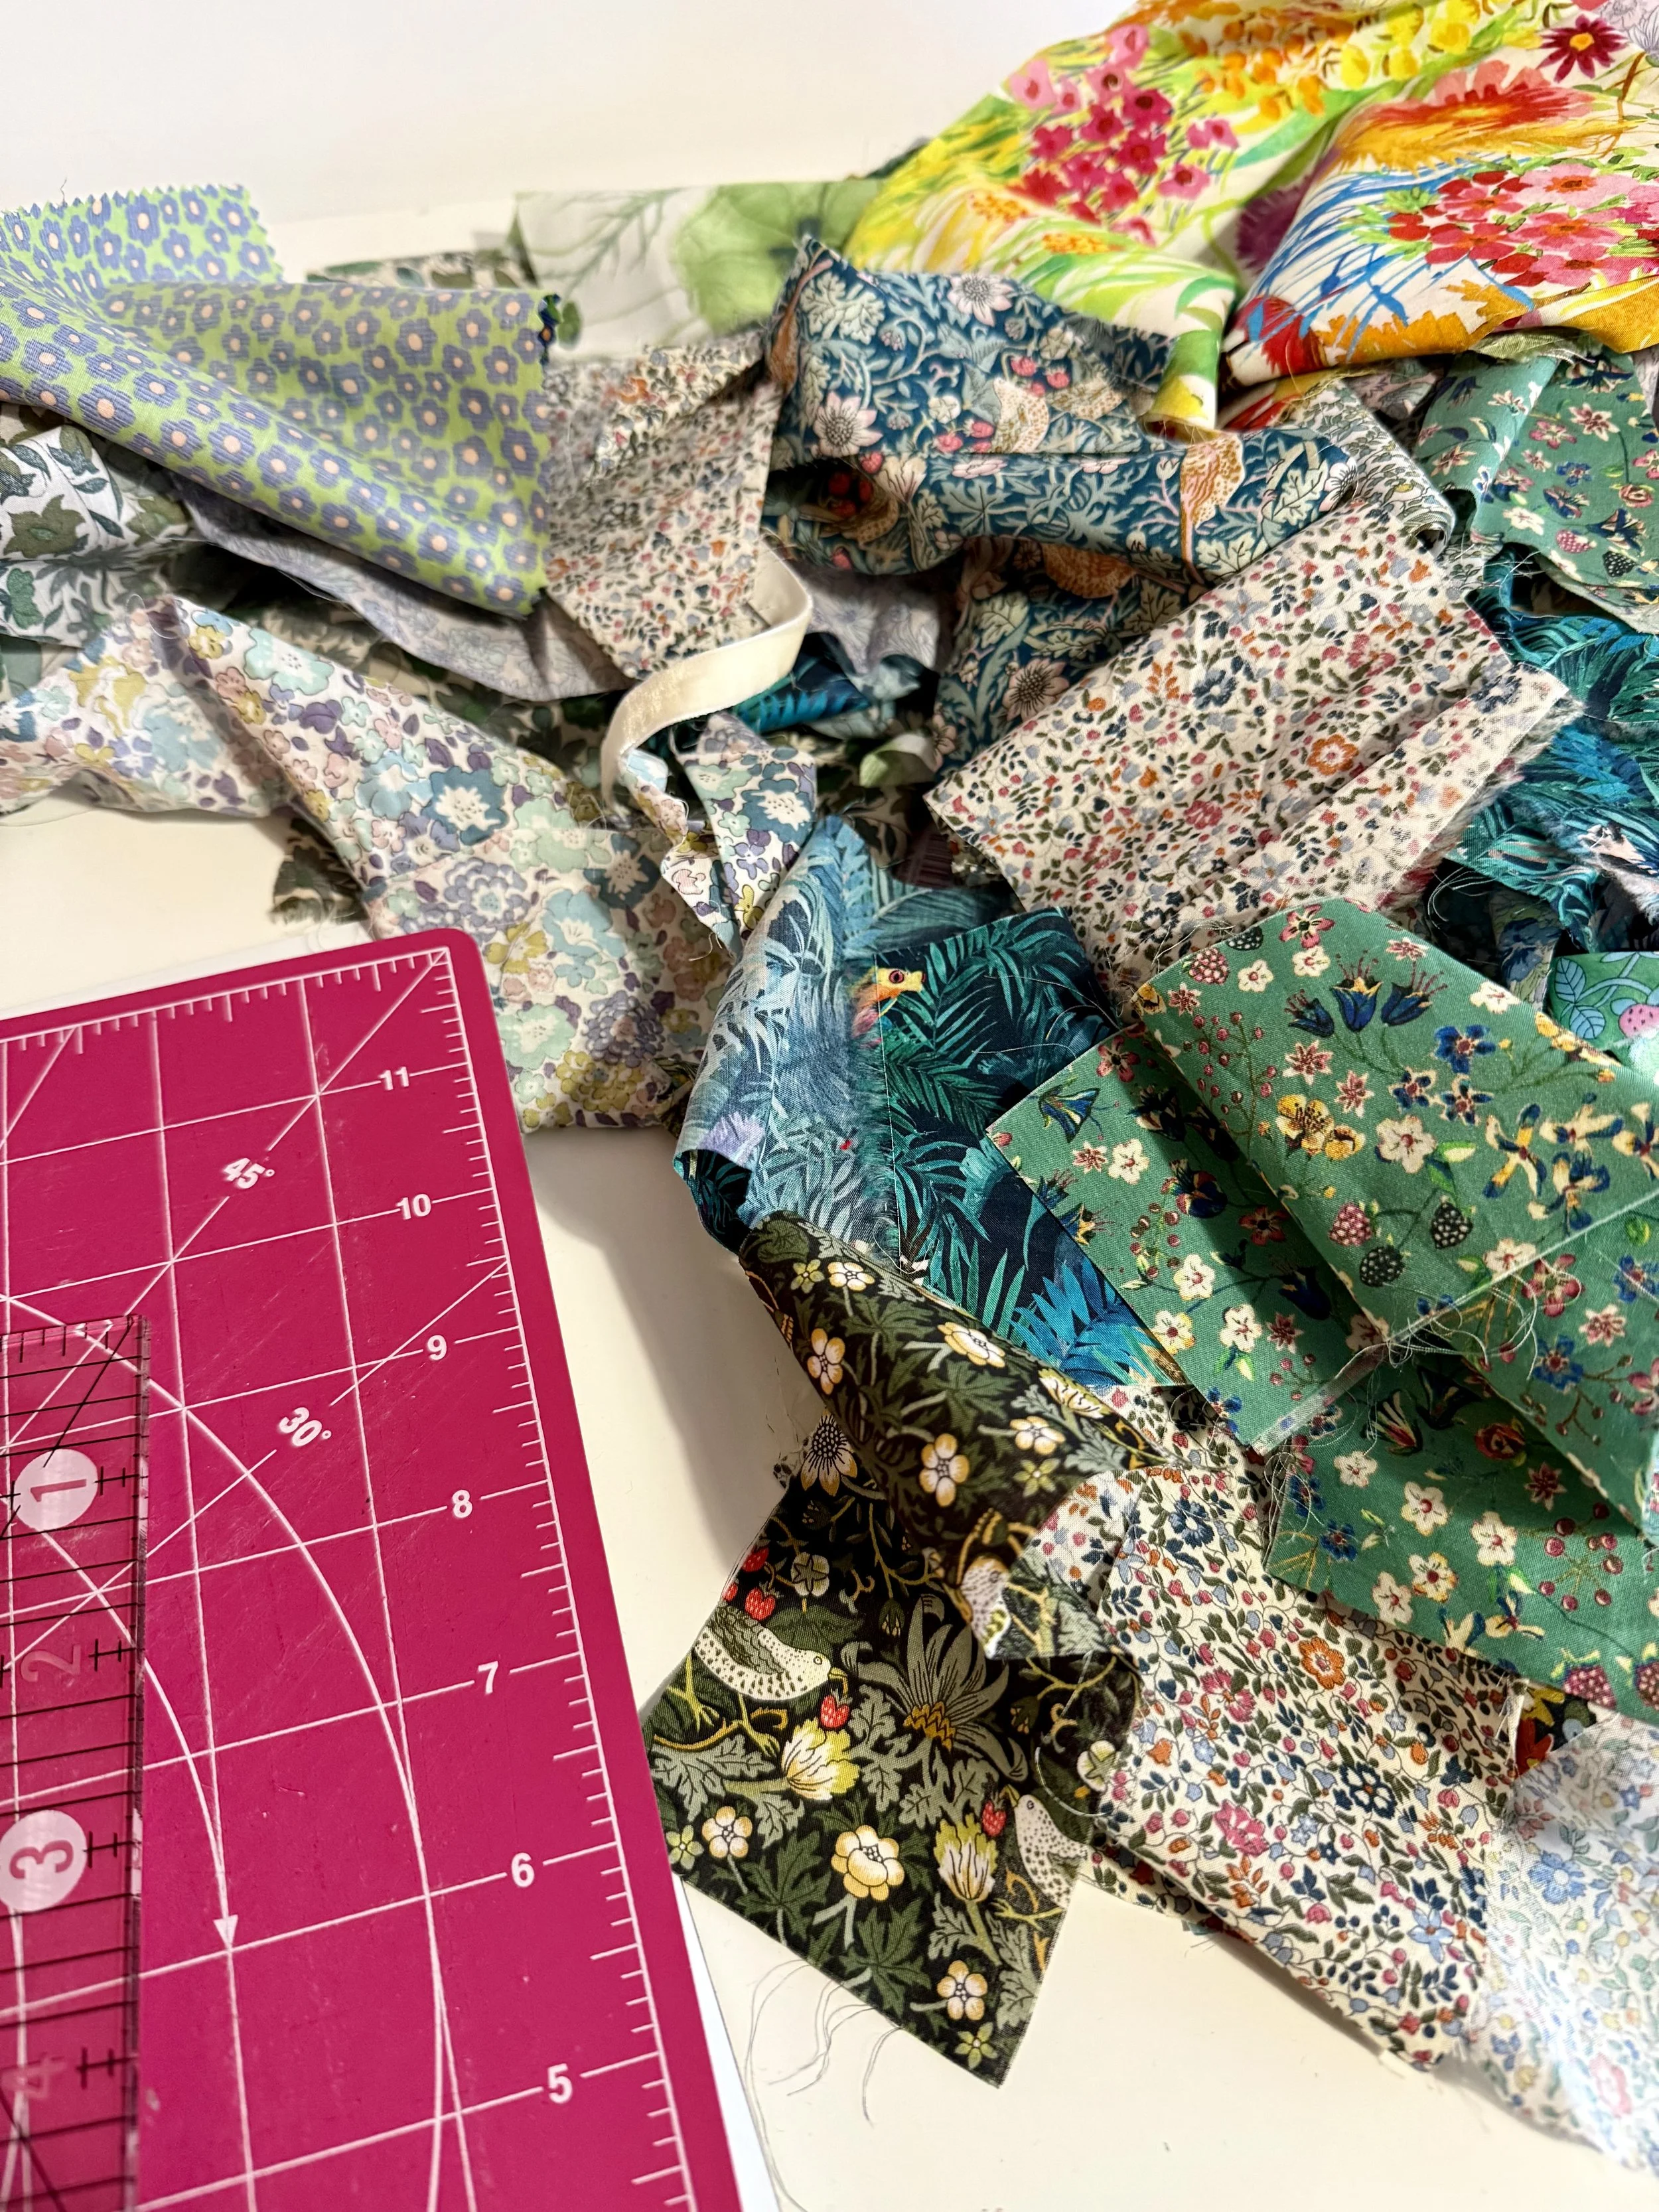
This week we will be turning your stash raids into piles of fabric into neat, ready-to-sew stacks. Cutting can feel repetitive, but it’ll be worth it to be organised.
Pattern Note
As this is the Scrappy version, that scrappiness applies to the background fabric too! Yes it is more time consuming to create, but it creates a wonderful texture and richness of colours. If you choose to make your background fabric the same, you will benefit from the texture the piecing gives. This week I have been gathering all my offcuts and scraps for the background and feature fabric.
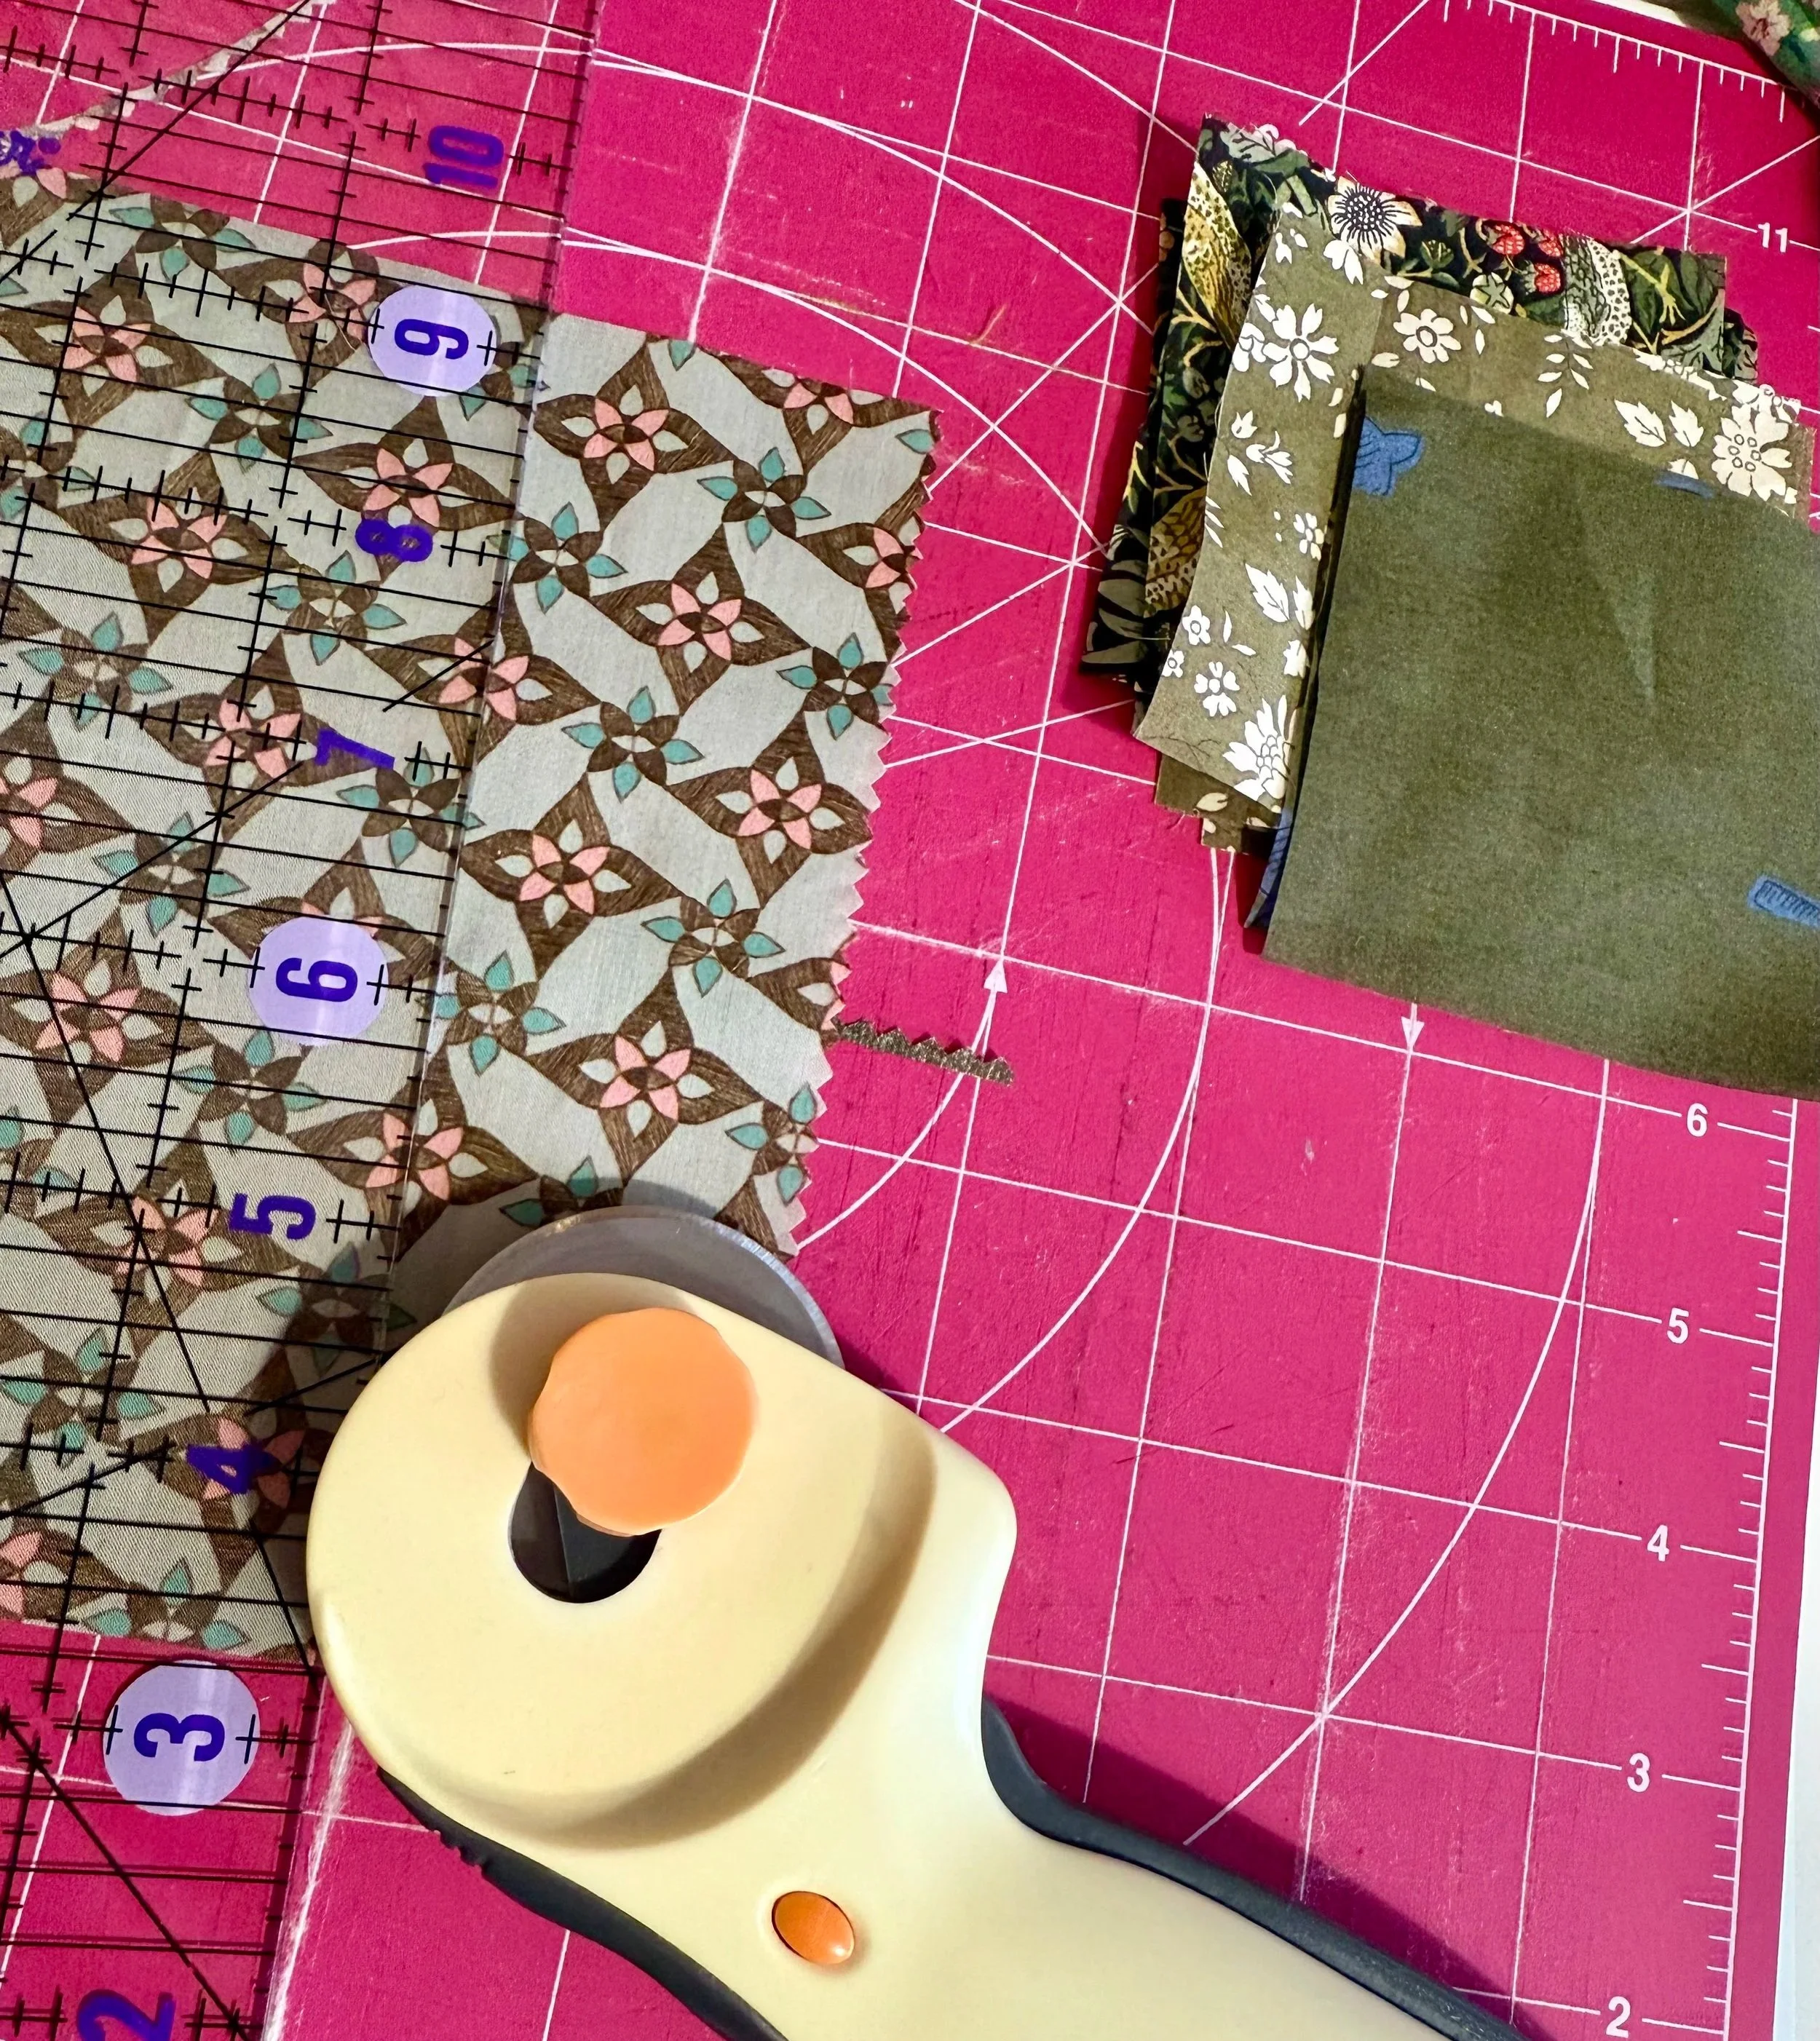
Cutting Tips
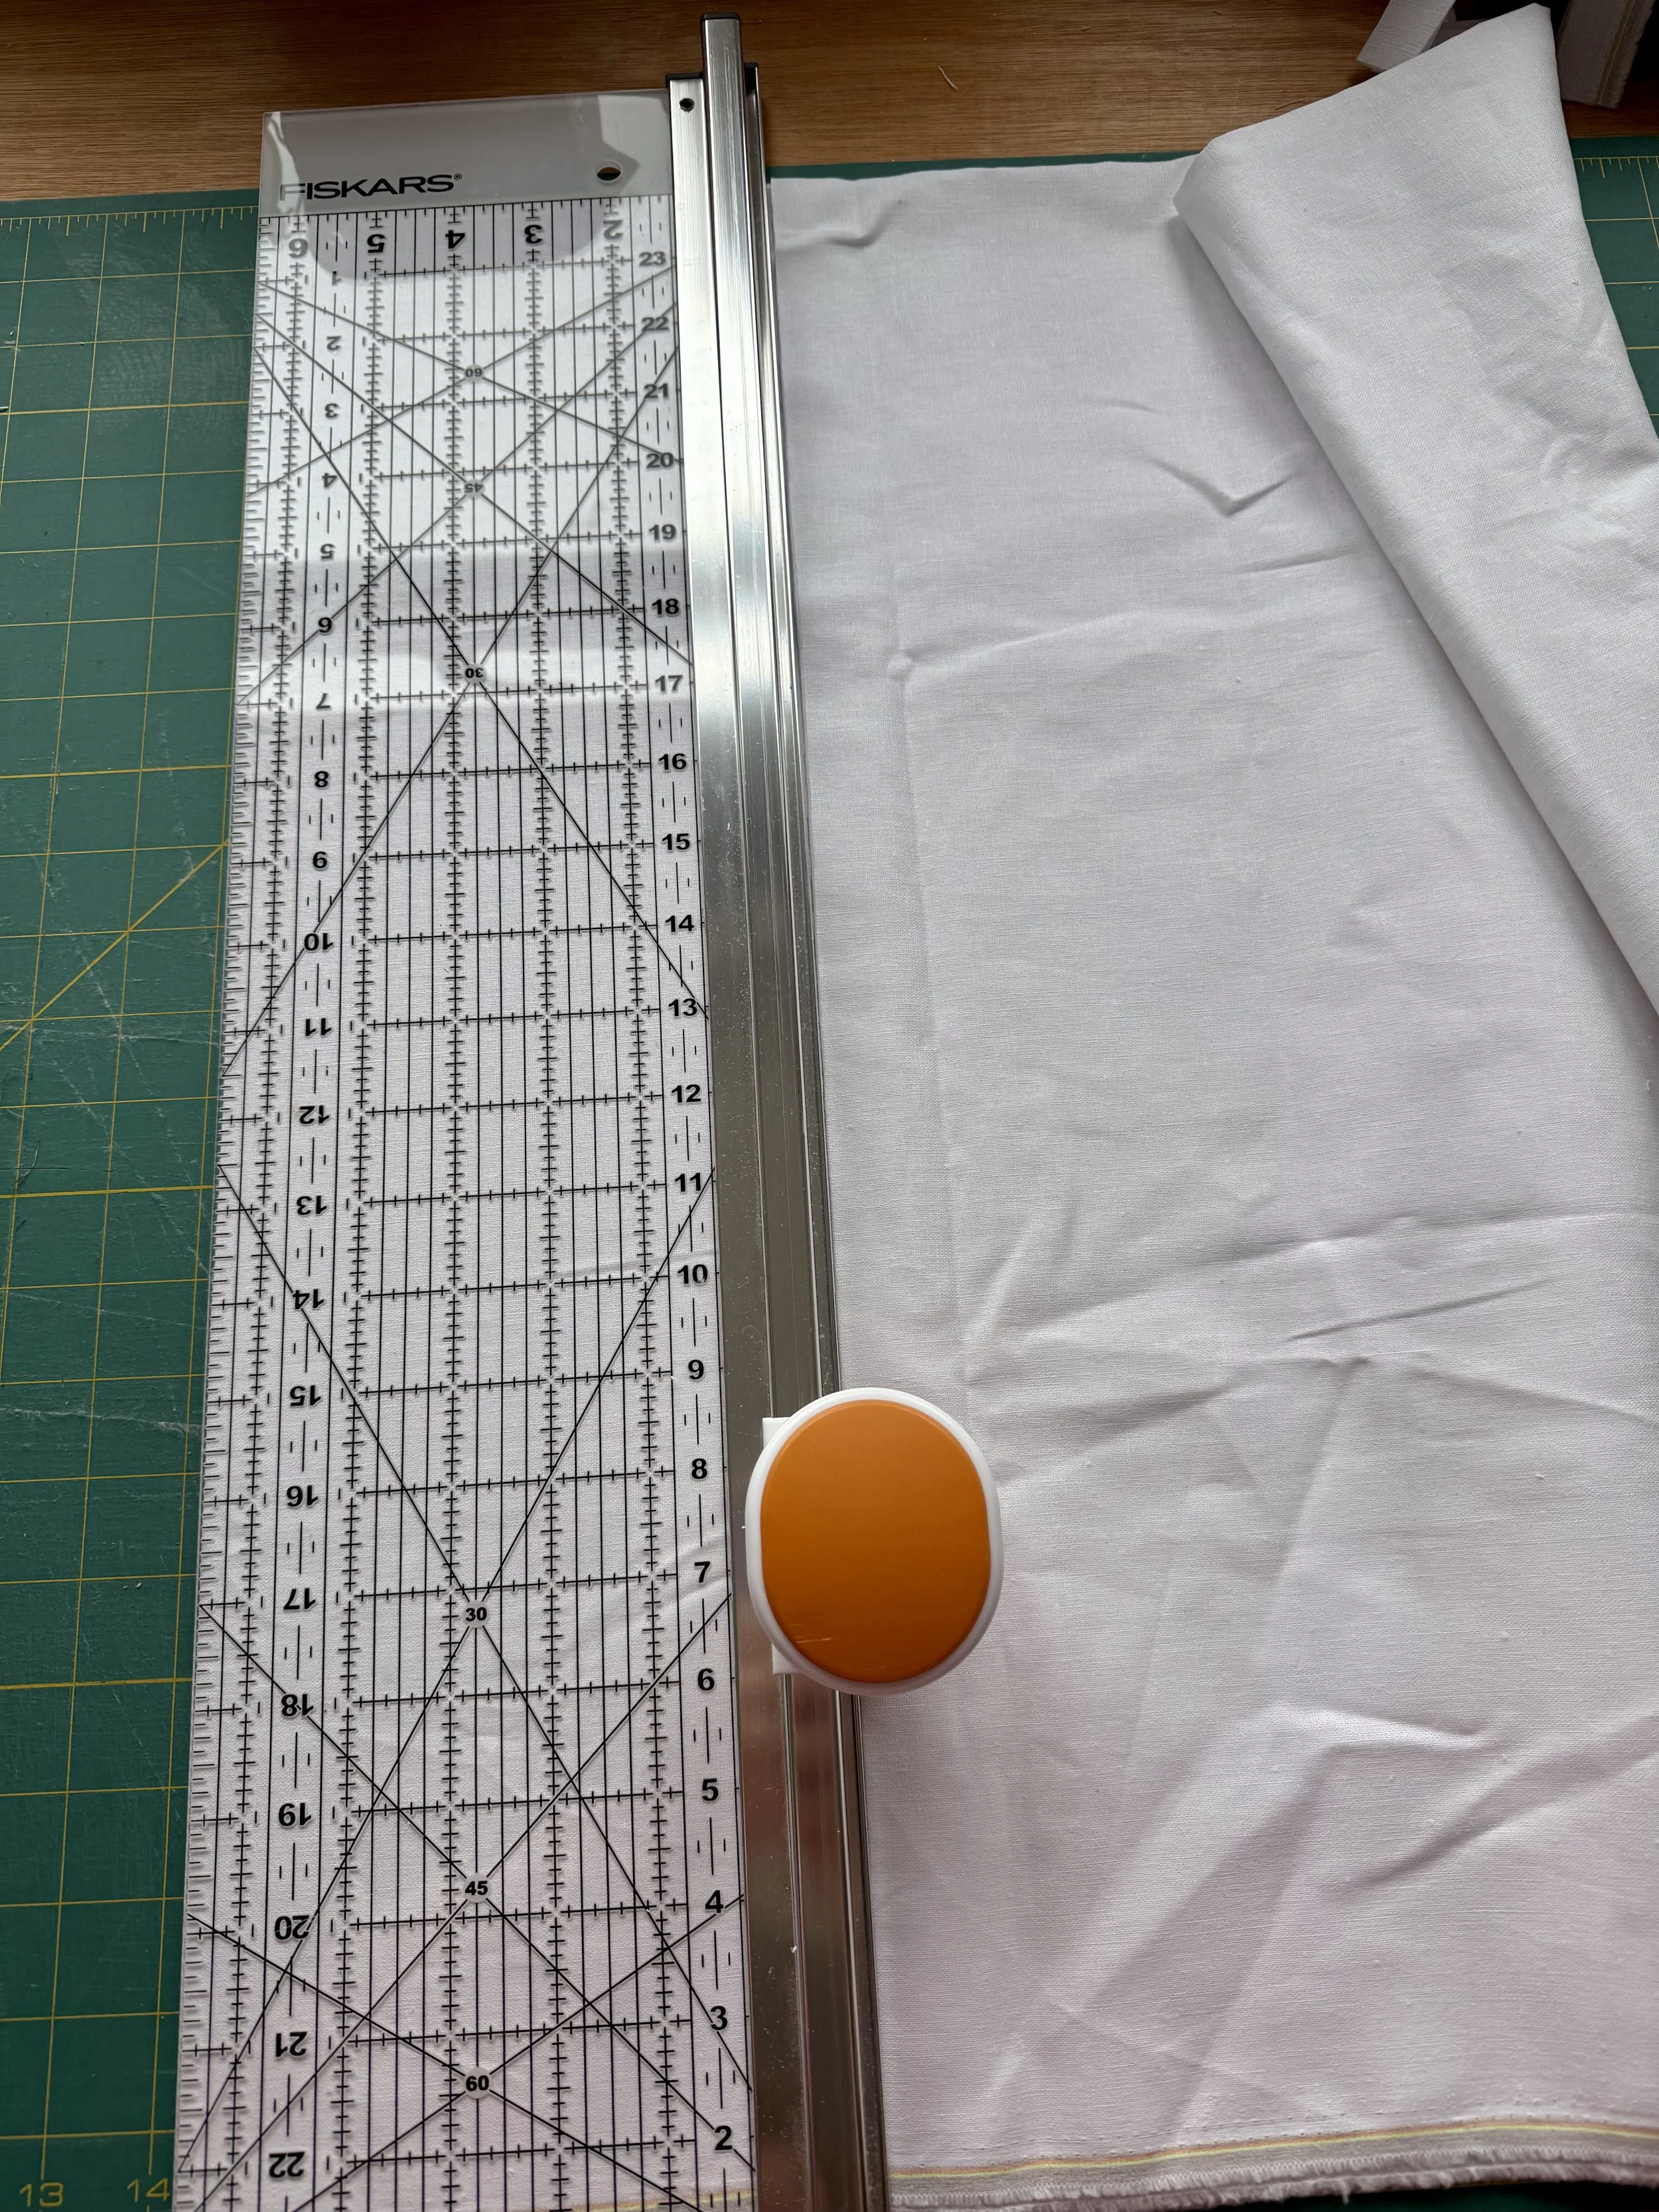
Replace your rotary blade — a sharp one makes clean cuts.
Cut no more than four layers at a time for accuracy.
Label and store pieces in boxes or trays by type.
I’ve decided to use a mix of greens for my background fabric.
Organisation Tip
A small tray, box, or even a biscuit tin makes the perfect storage. Keep your pieces labelled in their four sizes:
Accent fabric - A small, A large.
Background - B small, B large.
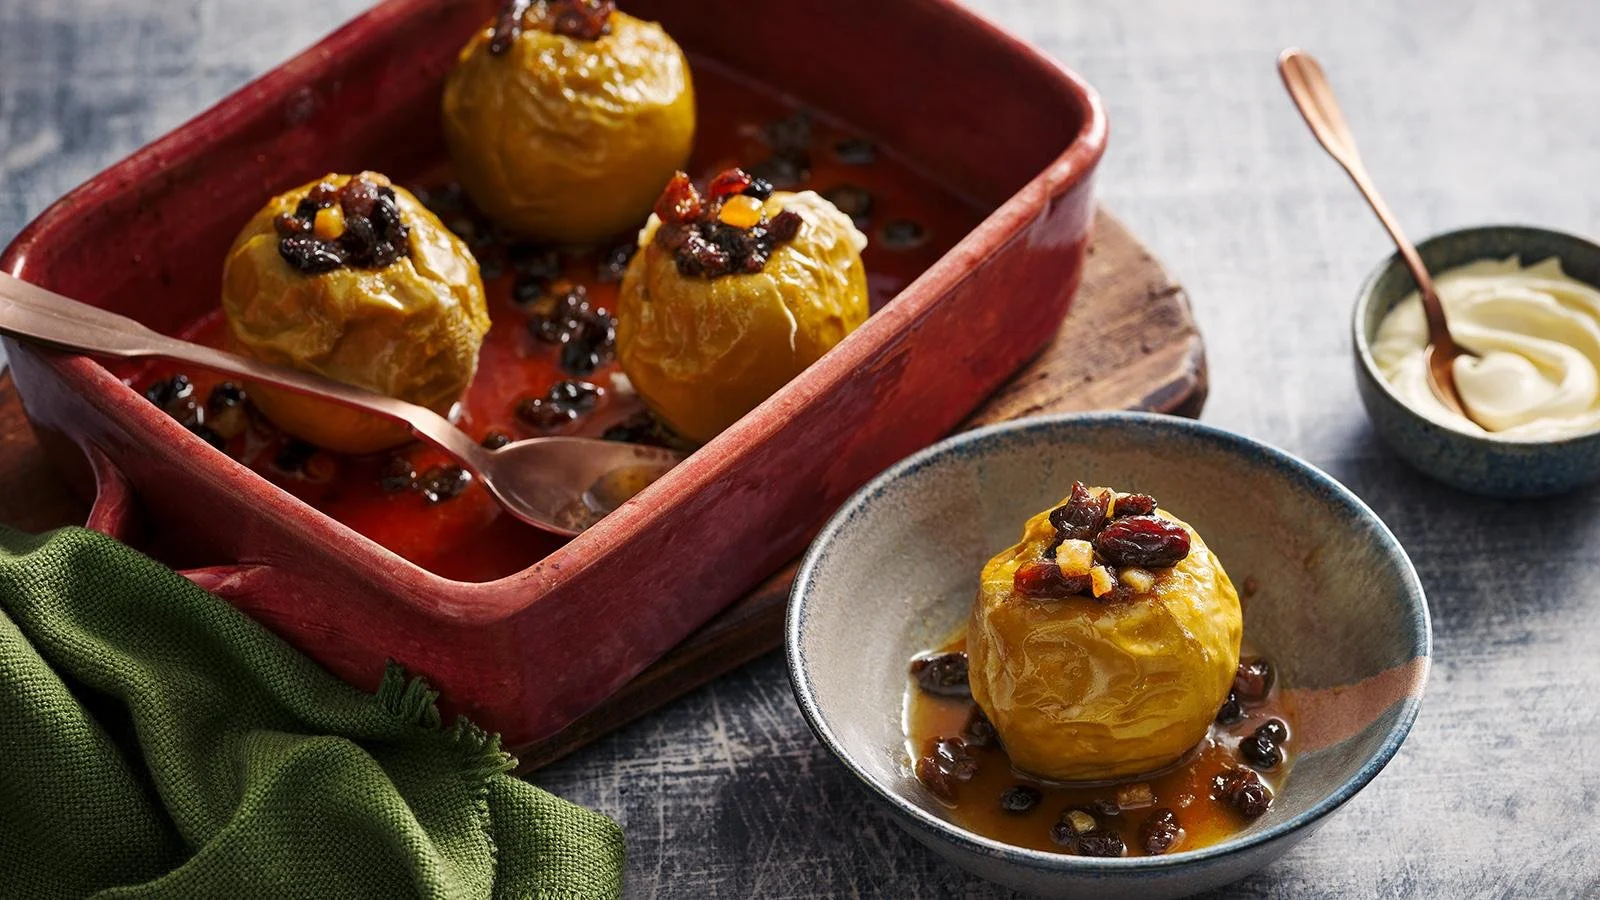
Cosy Treat
Spiced Baked Apples - Roast them in the oven while you work, your reward for all your hard cutting.
Pace Yourself
I like to cut fabric in short bursts with music or an audiobook. Stretch your shoulders and take little breaks.
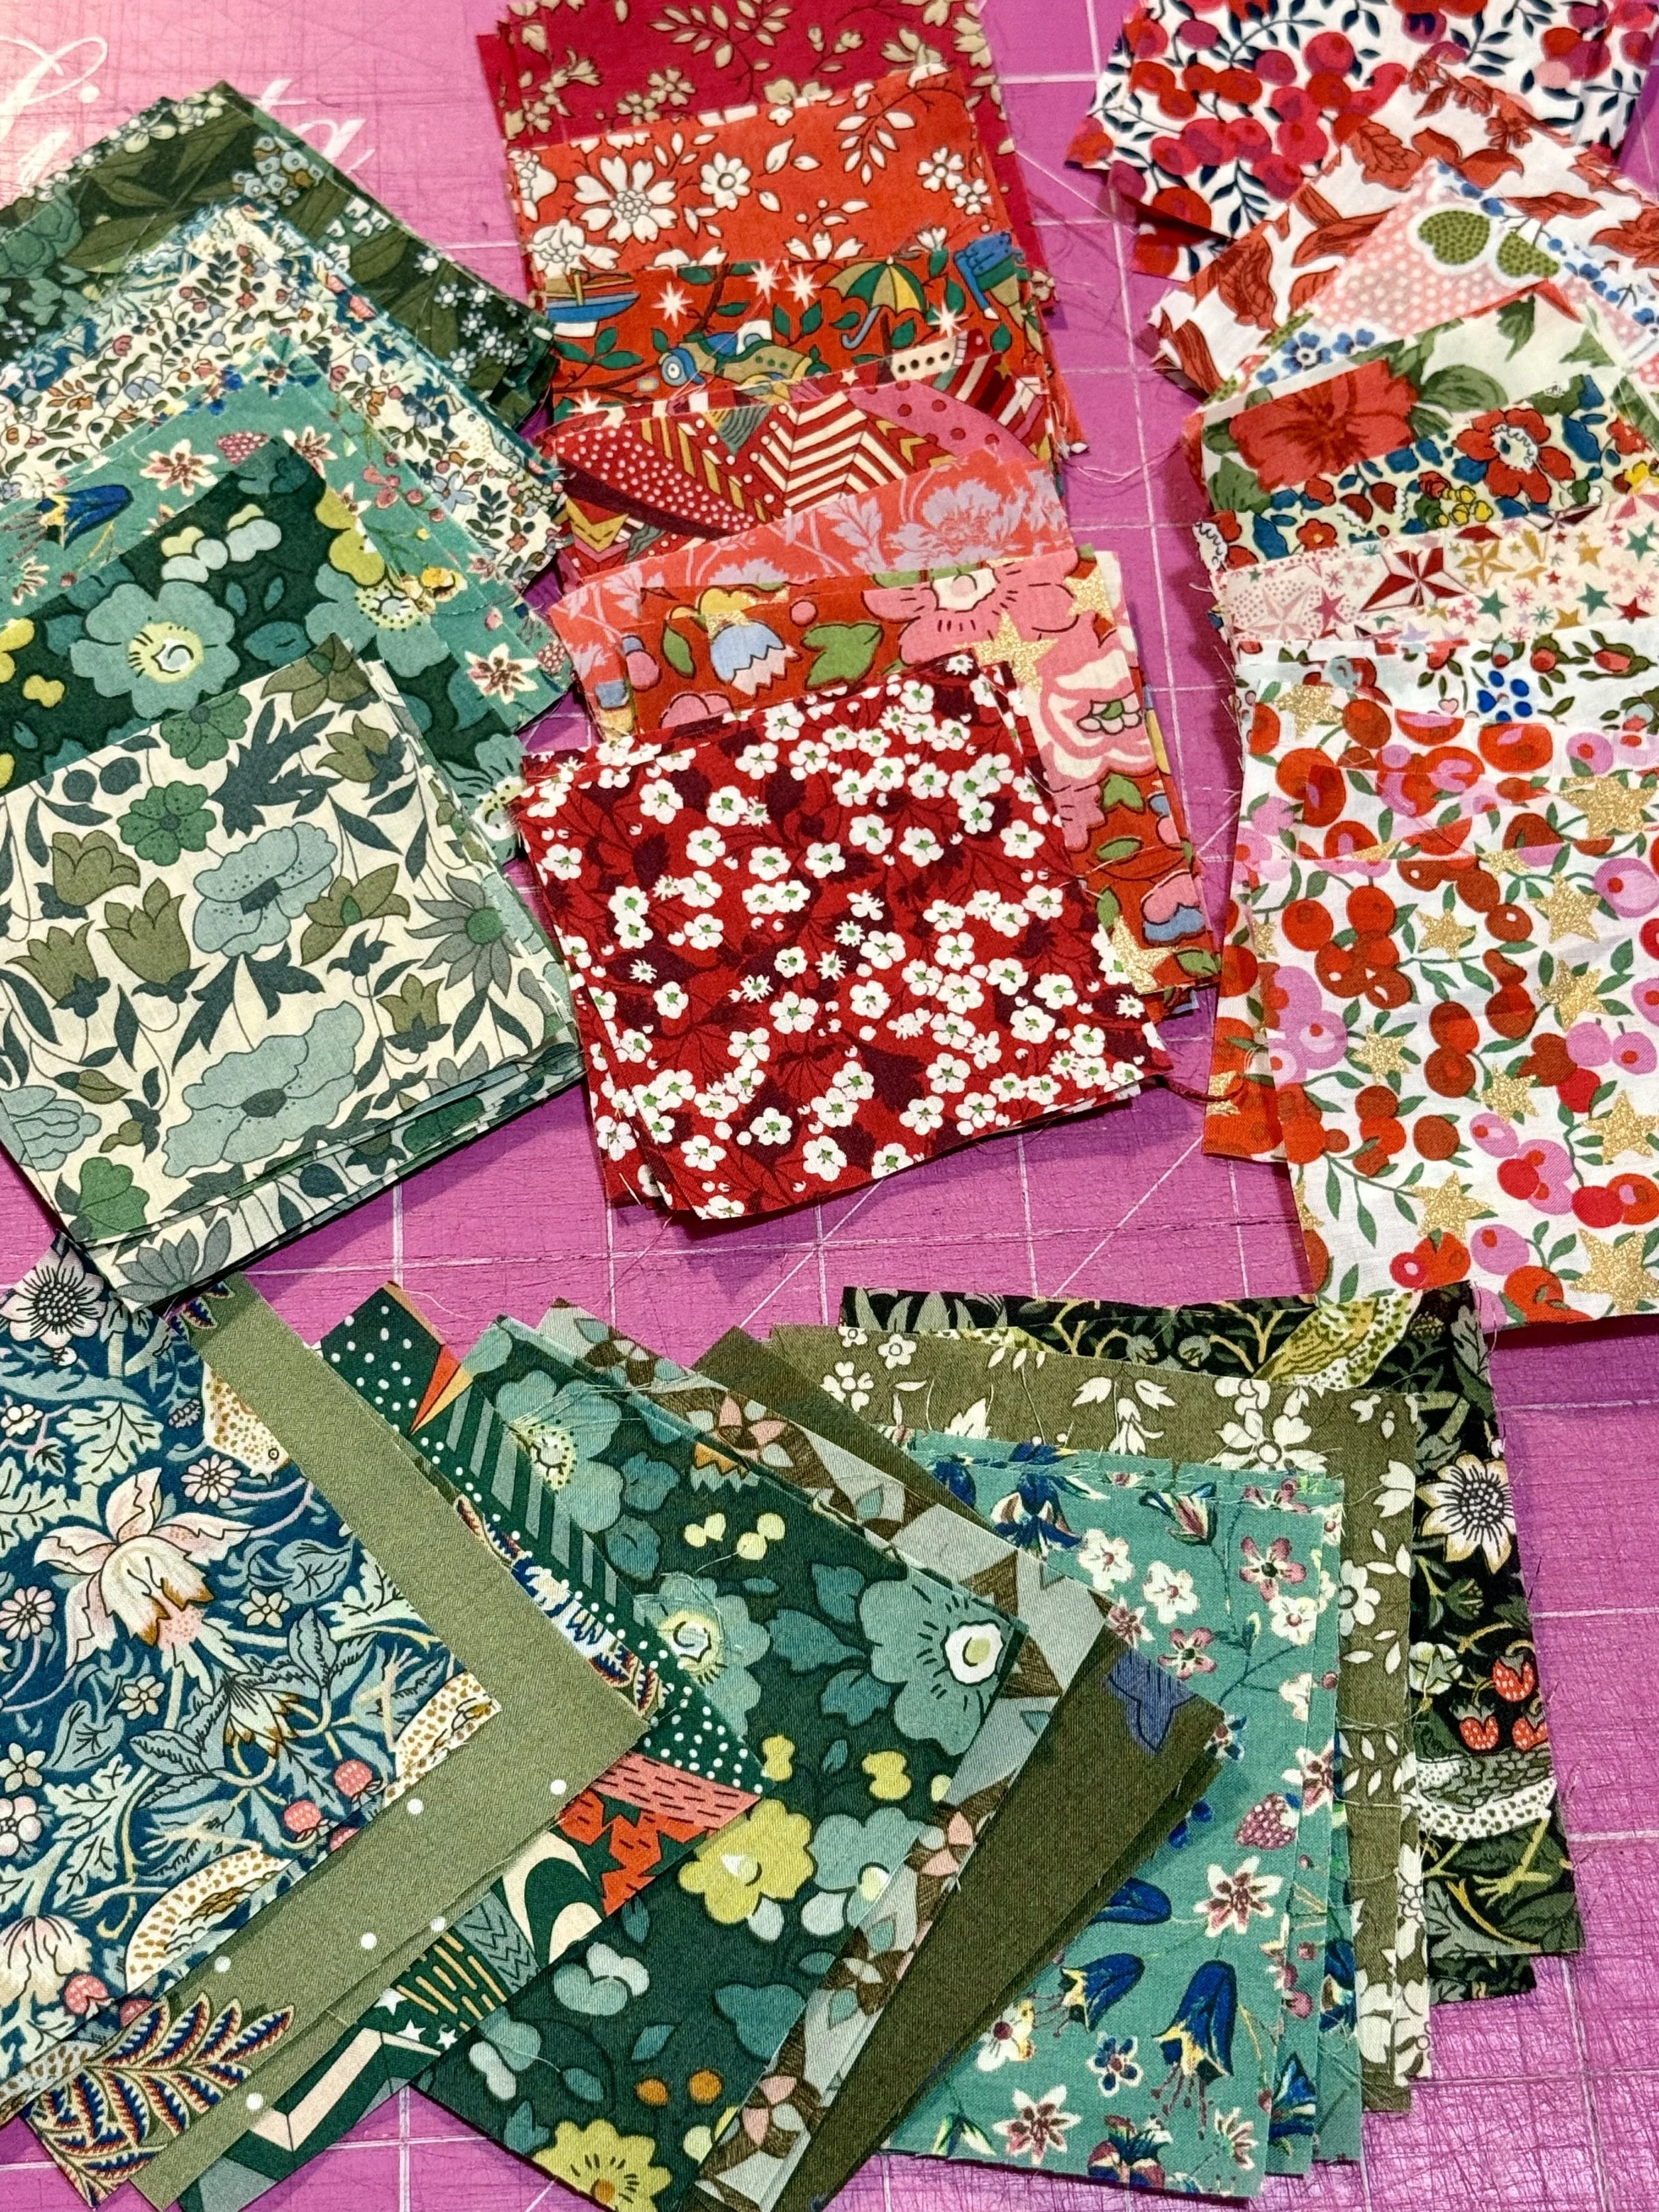
Reds and pinks as an accent contrast really well with green.
Your Task This Week
Cut all fabric pieces for your quilt.
Label.
Share your progress using #christmasthreesisters
Winter Folklore
The Yule Log — Once burned through the Twelve Days of Christmas, its ashes were kept for luck, just like your scraps.
This version is ideal for scraps and stash busting. If you are a hoarder of every tiny piece of fabric like me this is perfect for you. There are only two sizes of squares to cut but more piecing to do. I love the texture this extra piecing gives and make for easy lines to follow to quilt by. Most economic with fabric and lends itself to upcycled materials.
Join the current Quilt Along for Christmas over on my Blog

Christmas Three Sisters QAL – Week One
Christmas Three Sisters Quilt Along - Week One
Welcome to week one of six weeks of slow sewing, cosy treats & winter folklore!
I want to invite you to join me on a slow festive journey through patchwork and storytelling; where you take time for yourself after the hustle and bustle of the past year. Simple fabric pieces will become quilts of warmth, gifts of love or part of future traditions.
Gathering
Welcome to week one of six weeks of slow sewing, cosy treats & winter folklore!
I want to invite you to join me on a slow festive journey through patchwork and storytelling; where you take time for yourself after the hustle and bustle of the past year. Simple fabric pieces will become quilts of warmth, gifts of love or part of future traditions.
Each week, as well as pattern tips, I’ll be adding comforting treat suggestions and a little winter folklore story to set the scene as we cosy in.
This week is all about preparing your materials, choosing your festive fabrics, and easing gently into the rhythm of late Autumn sewing.
The Pattern
We will be making a festive version of my Three Sister’s Quilt. The pattern comes in different versions; a more simplified quilt that is pieced with larger pieces of fabric, but we will be using the Scrappy Version. This version allows you to mix and match smaller fabrics pieces in your stash to create a Christmas pallette. The pattern is beginner friendly, using only squares and half square triangle shapes to create three, ever increasing stars.
Sizes - The pattern comes in multiple sizes from cushion up to King Size, but feel free to use these sizes to create a table centre piece or a wall hanging.
Have a play on my Prequilt colouring page.
Colouring Page
Head over to my Prequilt page to colour the pattern in digitally to help you form pallette ideas. You can upload your own stash pictures, as well as using pre-loaded fabric lines. Don’t forget to play with the randomize function to see your quilt change colour until you are happy.
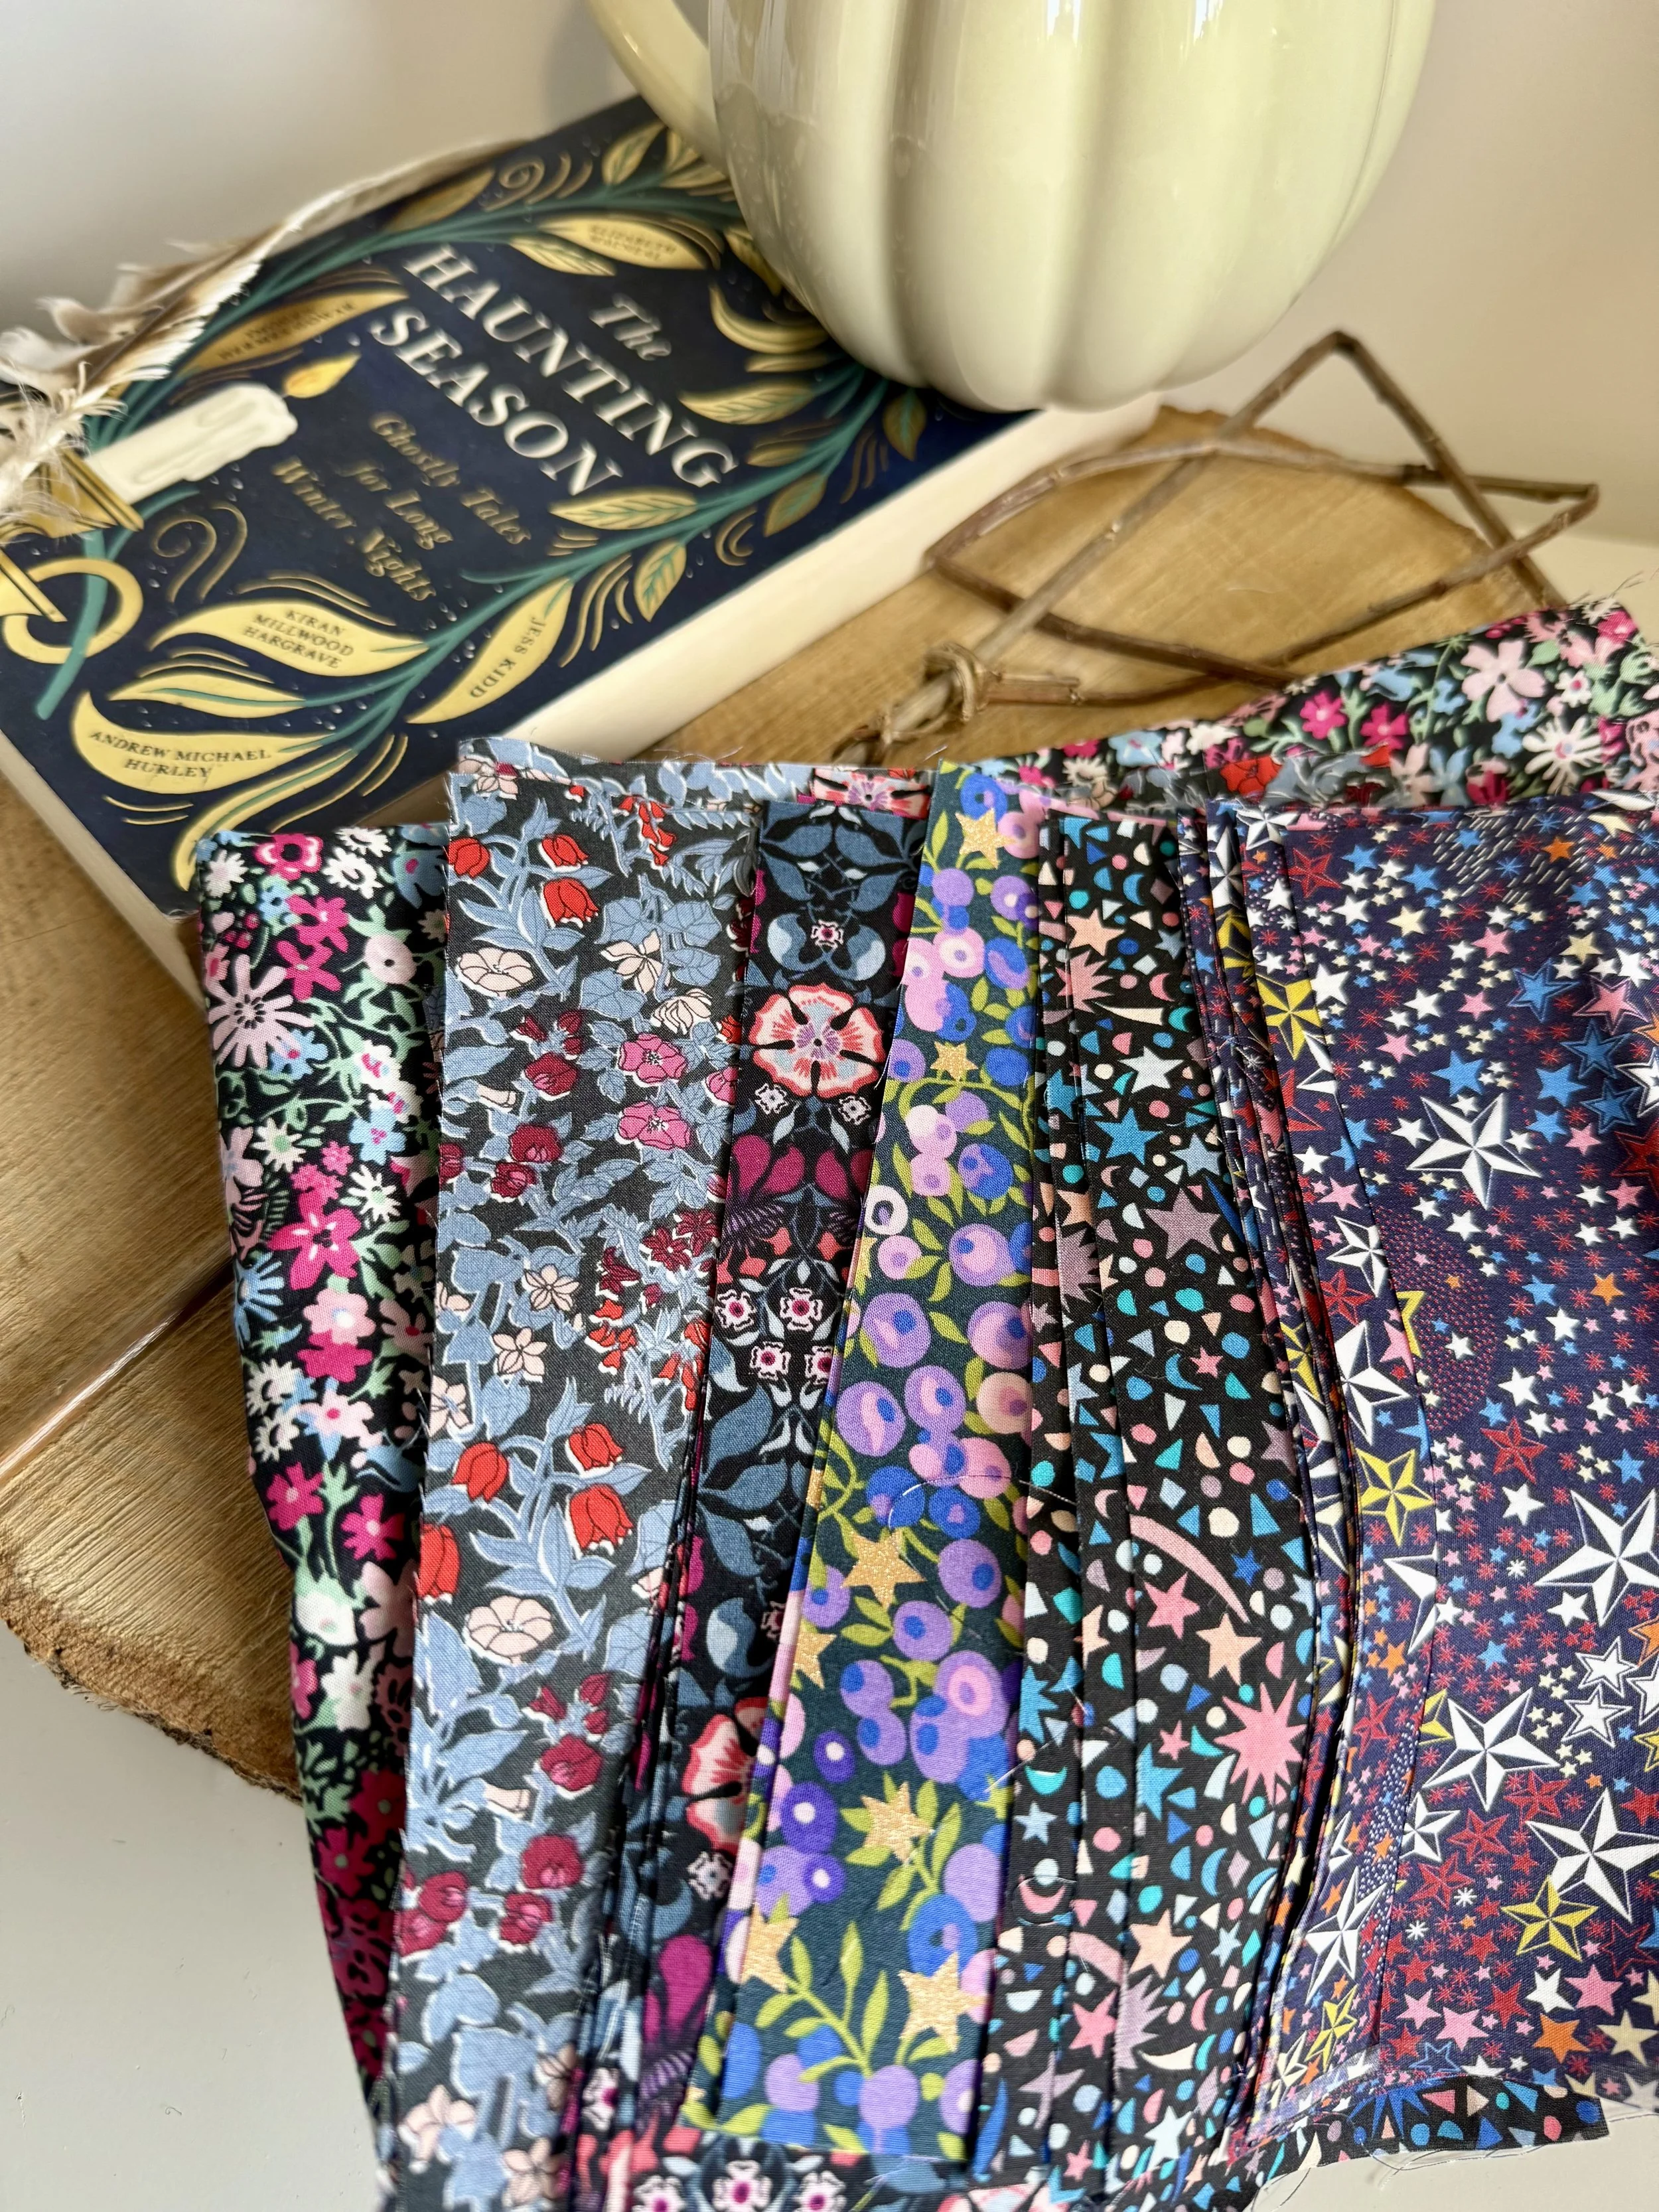
Fabric Focus
Choose three core colour families — perhaps reds, greens or pinks for a bright festive palette.
You could add a few accent prints — metallics, plaids, or subtle florals to mix into the patchwork.
Look for contrast between lights and darks to bring out your stars.
Background - make sure there is a good contrast between your accent fabrics and background so the stars don’t get lost.
Cutting & Prep Tips
I don’t tend to prewash my fabrics unless it is linen.
Steam, water spray or starch your fabrics ahead of cutting.
Lay fabrics together to check how prints and tones play together.
I already had these 2.5” Liberty squares cut for the baby size that I will use as a wall hanging.

Cosy Treat
Tea and homemade shortbread biscuits — perfect fuel for planning sessions. There are so many recipes out there online for this simple treat.
or
Hot buttery crumpets - butter and fabric aren’t friends but you will find a way!
Mindful Moment
Spread your fabrics across the table, pour a cup of tea, and take your time.
Your Task This Week
Choose and prepare your fabrics.
Cut your first pieces if you’re ready.
Share your fabric pull using #christmasthreesisters
Winter Folklore
The Holly King and the Oak King — In British folklore, these two ancient figures represent the changing of seasons. The Holly King rules winter’s darkness, while the Oak King brings the returning light. As you choose your fabrics, imagine that balance of light and dark and the colours of winter.
This version is ideal for scraps and stash busting. If you are a hoarder of every tiny piece of fabric like me this is perfect for you. There are only two sizes of squares to cut but more piecing to do. I love the texture this extra piecing gives and make for easy lines to follow to quilt by. Most economic with fabric and lends itself to upcycled materials.
Join the current Quilt Along for Christmas over on my Blog

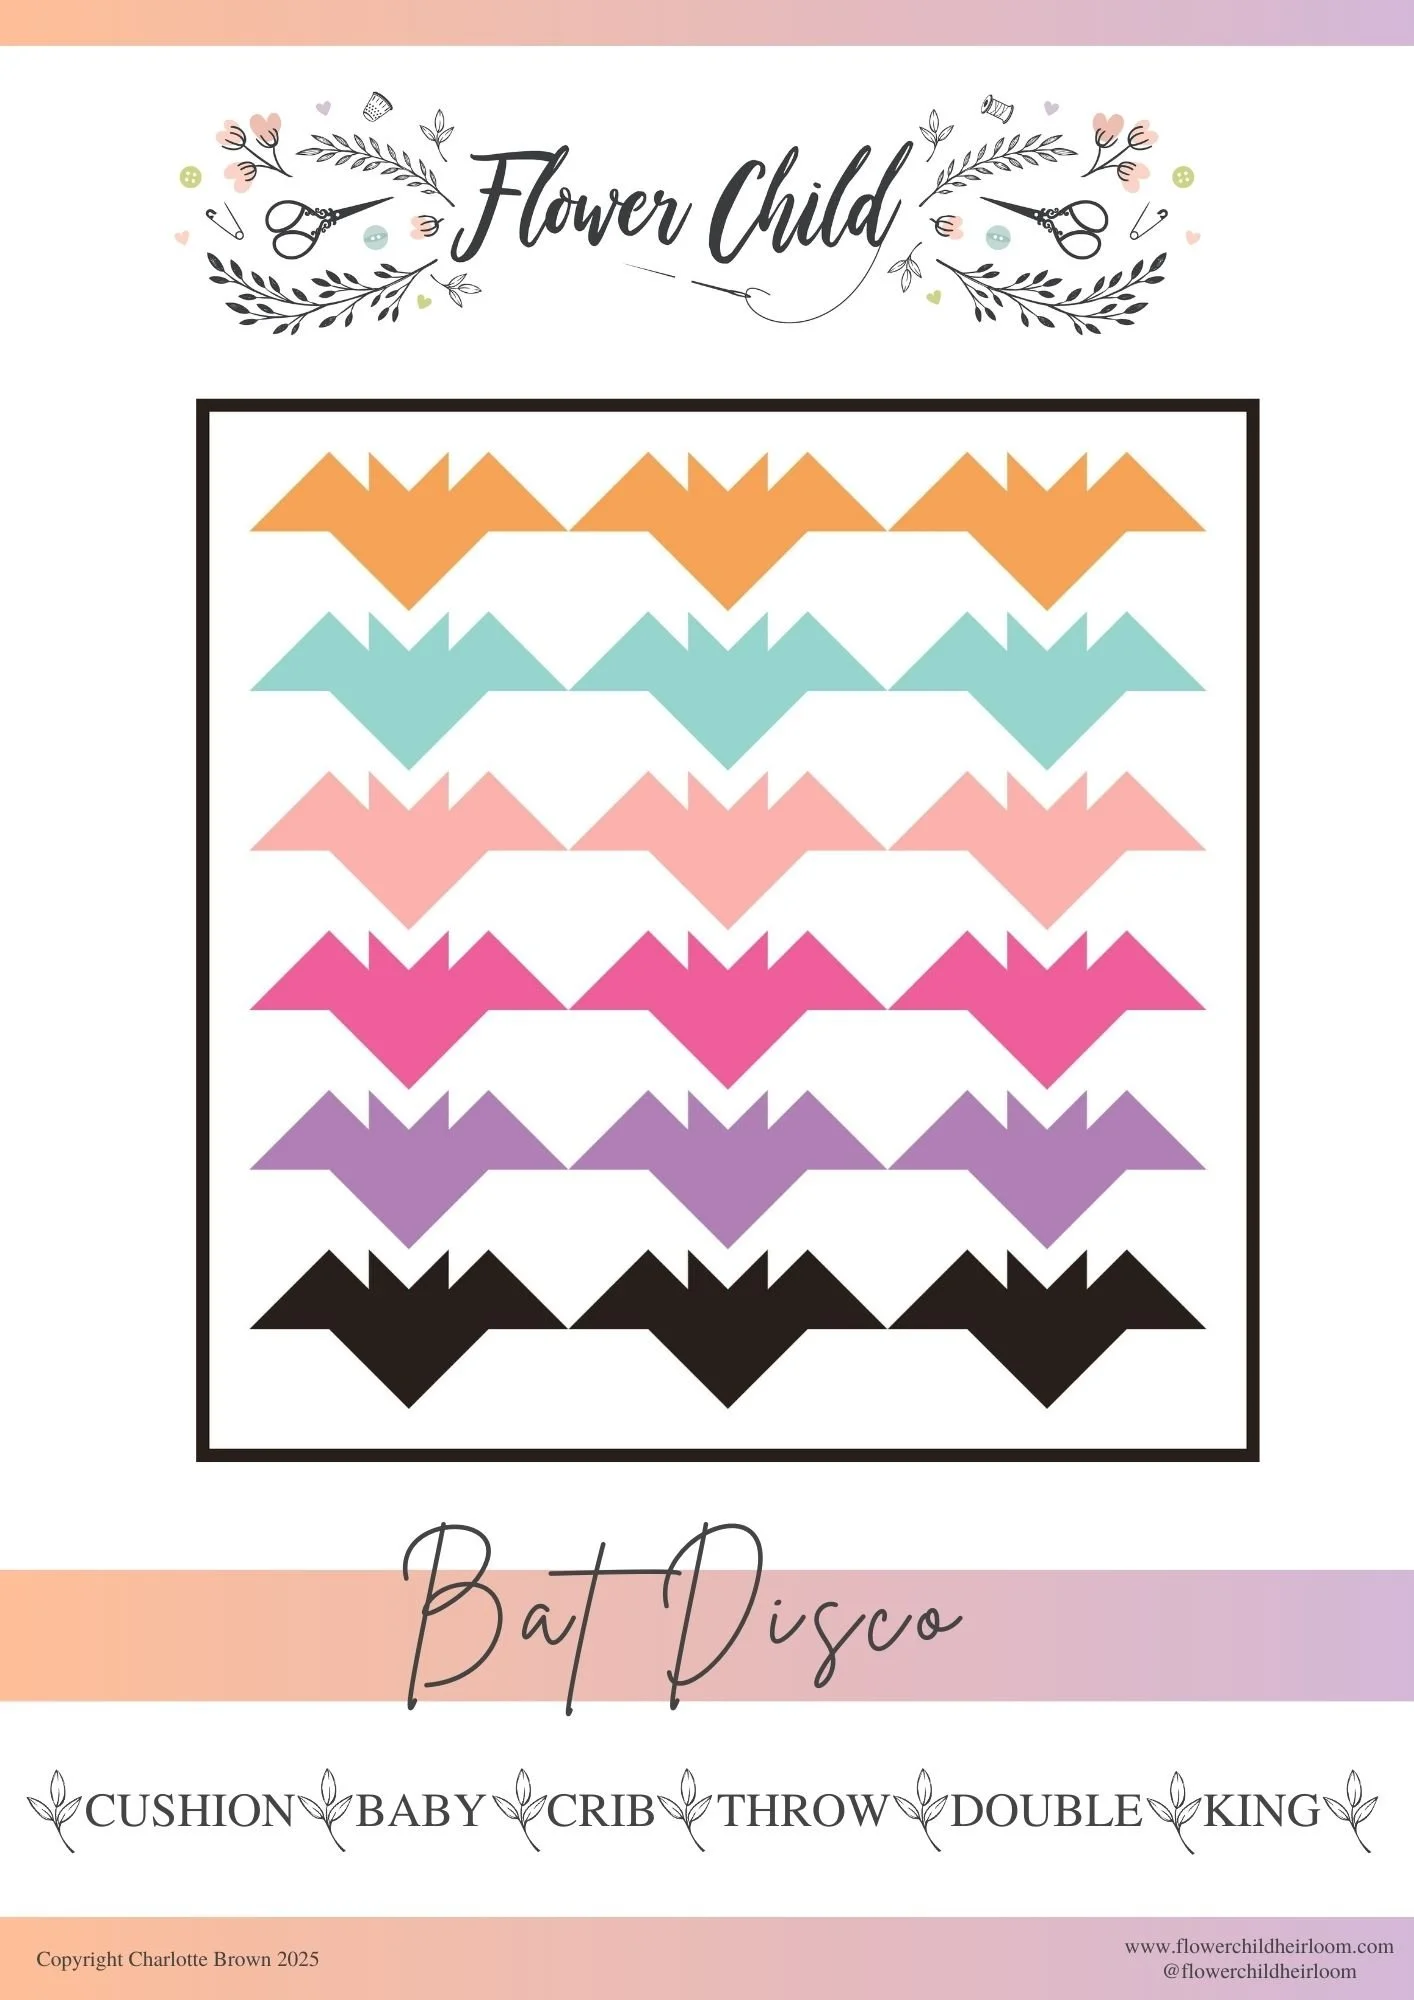
Bat Disco Quilt Along – Week Seven
Bat Disco Quilt Along – Week 7
We made it to the final week — time to finish our quilts!
This week is all about bringing your Bat Disco quilt to life with:
-Quilting
- Adding your binding
- And a bonus touch — little embroidered bat features!
Quilting, Binding & Bonus Embroidery
Can you believe it? We’ve reached the final week of the Bat Disco Quilt Along!
Over the last six weeks, you’ve chosen fabrics, made blocks, stitched your bats, and joined them into a beautiful quilt top. Now it’s time for the finishing touches — quilting, binding, and a little extra magic with some embroidered bat details.
My eerily floating topper ready to be quilted.
Top Tips for Basting Your Quilt Sandwich
Here are some favourite tried-and-true tips:
Press everything first
Give your quilt top and backing a good press. Smooth layers make a huge difference.Tape down your backing
Secure your backing to the floor or table with painter’s tape, right side down. Pull it gently taut — not stretched tight, just smooth.Smooth the batting
Lay your batting over the backing and smooth from the centre outwards.Add your quilt top
Place your quilt top right side up. Again, start smoothing in the middle and glide outward.Pin or spray — your choice
Safety pins: Place them every 3–4" for secure layering. Curved quilting pins help.
Basting spray: Light, even coverage, and press gently with your hands to set. Great for speed but you need good ventilation and a light touch, a little goes a long way
Check for wrinkles
Lift and peek underneath as you go — it’s easier to fix wrinkles now than when you’re quilting.Work in sections
If space is limited, baste one half, roll it, then baste the other half. Totally doable in smaller sewing spaces!Give it a wiggle test
When finished, lift the quilt and gently shake — everything should feel secure and smooth.
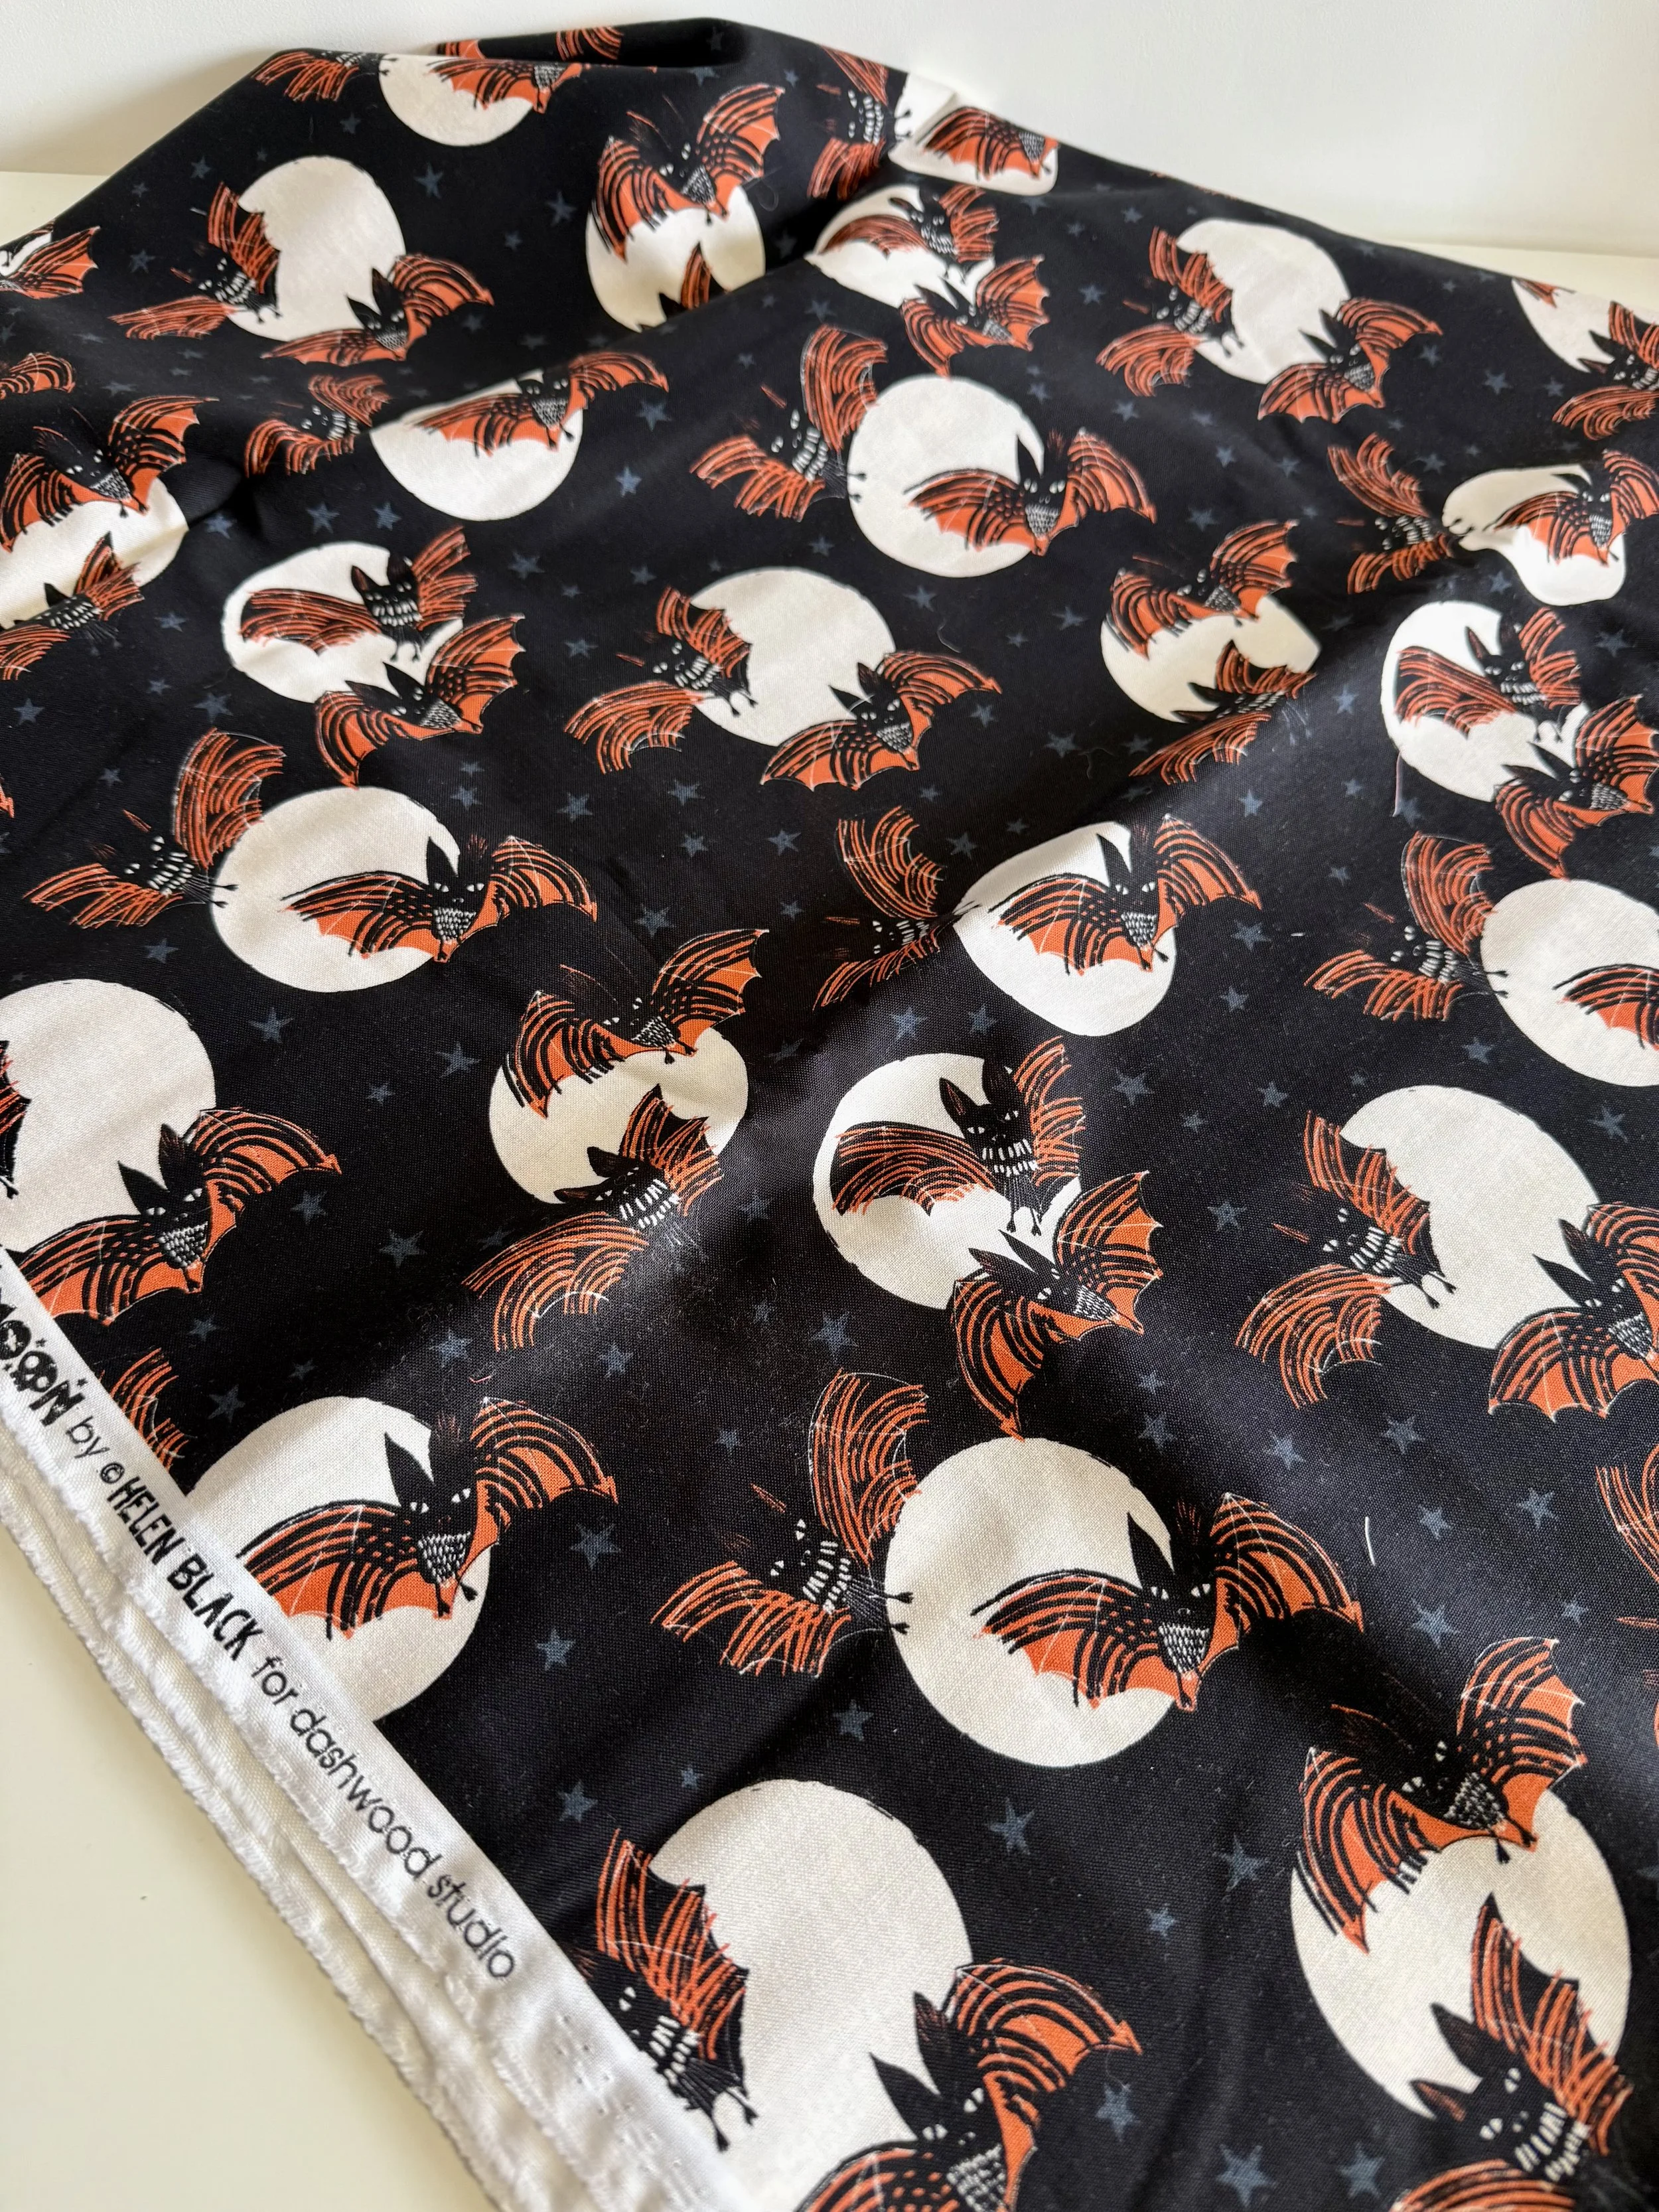
I found this perfect remnant for the backing.
Quilting Ideas
This is where your quilt truly becomes your own! You can keep things simple or go full-on disco glam — it’s completely up to you.
Straight-line quilting – Perfect for beginners and gives a clean, modern look. Try parallel lines with the width of your largest foot or creating diagonal lines across the quilt for movement.
Professional Long Arm Service – There are loads of cool Halloween pantographs out there.
Outline the bats – Stitching just outside each bat shape helps them stand out from the background — like little wings in motion! You could even hand quilt to do this.
Thread – Why not add a playful twist with neon? Or something to blend into the background fabric.

Ghost quilt photo had to be done!
Binding Time
A good binding frames your quilt beautifully:
Choose a contrasting binding if you want to highlight your edges and add a final “pop.”
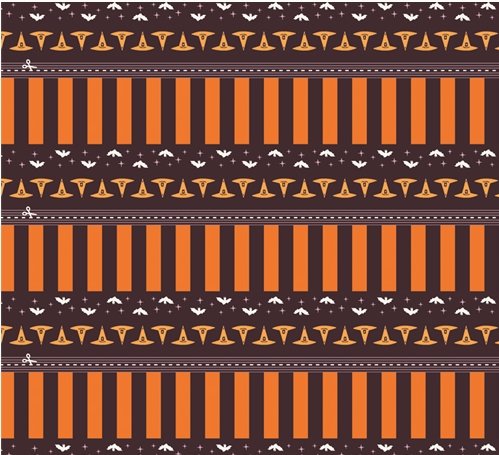
I love a stripy binding in Halloween colours.
Don’t forget to label your quilt — it’s part of your creative story!
Press your quilt well, square up those edges, and take a moment to admire how far you’ve come.
Art Gallery Fabrics 2.5” Edition, has pre-marked binding strips.
Bonus: Embroidered Bat Details
For a little extra fun, try embroidering tiny bat faces or features!
A few small back stitches for eyes, fangs, or little smiles bring such charm to your bats.
Semi-circles become closed eyes to make your bat cute.
Keep it subtle with matching thread or go bold with bright pops of colour.
You can even add tiny stars or sparkles for a touch of disco flair!
This extra step turns your Bat Disco quilt into something uniquely you — handmade personality and all.
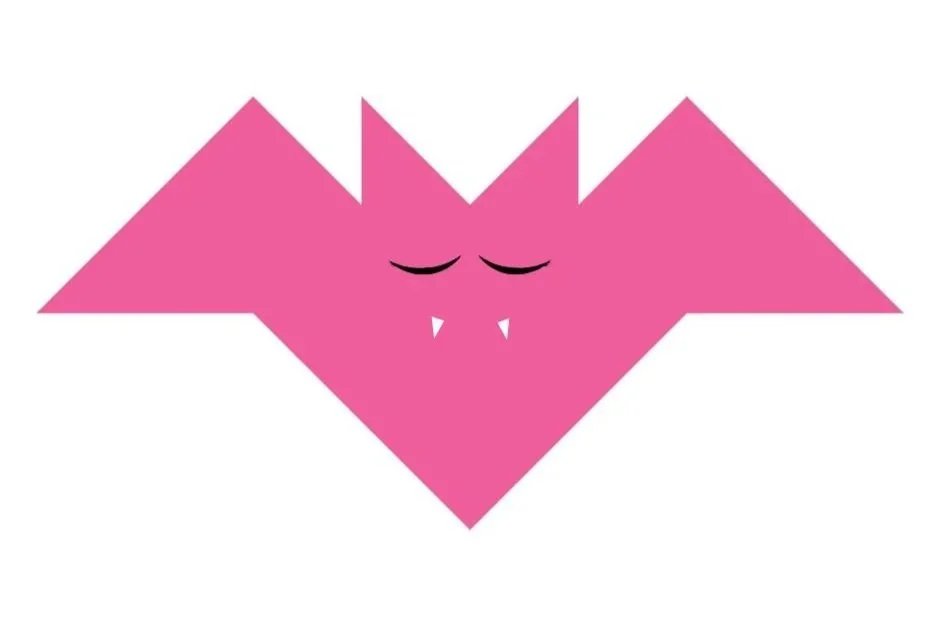
Add eye lashes for a girly bat.
Your Task This Week
Quilt your Bat Disco in your favourite style.
Add your binding.
Optional: add embroidered details for extra personality before you quilt!
Share your finished quilt using #BatDiscoQuiltAlong so we can all celebrate your beautiful finish!
And that’s a wrap on the Bat Disco Quilt Along!
Thank you so much for sewing along, sharing your progress, and filling these weeks with colour, creativity, and community. Your quilts are proof that Halloween can be cute, cosy, and absolutely full of sparkle. This resource will remain here for all newcomers to the pattern.
Until next time — keep sewing, keep shining, and keep dancing under your own little disco ball!
Bat Disco Quilt Along Schedule
Here’s what’s coming up over the next 6 weeks:
Week 1 – Fabric Pull
Show off your spooky (or not-so-spooky!) fabric picks.
Week 2 – Cutting
Get those fabrics prepped and organized.
Week 3 – Half-Square Triangles
Lots of HSTs = lots of disco magic!
Week 4 – Snowball Blocks
Cute, simple, and oh-so-satisfying.
Week 5 – Bat Blocks
Cute, simple, and oh-so-satisfying.
Week 6 – Quilt Top Assembly
Layout + rows = Bat Disco starting to shine!
Week 7 – Quilting & Finish
Quilting, binding, and celebrating your Bat Disco!
Use #BatDiscoQuiltAlong so we can all follow along and cheer you on!
🦇Bat Fact!
Bats aren’t blind at all — in fact, many species can see just fine in daylight! They rely on echolocation at night not because they can’t see, but because it helps them “see” with sound in complete darkness.
Inspired by my favourite time of the year and decorating my home for my family, I created this super beginner friendly Halloween quilt. These cute bats can be made in any colours, monochrome and you could even add embroidery onto their faces. Have lots of spooky fun!
I always go above and beyond on my patterns including detailed step-by-step instructions and tips across this 16 page quilt pattern.
The introductory offer ends next Monday 8th September at 8pm GMT.
The QAL starts on 4th September and everyone who has purchased the pattern. Please let me know in your purchase notes if you wish to sign up to the free emails.

Bat Disco Quilt Along – Week Six
Bat Disco Quilt Along – Week 6
This week we’re laying out our bat blocks and assembling the quilt top!
It’s so exciting to see all those little bats come together and start flying in formation! Which layout will you choose? I can’t wait to see!
Layout & Quilt Top Assembly
Welcome back to the Bat Disco Quilt Along! We’re in Week Six, and this is where everything comes together — literally!
You’ve made your bat blocks, pressed them to perfection, and now it’s time to start laying out your quilt top. This is the stage where the whole Bat Disco design really begins to dance (soz) — bats in formation, rhythm, and color, coming together in one big swoop of spooky-cute fun.
Multicoloured version, with a single colour per row.
Laying Out Your Bat Disco Quilt
Find your space
A design wall, the floor, or even a big table will work — anywhere you can see your blocks spread out clearly.Start with the bats
Lay out all your finished bat blocks first, following the pattern layout as your guide. This helps you visualise how your colours and prints play across the quilt.Balance your colours
Step back and take a look from a distance. Make sure your colours (or prints) feel balanced — no one corner too dark or too light.Snap a quick photo
Take a photo on your phone before you start sewing — it’s a lifesaver if a block gets turned or mixed up while assembling!Add border strips pieces
Once your bats are in place, add the border to them. This is where the pattern really comes to life, giving your bats space to “fly” and will set off your binding when you get to that stage.
This monochrome version really stands out with a contrasting binding.
Tips for Success
Work one row at a time — (when I say row I mean a bat block row) join your bat blocks in rows according to the version you have chosen.
Press seams carefully, alternating direction between rows for nested seams and flatter joins.
Once all bat block rows are ready, sew them together to complete your quilt top.
Take your time — this is the big moment! Watching your Bat Disco quilt top come together is pure sewing joy. Use plenty of wonder clips or pins at seam joins so keep sharp.

Another monochrome idea in striking black and white.
My Progress
Literally as I type this I am debating whether to do rows of lighter fabrics to dark, dark to light or to completely jumble up the prints? Check back next week or follow me on Instagram to see what I do.

How about this bonus layout?! You could even just have one bat round the other way in a contrast colour.
Your Task This Week
Lay out your bat blocks.
Adjust your colours and placement until you’re happy with the balance.
Sew your rows together and press your finished quilt top.
Share your layout or completed top with #BatDiscoQuiltAlong — we can’t wait to see your bats take flight!
Next week we’ll dive into quilting, binding, and a fun little bonus — adding embroidered bat details! Get ready to finish your Bat Disco quilt with flair and a touch of handmade magic.
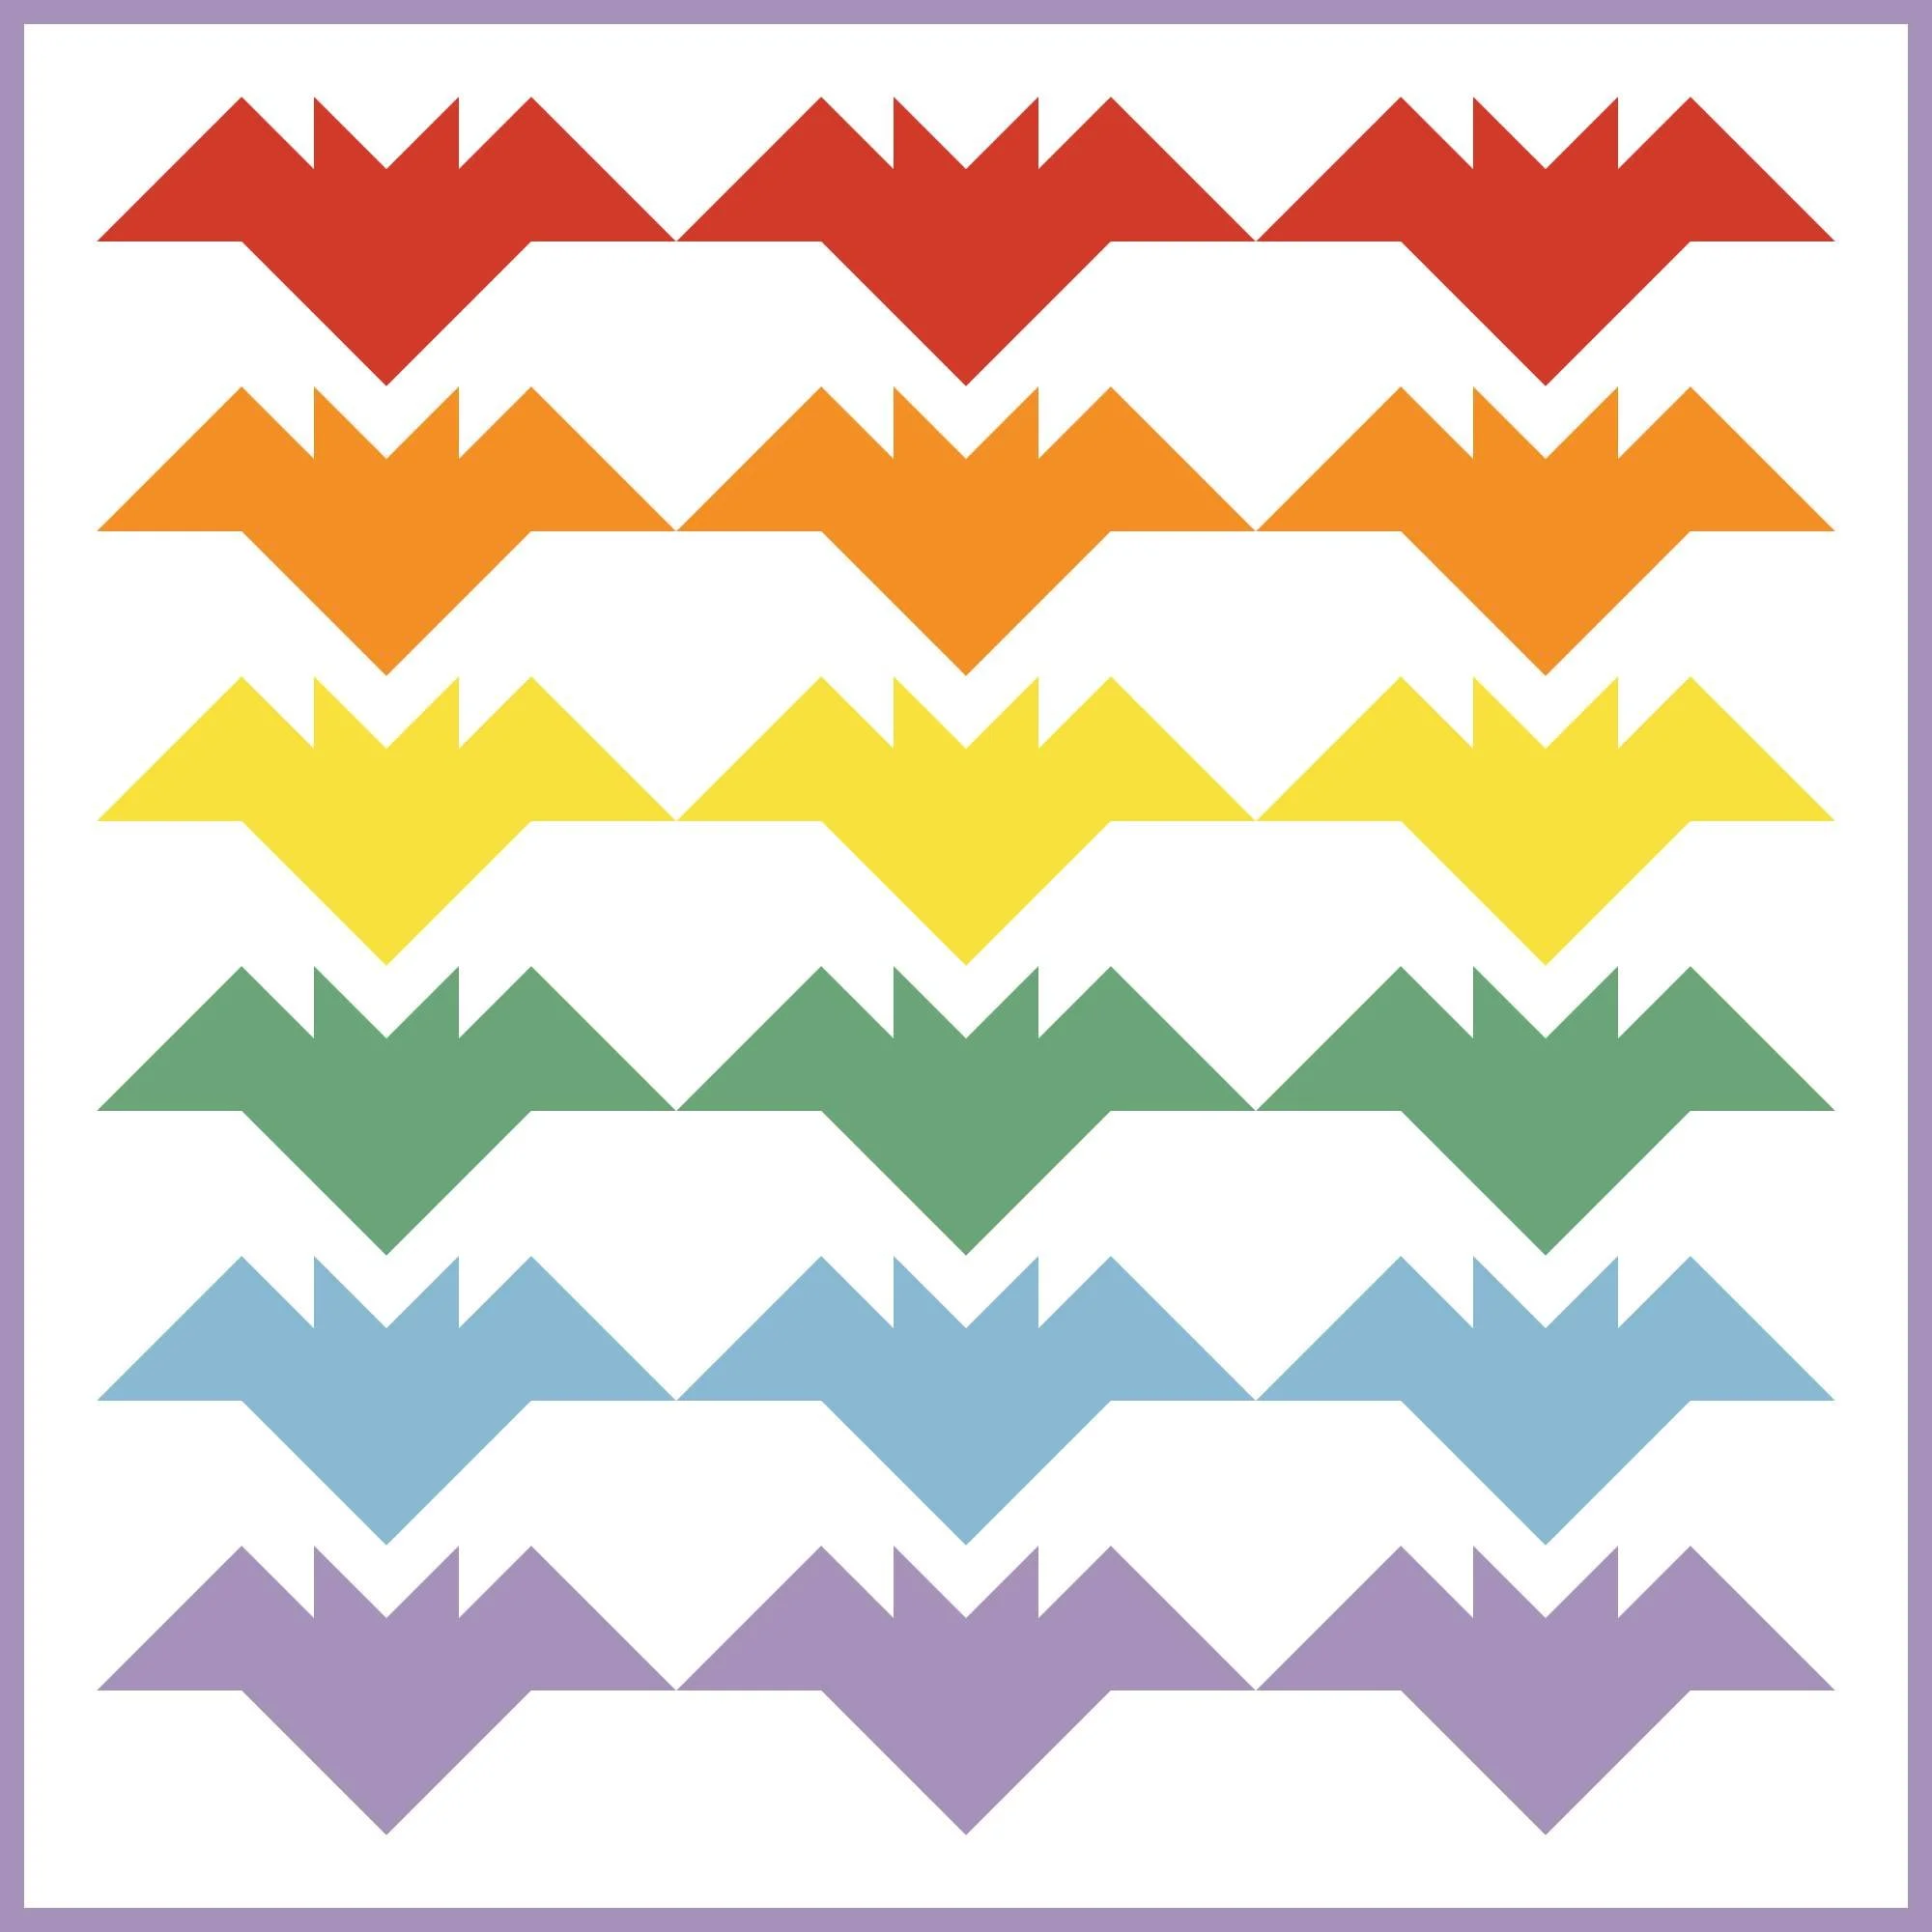
It wouldn’t be a Flower Child design without a rainbow version.
Bat Disco Quilt Along Schedule
Here’s what’s coming up over the next 6 weeks:
Week 1 – Fabric Pull
Show off your spooky (or not-so-spooky!) fabric picks.
Week 2 – Cutting
Get those fabrics prepped and organized.
Week 3 – Half-Square Triangles
Lots of HSTs = lots of disco magic!
Week 4 – Snowball Blocks
Cute, simple, and oh-so-satisfying.
Week 5 – Bat Blocks
Cute, simple, and oh-so-satisfying.
Week 6 – Quilt Top Assembly
Layout + rows = Bat Disco starting to shine!
Week 7 – Quilting & Finish
Quilting, binding, and celebrating your Bat Disco!
Use #BatDiscoQuiltAlong so we can all follow along and cheer you on!
🦇Bat Fact!
Bats often hang upside down because it’s the easiest way for them to take off into flight — their little legs aren’t built for running, but they’re perfect for hanging out!
Inspired by my favourite time of the year and decorating my home for my family, I created this super beginner friendly Halloween quilt. These cute bats can be made in any colours, monochrome and you could even add embroidery onto their faces. Have lots of spooky fun!
I always go above and beyond on my patterns including detailed step-by-step instructions and tips across this 16 page quilt pattern.
The introductory offer ends next Monday 8th September at 8pm GMT.
The QAL starts on 4th September and everyone who has purchased the pattern. Please let me know in your purchase notes if you wish to sign up to the free emails.

Bat Disco Quilt Along – Week Five
Bat Disco Quilt Along – Week 5
It’s time to bring the pieces together and make some bat blocks!
This is the week when Bat Disco really starts to come alive — those half-square triangles and snowballs you’ve been sewing become the cutest little bats!
Making the Bat Blocks
Welcome back to the Bat Disco Quilt Along! We’re officially in Week Five, and this is where the magic starts to happen — we’re making our bat blocks! I have decided to add an extra week to our QAL so it gives you a chance to focus on this stage before we rush into layouts.
Over the last few weeks, you’ve built up your pieces: half-square triangles, snowball blocks, and all those carefully labelled background and accent cuts. Now it’s time to bring them together into your bats!
This is where I left you last week making bat ear. These two now square pieces form the top centre of the block.
Building Your Bat Blocks
Lay out your pieces – Each bat block is made up of a mix of half-square triangles, snowballs, and background squares. Take a moment to lay them out according to the pattern diagram so you can see your bat take shape before you sew.
Sew in sections – Start by joining the four squares of the top row, then the four squares of the bottom row, press and bring the two halves together to complete the bat.
Mind your direction – Check that all your triangles are facing the right way before you sew — it’s easy for one sneaky piece to flip!
Press with care – Press seams open or to one side, whichever gives you the flattest result. I press my seams in one direction on the top row and the opposite direction on the bottom row to nest the seams. A good press really makes those bat wings stand out.
You need the medium squares now to put on the bottom comers of the bat block.
Tips for Success
Batch sew – Make all your bats at once, or work colour by colour. Find your rhythm!
Chain piecing – If you’re making multiple bats, chain piecing can really speed things up.
Keep it organised – I put all the pieces for one block together with a wonder clip.
Line up your points first and pin or clip and then sew together. If your points don’t line up perfectly, press the seam allowance in the opposite direction and it may make all the difference.
Step back and admire – Once you finish a few bats, lay them out together — it’s so rewarding to see them take shape.

Follow the layout in your pattern to bring the bats to life.
My Progress
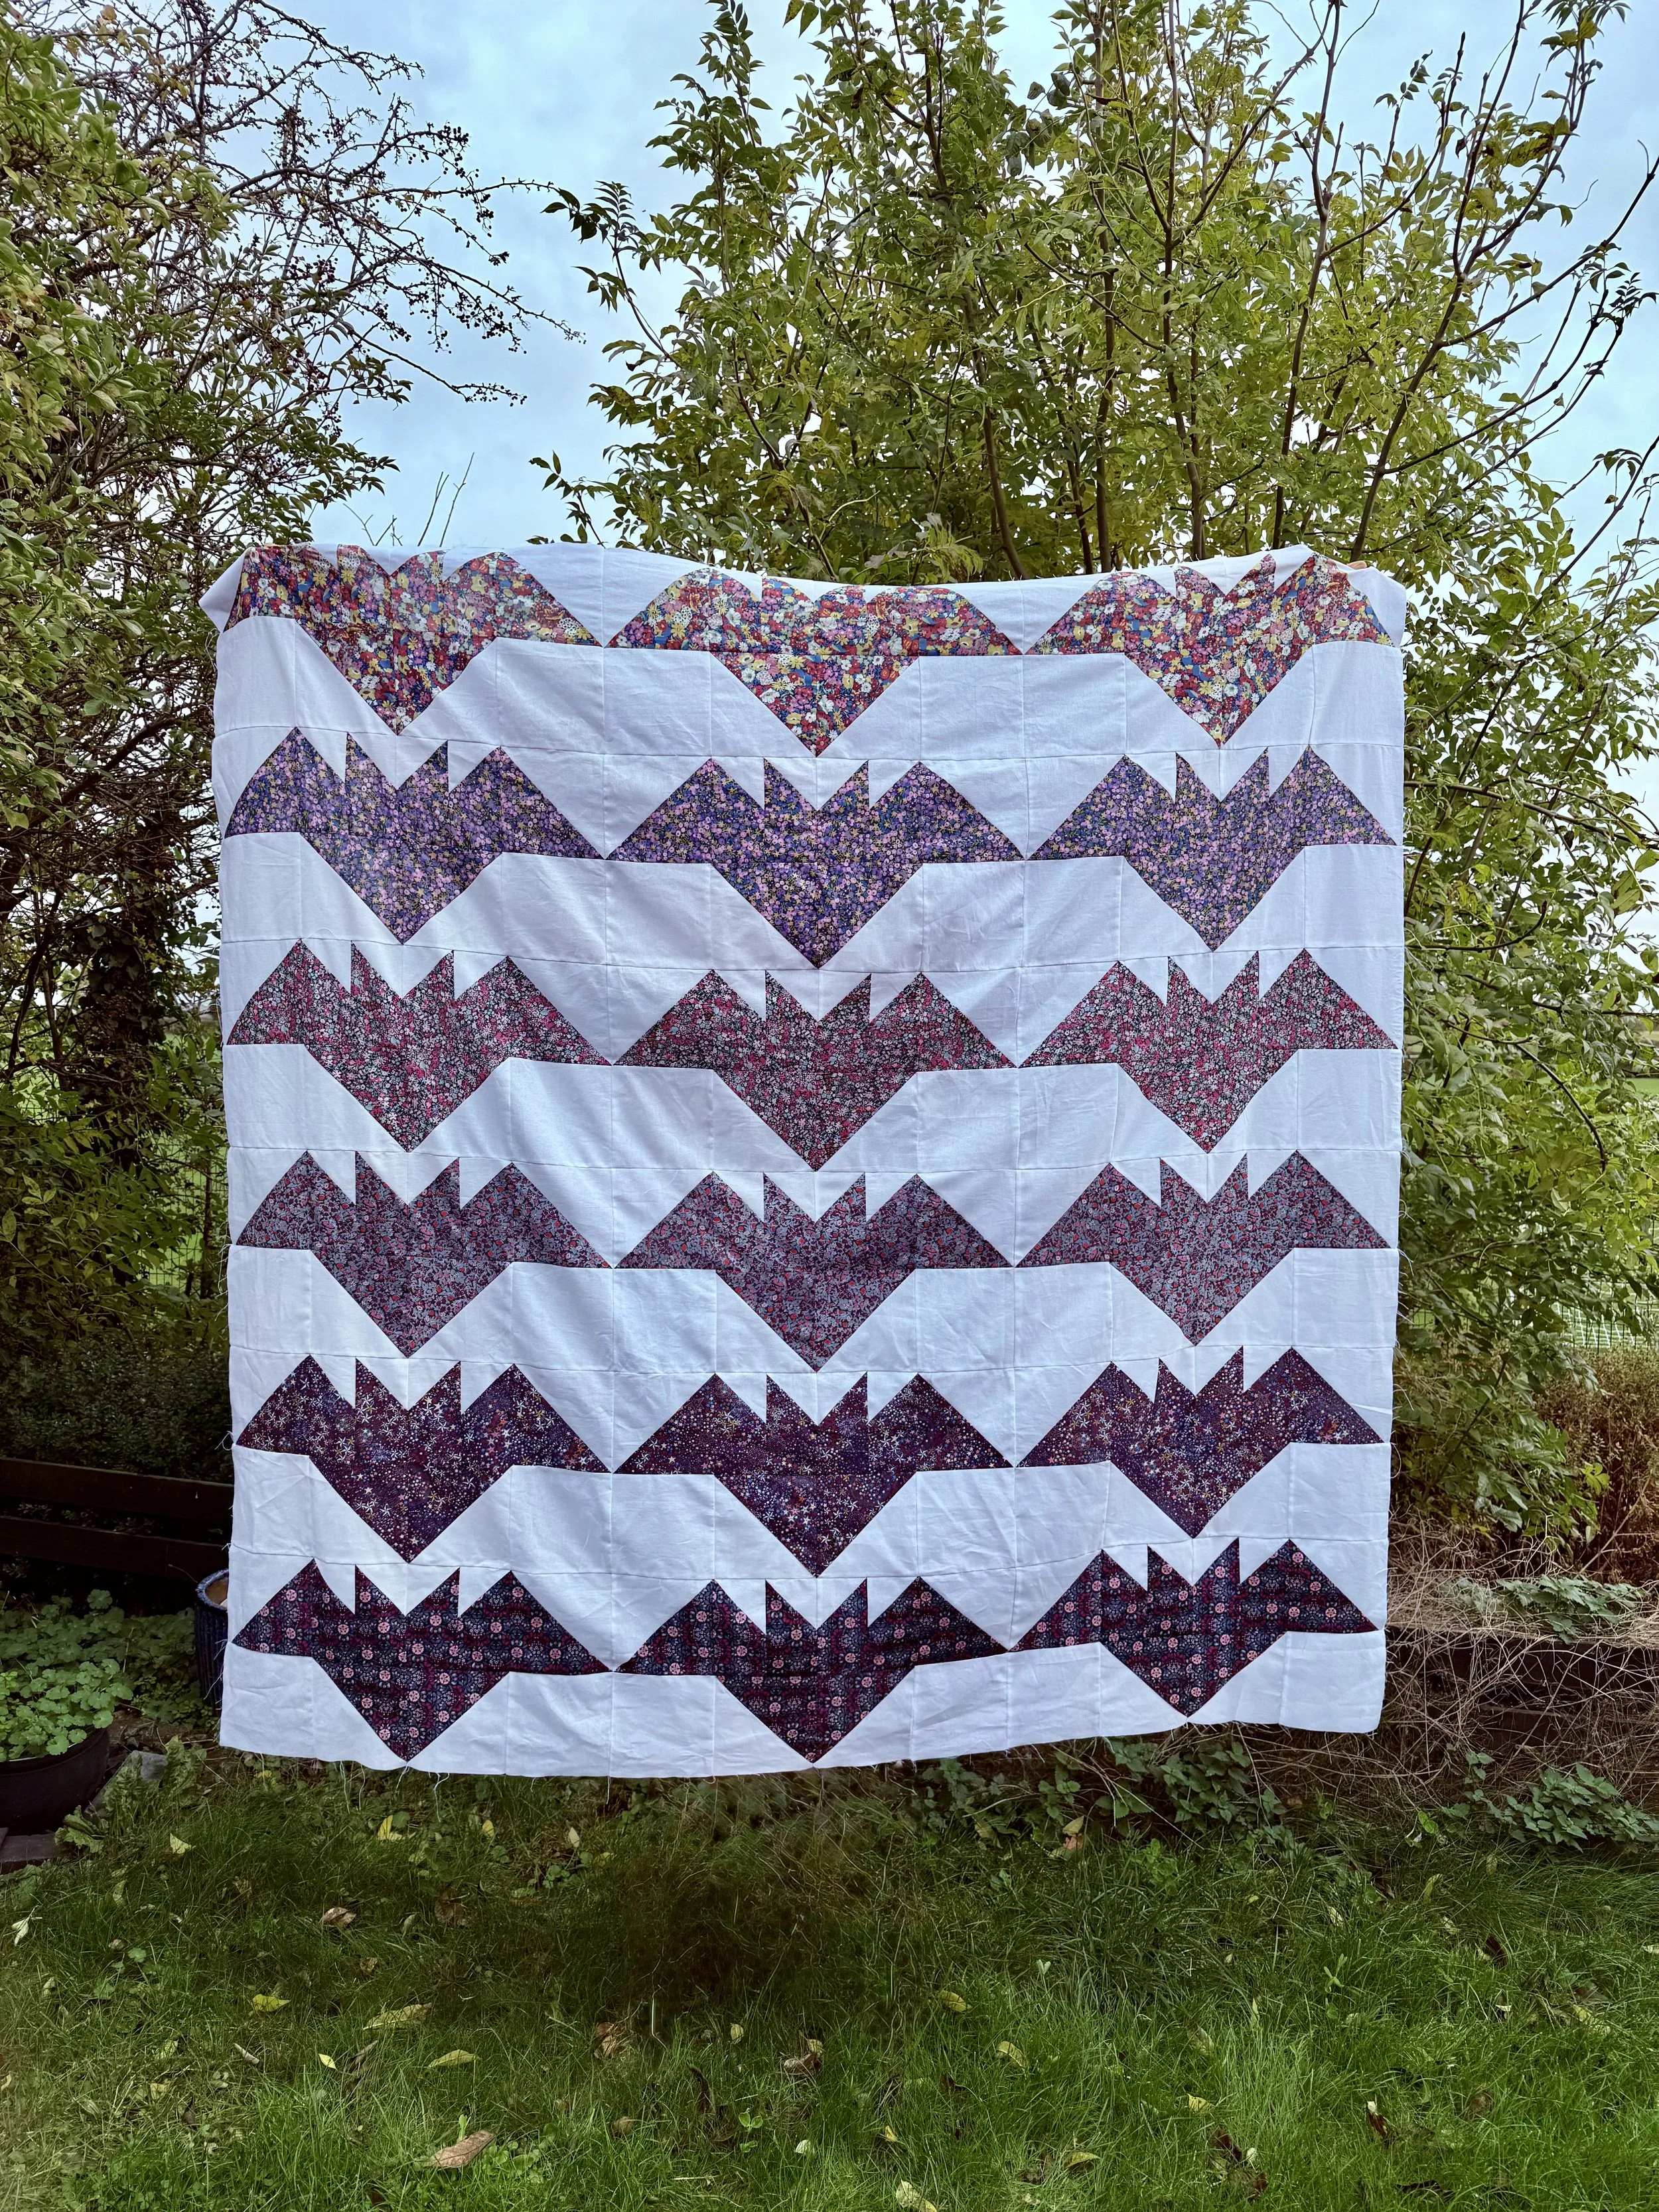
My Liberty version has a darker, more mysterious, cosy autumn charm than I usually work with in the brighter prints. I like the contrast of of the prints with the white Essex Linen to help them pop.
Don’t forget to admire your handy work.
Your Task This Week
Sew your bat blocks together.
Press them neatly and admire those little wings!
Share your bat block progress (even one finished bat counts!) with #BatDiscoQuiltAlong so we can all cheer you on.
Next week — all things layout and adding borders.
Bat Disco Quilt Along Schedule
Here’s what’s coming up over the next 6 weeks:
Week 1 – Fabric Pull
Show off your spooky (or not-so-spooky!) fabric picks.
Week 2 – Cutting
Get those fabrics prepped and organized.
Week 3 – Half-Square Triangles
Lots of HSTs = lots of disco magic!
Week 4 – Snowball Blocks
Cute, simple, and oh-so-satisfying.
Week 5 – Bat Blocks
Cute, simple, and oh-so-satisfying.
Week 6 – Quilt Top Assembly
Layout + rows = Bat Disco starting to shine!
Week 7 – Quilting & Finish
Quilting, binding, and celebrating your Bat Disco!
Use #BatDiscoQuiltAlong so we can all follow along and cheer you on!
🦇Bat Fact!
Bats aren’t spooky at all — they’re social creatures that often live in large colonies and help pollinate fruit like bananas and mangoes. So really, they’re party animals at heart!
Inspired by my favourite time of the year and decorating my home for my family, I created this super beginner friendly Halloween quilt. These cute bats can be made in any colours, monochrome and you could even add embroidery onto their faces. Have lots of spooky fun!
I always go above and beyond on my patterns including detailed step-by-step instructions and tips across this 16 page quilt pattern.
The introductory offer ends next Monday 8th September at 8pm GMT.
The QAL starts on 4th September and everyone who has purchased the pattern. Please let me know in your purchase notes if you wish to sign up to the free emails.

Bat Disco Quilt Along - Week Four
Bat Disco Quilt Along – Week 4
This week we’re making snowball blocks aka bat ear blocks — the second building block of Bat Disco! This is where you start to see our little bat friends emerge.
Snowball Blocks aka Bat Ear Blocks
Welcome back to the Bat Disco Quilt Along! We’ve already tackled half-square triangles, and this week we’re jumping into our second building block: the snowball!
Snowballing is when you '“round off” a corner in quilting terms. In other words you create triangles of contrasting fabric at the corner of squares or in this case rectangles.
This is the goal for each bat block.
You need the small squares for your snowballed rectangles.
How to Make a Snowball Block
Here’s a quick rundown (the pattern has all the detailed measurements):
Using a rectangles of accent fabric, place a small square of background fabric directly on top, aligned with the short side of the rectangle.
Mark the diagonal across each small square.
Sew on the marked line.
For a bonus HST sew 1/2” away from the line you have just stitched on the top side.
Cut between the stich lines leaving a seam allowance for the snowballed rectangle and your bonus HST.
Set you bonus HST aside for a future project (I’ll be showing you mini HST suggestions later).
Press the seam to the dark side.
Stitch on the line for a snowballed block.

For a bonus HST and to avoid waste stich 1/2” up from your marked line.

Cut between the lines so there is a seam allowance on both sides. Set the bonus HST for a future project.

Press to the dark side.
Each bat block needs 4 snowballed rectangles, 2 to the left and two to the right.

Finished snowballed rectangles for one bat block.
Tips for Crisp Snowballs
Mark carefully – A clear diagonal line makes all the difference. A hera marker, chalk, or fine pencil works great.
Avoid Chewing - Use a scrap piece of fabric to run ahead in your machine so fine corners don’t get sucked into the machine.
Chain piece – Sew one corner on each block at a time, then rotate and repeat for the next corners.
Ear Joininging - When sewing the two left or two right rectangles together, align from the snowballed corner down.
Don’t skip trimming – Snip away those excess dog ears or if the the bottoms of the accent fabric do not quite align.
Press well – A hot iron helps those corners lay flat for easier assembly later.
Sew the left ear and the right ear rectangles together. Keep in fabric piles until we are ready to assemble the whole bat block.
My Progress
Keeping all my pieces organised in piles with wonder clips helps me stay organised so I can bring all the pieces for one bat block together.
Your Task This Week
Sew up your snowball blocks.
Trim and press them for a neat finish.
Share your blocks (or even your trimmings pile!) with the hashtag #BatDiscoQuiltAlong so we can all admire your progress.
Next week, the real magic happens — we’ll start assembling the quilt top and watching Bat Disco come to life.
Bat Disco Quilt Along Schedule
Here’s what’s coming up over the next 6 weeks:
Week 1 – Fabric Pull
Show off your spooky (or not-so-spooky!) fabric picks.
Week 2 – Cutting
Get those fabrics prepped and organized.
Week 3 – Half-Square Triangles
Lots of HSTs = lots of disco magic!
Week 4 – Snowball Blocks
Cute, simple, and oh-so-satisfying.
Week 5 – Quilt Top Assembly
Layout + rows = Bat Disco starting to shine!
Week 6 – Quilting & Finish
Quilting, binding, and celebrating your Bat Disco!
Use #BatDiscoQuiltAlong so we can all follow along and cheer you on!
🦇Bat Fact!
In old European folklore, bats became linked with Halloween because they were often seen swooping around bonfires during autumn festivals, chasing the insects drawn to the flames.
Inspired by my favourite time of the year and decorating my home for my family, I created this super beginner friendly Halloween quilt. These cute bats can be made in any colours, monochrome and you could even add embroidery onto their faces. Have lots of spooky fun!
I always go above and beyond on my patterns including detailed step-by-step instructions and tips across this 16 page quilt pattern.
The introductory offer ends next Monday 8th September at 8pm GMT.
The QAL starts on 4th September and everyone who has purchased the pattern. Please let me know in your purchase notes if you wish to sign up to the free emails.

Bat Disco Quilt Along - Week Three
Bat Disco Quilt Along – Week 3
This week we’re making half-square triangles — the first building block of Bat Disco! They’re simple, satisfying, and can get into a groove making them.
Half-Square Triangles
Welcome back to the Bat Disco Quilt Along! We’ve chosen our fabrics, we’ve cut our pieces, and now it’s time to start sewing. This week, we’re diving into our very first building block: the half-square triangle (HST).
HSTs are the backbone of the Bat Disco design — they create movement, sharp lines, and the silhouette of the bats. If you’ve never made them before, don’t worry: they’re simple, satisfying, and a great skill to master.

All my prints ready to trim.
Making Half-Square Triangles
Here’s a quick reminder of the steps (the pattern gives you full details, of course):
Pair your squares – You’ll match your background squares with your accent squares.
Mark the diagonal – Draw a line corner-to-corner on the back of the lighter fabric.
Sew ¼” on both sides of the line.
Cut apart on the marked line.
Press open (I like pressing to the darker fabric, but pressing open works too!).
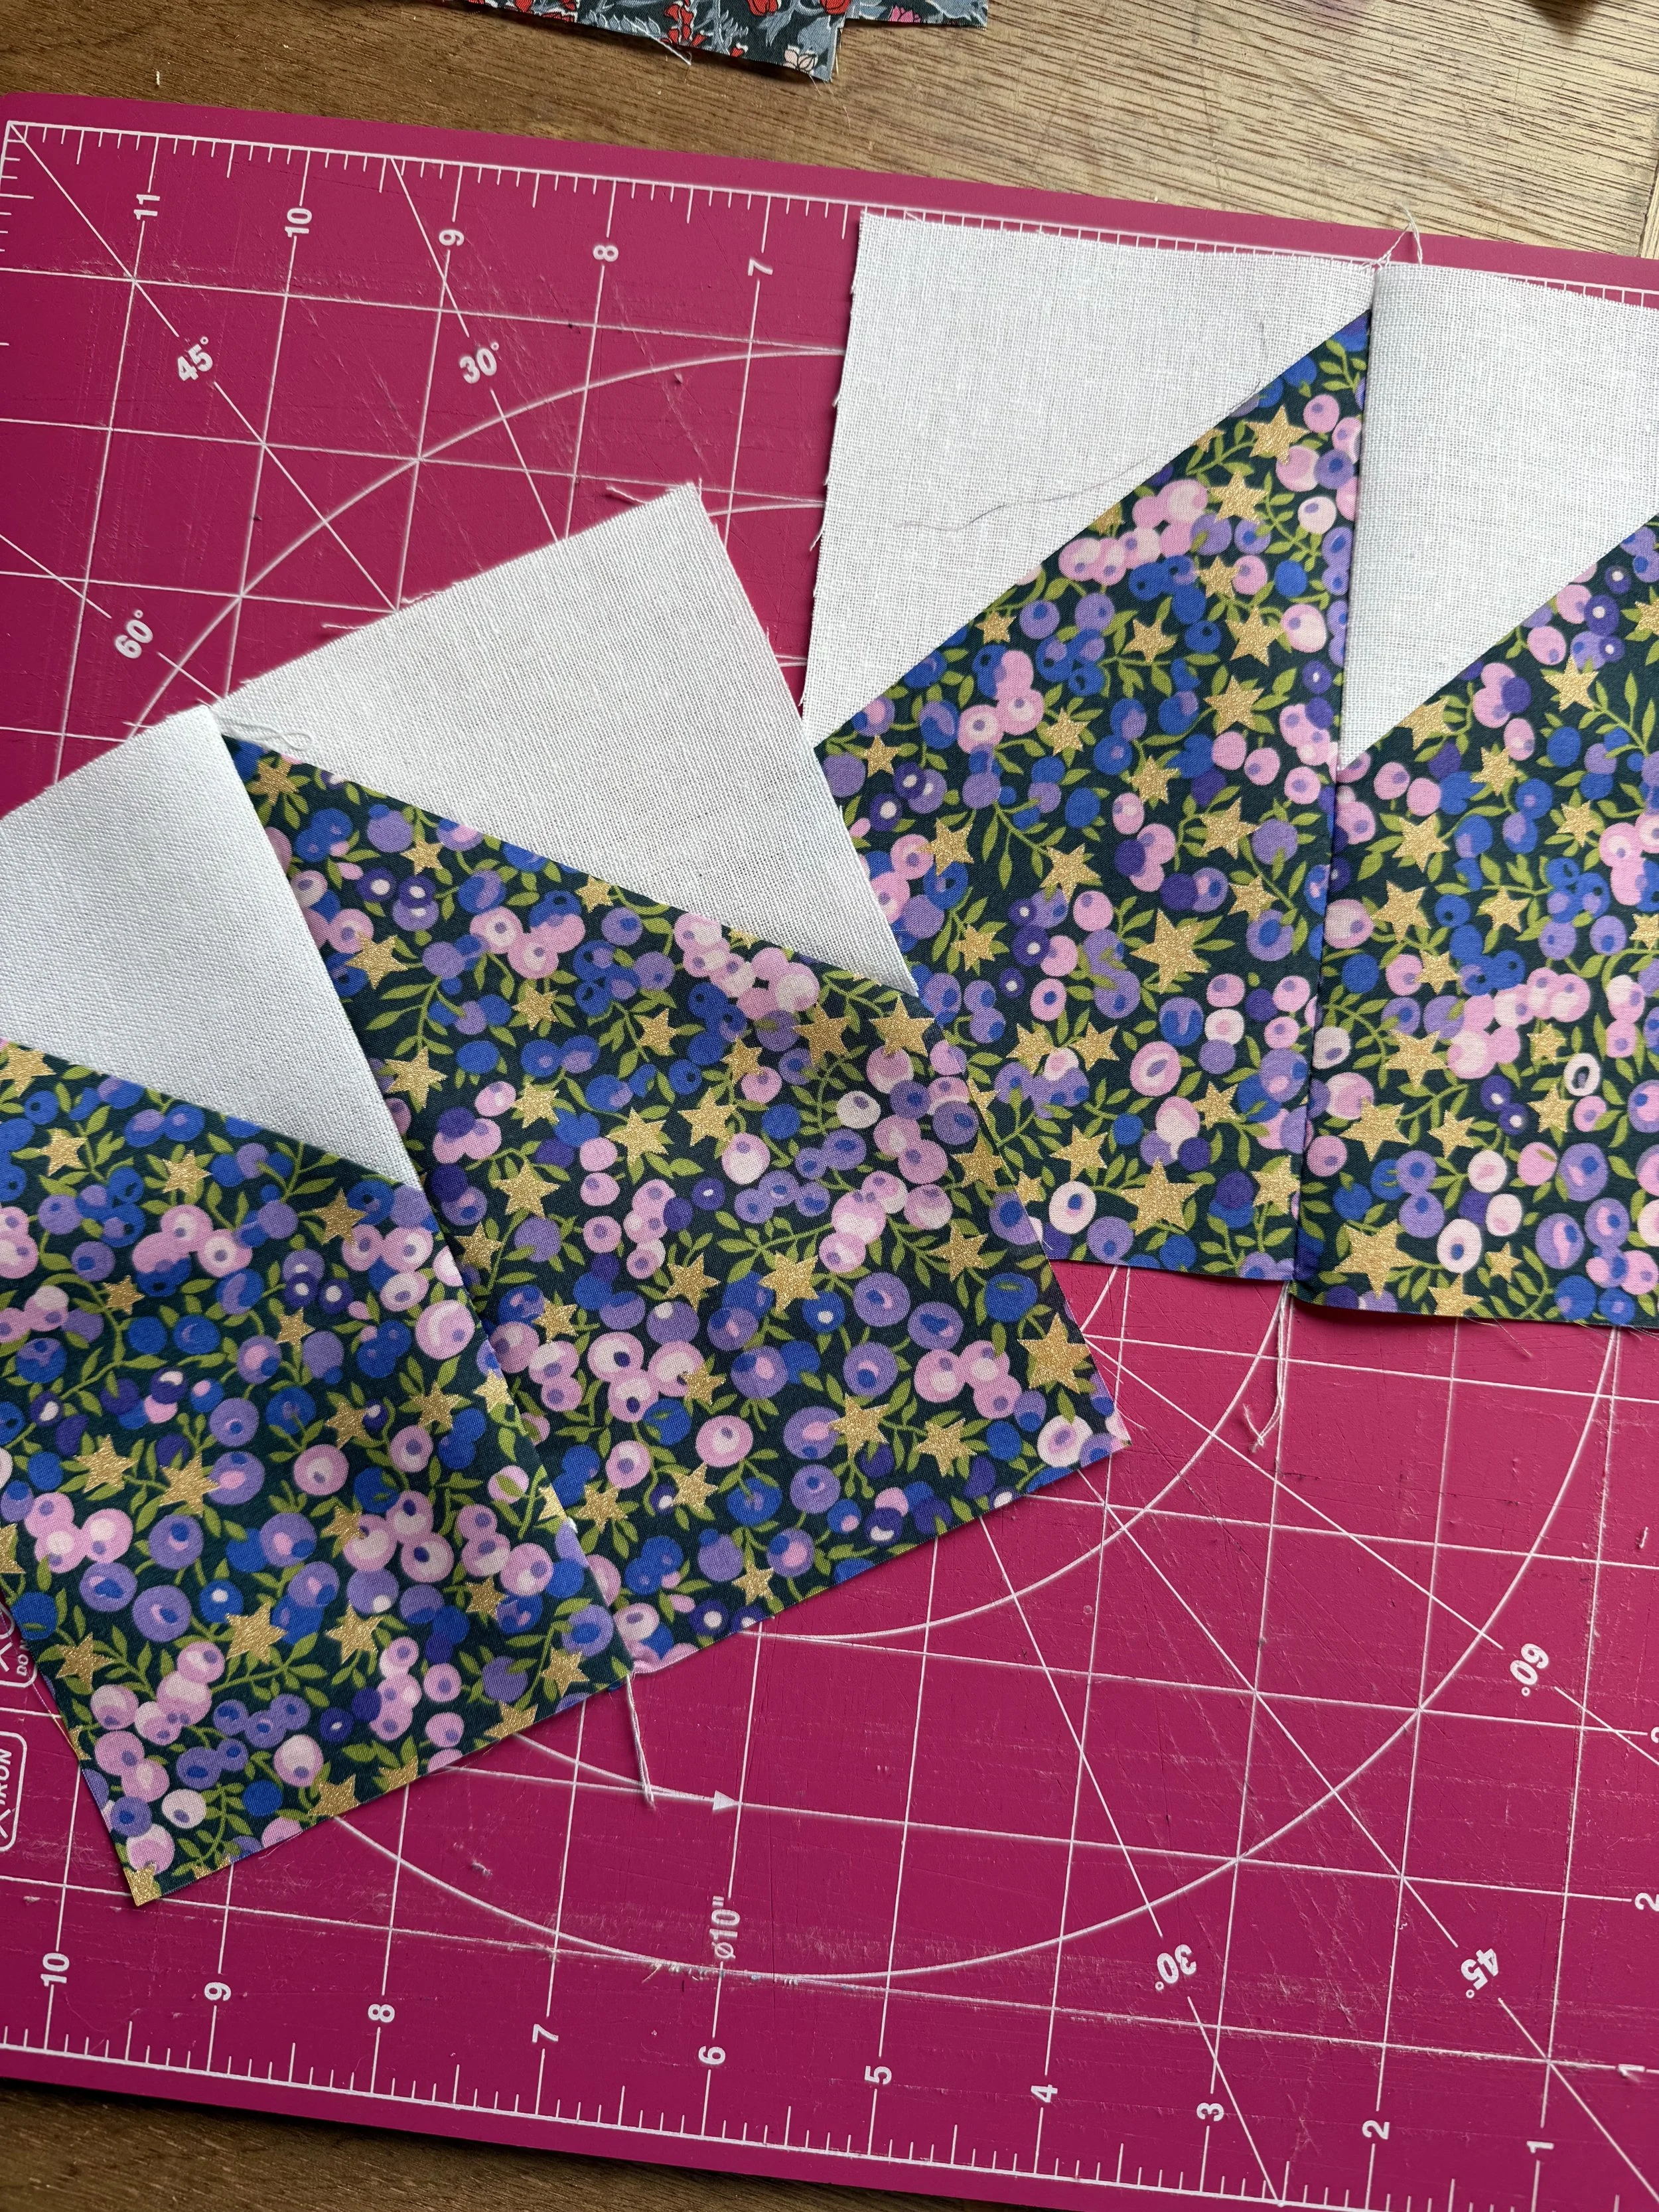
You need the large squares for your HSTs.

Draw a line horizontally & sew 1/4” each side of the line.

I trim my HSTs before I press them open to save cuts..
Tips for Neat & Accurate HSTs
Chain piece – Sew a whole batch at once for speed and rhythm.
Trim for perfection – Even if it feels like an extra step, trimming your HSTs to size will make your quilt top so much easier to assemble.
Starch if you like – A light spritz of spray starch can help tame bias edges and keep everything crisp or just simply steam ironing.
Square them up – Any quilting ruler will help you square, you don’t need a fancy one. A rotating mat is handy too.
Keep up the moves - Good tunes and substance will help you keep your HST trimming groove.
Different Versions
For the six colour version, you will have six piles of HSTs in bright vibrant colours, tirm a colour at a time to keep the momentum going.
For my Liberty version, I’ve arranged the six floral piles by print and trim in batches.
For the monochrome version, you will have a big stack of two tone HSTs to trim up, I do mine in little batches and have a break inbetween.

A finished HST!
Your Task This Week
Sew up your half-square triangles.
Trim them to size according to the cutting chart in the pattern for your chosen size.
Share your stacks (or your trimmings pile!) with the hashtag #BatDiscoQuiltAlong so we can admire your progress.
Next week, we’ll tackle our second block: the snowball to create super cute bat ears.
Bat Disco Quilt Along Schedule
Here’s what’s coming up over the next 6 weeks:
Week 1 – Fabric Pull
Show off your spooky (or not-so-spooky!) fabric picks.
Week 2 – Cutting
Get those fabrics prepped and organized.
Week 3 – Half-Square Triangles
Lots of HSTs = lots of disco magic!
Week 4 – Snowball Blocks
Cute, simple, and oh-so-satisfying.
Week 5 – Quilt Top Assembly
Layout + rows = Bat Disco starting to shine!
Week 6 – Quilting & Finish
Quilting, binding, and celebrating your Bat Disco!
Use #BatDiscoQuiltAlong so we can all follow along and cheer you on!
🦇 Bat Fact!
Far from being spooky, bats are heroes of the night sky — a single bat can eat thousands of insects in one night, making them nature’s pest control experts.
Inspired by my favourite time of the year and decorating my home for my family, I created this super beginner friendly Halloween quilt. These cute bats can be made in any colours, monochrome and you could even add embroidery onto their faces. Have lots of spooky fun!
I always go above and beyond on my patterns including detailed step-by-step instructions and tips across this 16 page quilt pattern.
The introductory offer ends next Monday 8th September at 8pm GMT.
The QAL starts on 4th September and everyone who has purchased the pattern. Please let me know in your purchase notes if you wish to sign up to the free emails.

Bat Disco Quilt Along - Week Two
Week Two of the Bat Disco Quilt Along is here!
This week we’re cutting our fabrics and getting everything organised. By the end, you’ll have three sizes of background squares (small, medium, and large) plus two sizes of accent pieces (squares and rectangles) — all neatly labeled and ready for sewing.
Cutting Your Fabrics
Welcome back to the Bat Disco Quilt Along! Last week was all about fabric pulls, and I loved seeing all the creative palettes you’ve been sharing. From bold solids to scrappy stashes and cute Halloween vibes — every version of Bat Disco is going to be fang-tastic. I can only apologise🖤
This week, it’s time to cut our fabrics and get everything ready for sewing. Future you will be glad you took the time to cut carefully and keep things organised.
Accent fabric is cut in two pieces. squares & rectangles.
Tips for Cutting Success
Press before you cut
Give your fabrics a good press with a hot iron. It makes for smoother cutting and more accurate pieces. I don’t typically starch, just a mist of water works for me.Fresh blade, sharp cuts
If your rotary cutter has been struggling, this is the time to swap in a fresh blade. Everytime I change my blade I wonder why I hadn’t done it sooner.Follow the pattern closely
The Bat Disco pattern has cutting charts for you to follow so have this open on a tablet or printed so you can tick them off as you go.Stay organised
Since Bat Disco uses six colours, I recommend labelling your stacks. You can use sticky notes, washi tape, or little trays/baskets. This will save you lots of head-scratching when it’s time to sew.
As well as my rotary cutter I treated myself to one of these rotary combos from Friskar, more ergonomic if cut lots of fabric.
Cutting Breakdown for Bat Disco
When you’ve finished cutting, you should have:
Three sizes of background squares:
Small
Medium
Large
Two sizes of accent fabric pieces:
Squares
Rectangles
I suggest labelling these groups clearly as you go — Small/Medium/Large for the background squares, and Square/Rectangle for the accent fabrics. I have kept my labels literal, rather than fabric A, B etc just for clarity. Keeping everything together now will make piecing next week so much smoother!
The three sizes of background fabric: small, medium and large.
Different Versions
For my six colour version, I’d cut six stacks of solids in bright, happy colours playing with the traditional Halloween colours.
For my Liberty version, I’ve cut six moody prints with darker hues for a floral take.
For the monochrome version, I simply have a stack of squares and rectangles in my chosen fabric.
Your Task This Week
Cut your fabrics according to the pattern.
Sort them into five groups: three sizes of background squares + two sizes of accent pieces.
Label your piles and keep them organized.
Share a picture of your cut fabrics (tidy or not-so-tidy — we won’t judge 😅) with the hashtag #BatDiscoQuiltAlong so we can all cheer you on.
Next week, we’ll jump into our first building block: half-square triangles! Get those rotary cutters moving, and I’ll see you back here for Week Three.
Bat Disco Quilt Along Schedule
Here’s what’s coming up over the next 6 weeks:
Week 1 – Fabric Pull
Show off your spooky (or not-so-spooky!) fabric picks.
Week 2 – Cutting
Get those fabrics prepped and organized.
Week 3 – Half-Square Triangles
Lots of HSTs = lots of disco magic!
Week 4 – Snowball Blocks
Cute, simple, and oh-so-satisfying.
Week 5 – Quilt Top Assembly
Layout + rows = Bat Disco starting to shine!
Week 6 – Quilting & Finish
Quilting, binding, and celebrating your Bat Disco!
Use #BatDiscoQuiltAlong so we can all follow along and cheer you on!
🦇 Bat Fact!
There are over 1,400 species of bats in the world! They range from tiny bumblebee bats (lighter than a penny!) to flying foxes with 6-foot wingspans.

Bat Disco Quilt Along – Week One
Quilt Along Details
We’ll sew together week by week, with space to share your progress and ask questions along the way.
The goal is to inspire and encourage you as you make your Bat Disco quilt.
The pattern is still available at its introductory 20% off, so it’s the perfect time to join in!
Choosing Your Fabrics
Welcome to Week One of the Bat Disco Quilt Along! 🦇 I’m so thrilled you’re here to sew along with me.
Bat Disco is a Halloween-inspired quilt, but with a twist: it’s all about fun and celebration. In my house, we like our spooky season to be more cute than scary — think friends, family, food and a little magic. This quilt is exactly that: playful, bold, and a joy to make.
Over the next few weeks, we’ll stitch it together step by step, and by the end, you’ll have your very own Bat Disco quilt to cozy up with for Halloween (or all year round, because bats are always in style!).
About the Bat Disco Quilt
Bat Disco is made from half-square triangles and snowball blocks — two beginner-friendly shapes that combine into a striking design. The pattern walks you through everything in detail, so it’s a fun make for beginners, but still satisfying for experienced quilters who love bold, graphic layouts.
And here’s the best part: you can style this quilt however you like.
Fabric Ideas for Bat Disco
This quilt has been designed in two versions - six colour or monochrome, but you’ve got tons of room to make it your own:
Monochrome Magic – Keep it sleek and spooky with shades of black, grey, and white. Perfect for a subtle Halloween vibe.
Classic Halloween – Pumpkins, Beetlejuice stripes, and witchy purples! Solids work beautifully here for that bright, festive feel.
Cute & Not-So-Spooky – Think pastel Halloween: lavender, mint, peach, and pink. A softer, more whimsical take.
Prints That Pop – I’m making a Liberty version using six different prints in darker, tonal hues. But you could just as easily go for vibrant modern prints, or even a scrappy mix-and-match style. Ruby Star Society is another great choice with its playful colours and prints.
Solids for the Win – Use your favourite solids for a bold, clean, and graphic design.

Ruby Star Society for a bold print.
Batty Background
The designs in the pattern show a white background to make the design pop but don’t be restricted, you could try black, orange, purple or even a vivid pink,
As well as using traditional solids for your background I also like to work with Essex Linen, it adds a contrasting texture if I am using Tana Lawn.
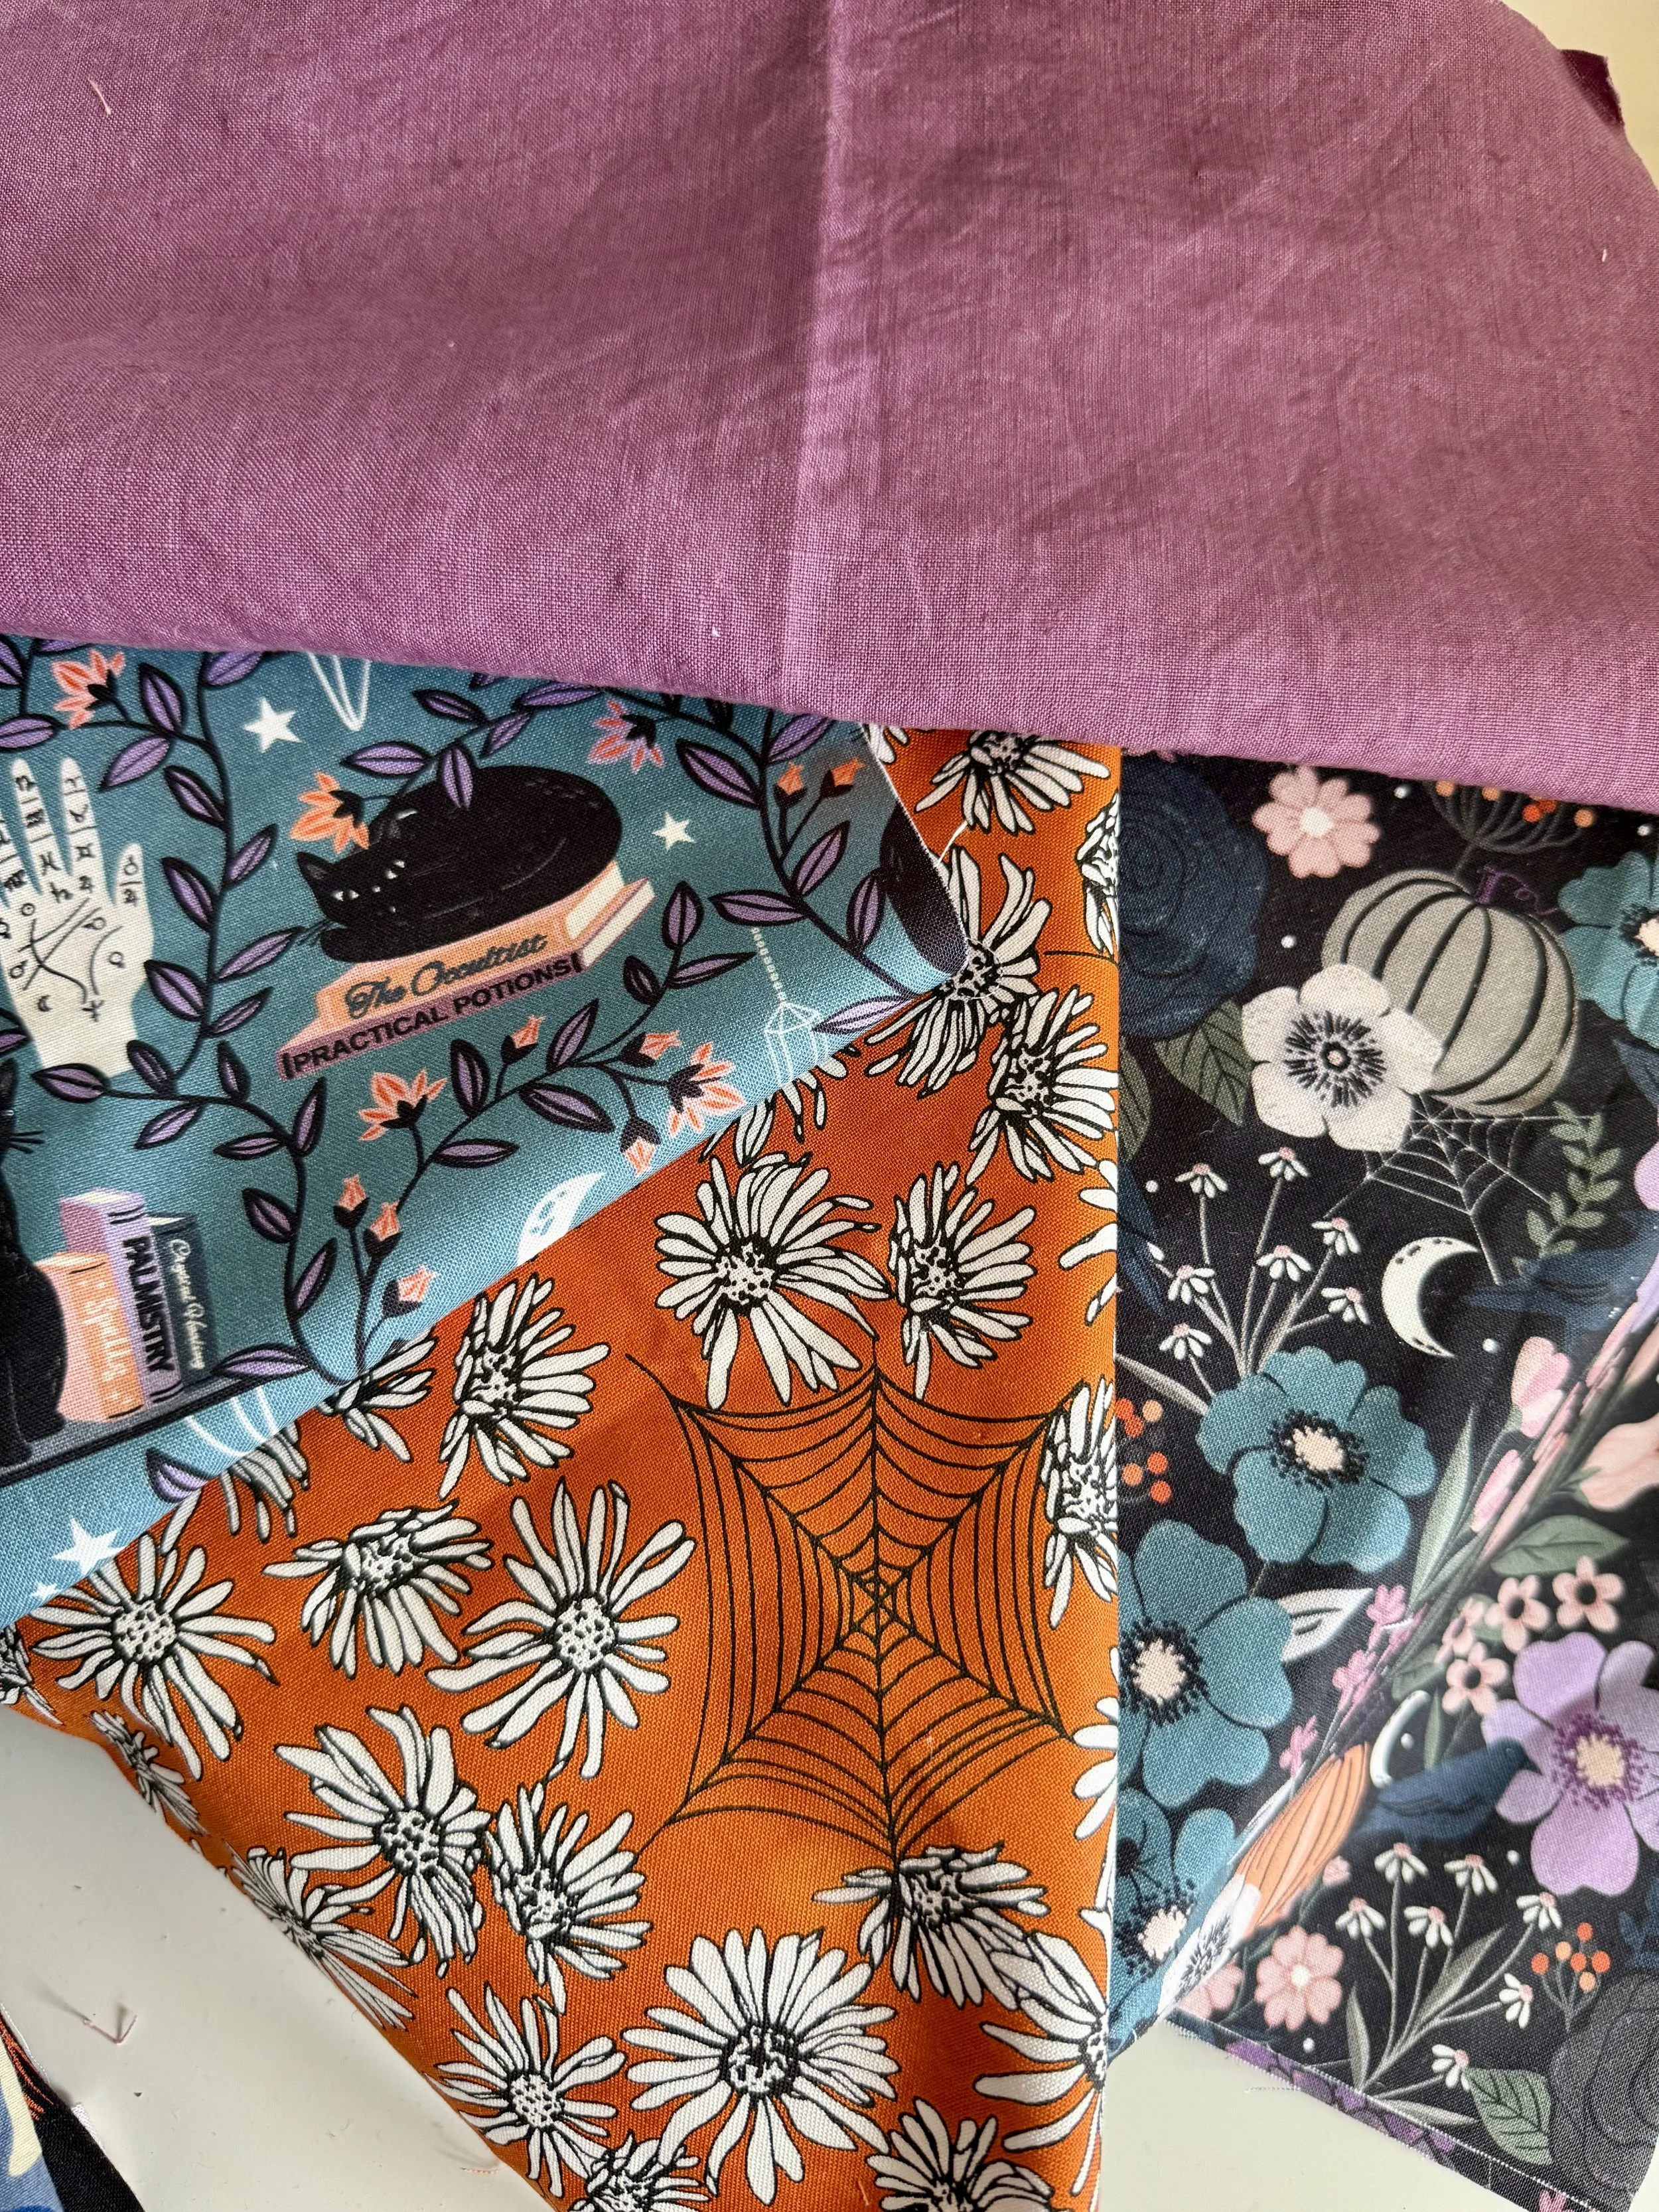
There are so many cute Halloween prints around including these from Moda and Dashwood Studio. I have teamed these with purple linen.
My Versions
Solid Fabrics: my original six-colour solid version plays with seasonal colours and turns up the saturation to really let the shapes shine. I used Art Gallery solids and you can find them all on my PreQuilt colouring page. A free online app to play with colour.
Liberty Bat Disco: I’ve pulled six moody prints for a darker but still very floral Halloween mood. I have to confess I don’t know all the names of the prints so maybe you can message me. It’s a great excuse to use the prints in my stash I don’t typically use when it comes to Liberty Tana Lawn.
Both versions celebrate that Bat Disco spirit — festive, a little quirky, and lots of fun.
Liberty Tana Lawn in Thorpe mixed with Essex Linen
This Week’s Task
Choose your fabrics. Go spooky, go cute, go scrappy — whatever feels most you.
Share your fabric pull. Post a picture on Instagram with the hashtag #BatDiscoQuiltAlong so we can all admire and cheer you on.
Get ready for Week Two, where we’ll start cutting!
I can’t wait to see the incredible fabric pulls you come up with. So grab your stash, turn up some music (maybe a little disco with a Halloween twist ), and let’s get this Bat Disco started!
Bat Disco Quilt Along Schedule
Here’s what’s coming up over the next 6 weeks:
Week 1 – Fabric Pull
Show off your spooky (or not-so-spooky!) fabric picks.
Week 2 – Cutting
Get those fabrics prepped and organized.
Week 3 – Half-Square Triangles
Lots of HSTs = lots of disco magic!
Week 4 – Snowball Blocks
Cute, simple, and oh-so-satisfying.
Week 5 – Quilt Top Assembly
Layout + rows = Bat Disco starting to shine!
Week 6 – Quilting & Finish
Quilting, binding, and celebrating your Bat Disco!
Use #BatDiscoQuiltAlong so we can all follow along and cheer you on!
🦇 Bat Fact!
Did you know? Bats are the only mammals that can truly fly — their wings are actually their hands with super-stretched fingers!